If you compose documents often in Pages on Mac, it’s important
to know how to work with headers and footers. You may be writing an essay for
class, creating a manual for work, or crafting chapters for a book. Each of
these types of documents, and many others, can benefit from headers and
footers. You can enter dates, page numbers, your name, your company, and similar
details that automatically carry across all pages.
If you’re new to using these sections in Pages, we’re here to help. Here’s how to work with headers and footers in Pages on Mac.
Accessing the headers and footers
With a document open in Pages, you can easily access the headers
and footers.
Move your mouse or Trackpad to the very top of a page and
you’ll see the header or to the very bottom to see the footer. If you still don’t
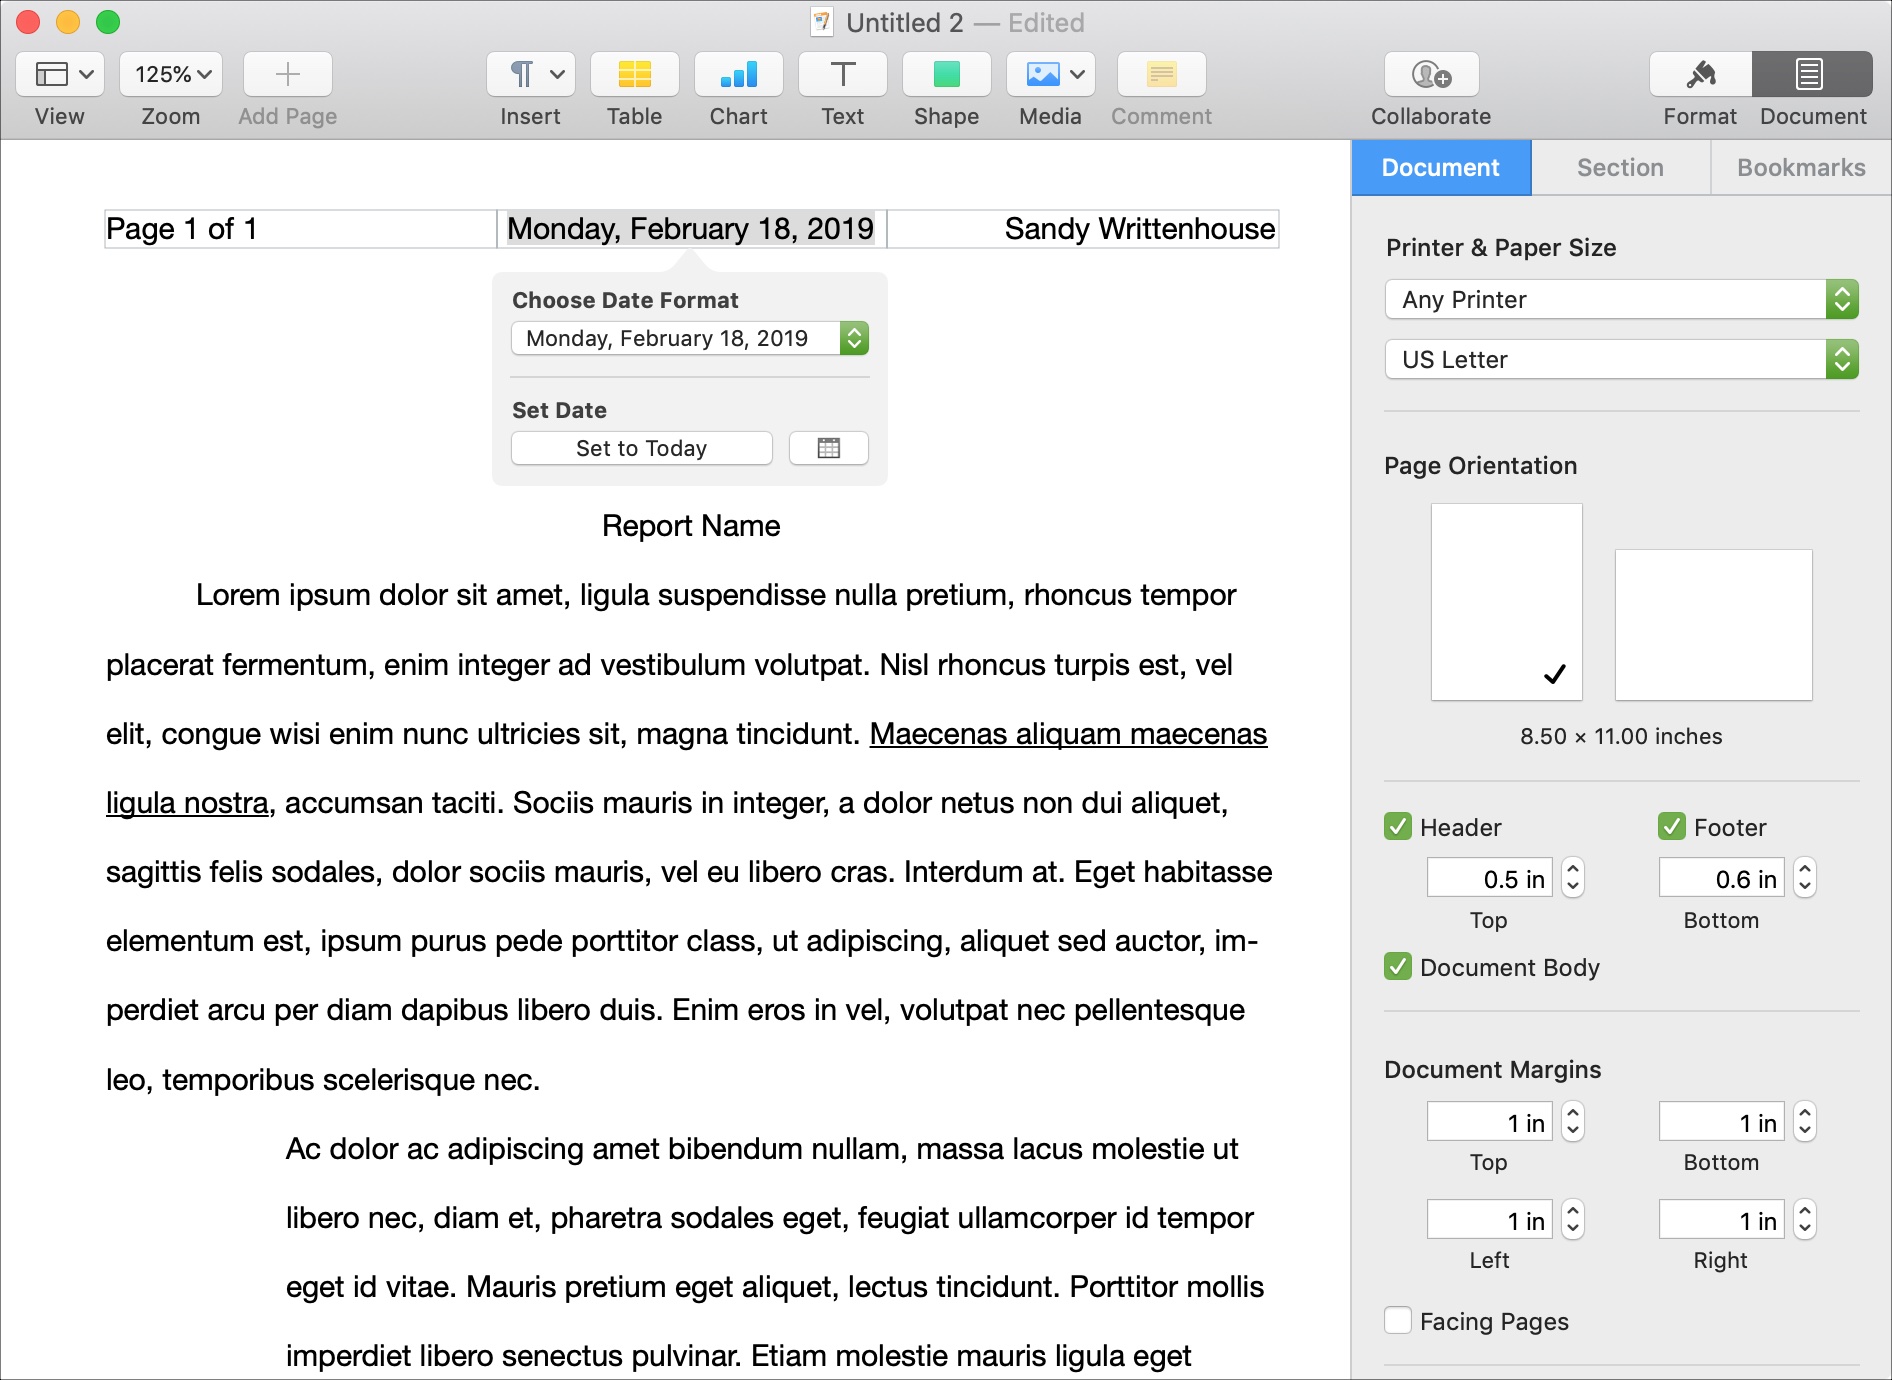
see one or both, click the Document button from the top right of the menu bar. Mark the checkboxes for Header and Footer and optionally adjust their sizes.
Now, click in either the header or footer to format it and
insert your details.
Formatting the headers and footers
The easiest way to format any part of a Pages document is
with the sidebar. Click the Format button from top right of your toolbar to open it.
You will then see that you are in the Header & Footer
section. You can adjust the font style, size, format and color as well as the
alignment, spacing, and bullets and lists.
Inserting details into the headers and footers
You have three sections in the header and three in the
footer. Click inside one of the sections where you want to add a detail.
Add your own details:
To add your name, company name, school name, subject, or something like this,
you can simply type it into the section of the header or footer where you want
it.
Page Count: To
add a page count, click Insert from
the menu bar or the Insert button in
your toolbar. Then, select Page Count.
Page Numbers: You’ll notice that when you first click the header or footer, you have an option to insert page numbers with the Insert Page Number pop-up menu. There, you can select the formatting for your page numbers.
You will only see the pop-up if you haven’t added page
numbers elsewhere in your document. If you don’t see it, you can select Page Number from the Insert menu.
Date and Time: If
you add Date & Time from the Insert menu, you can adjust its
formatting as well. First, add it and then click on it. In the pop-up window, open
the Choose Date Format drop-down and
select a format. By default, the current date will be added, but you can choose
a specific date by clicking the Calendar
button under Select Date.
Wrapping it up
Adding and formatting headers and footers in Pages on Mac is super easy, as you can see. Hopefully this will help you with your next document. For more help with Pages, check out how to display the word count in Pages on Mac, iPhone and iPad or how to create a table of contents in Pages on Mac.
If you have something specific you’re struggling with using
Pages, let us know and a tutorial may come of it!


Recent Comments