
How do you quickly and easily fix lighting and color issues, or make your photos black and white? With smart adjustments!
Smart adjustments in Photos let you enhance your images, either automatically, intuitively, or precisely. Magic wand is still there, of course, but you can also change light, color, and black and white with a swipe, or dive down into brightness, warmth, and other details. Crank it up, crush it down, or go gray. It’s all up to you!
- How to enhance images in Photos
- How to change lighting with smart adjustments in Photos
- How to change color with smart adjustments in Photos
- How to convert to black and white with smart adjustments in Photos
- How to fine tune smart adjustments in Photos
- How to revert back to the original in Photos
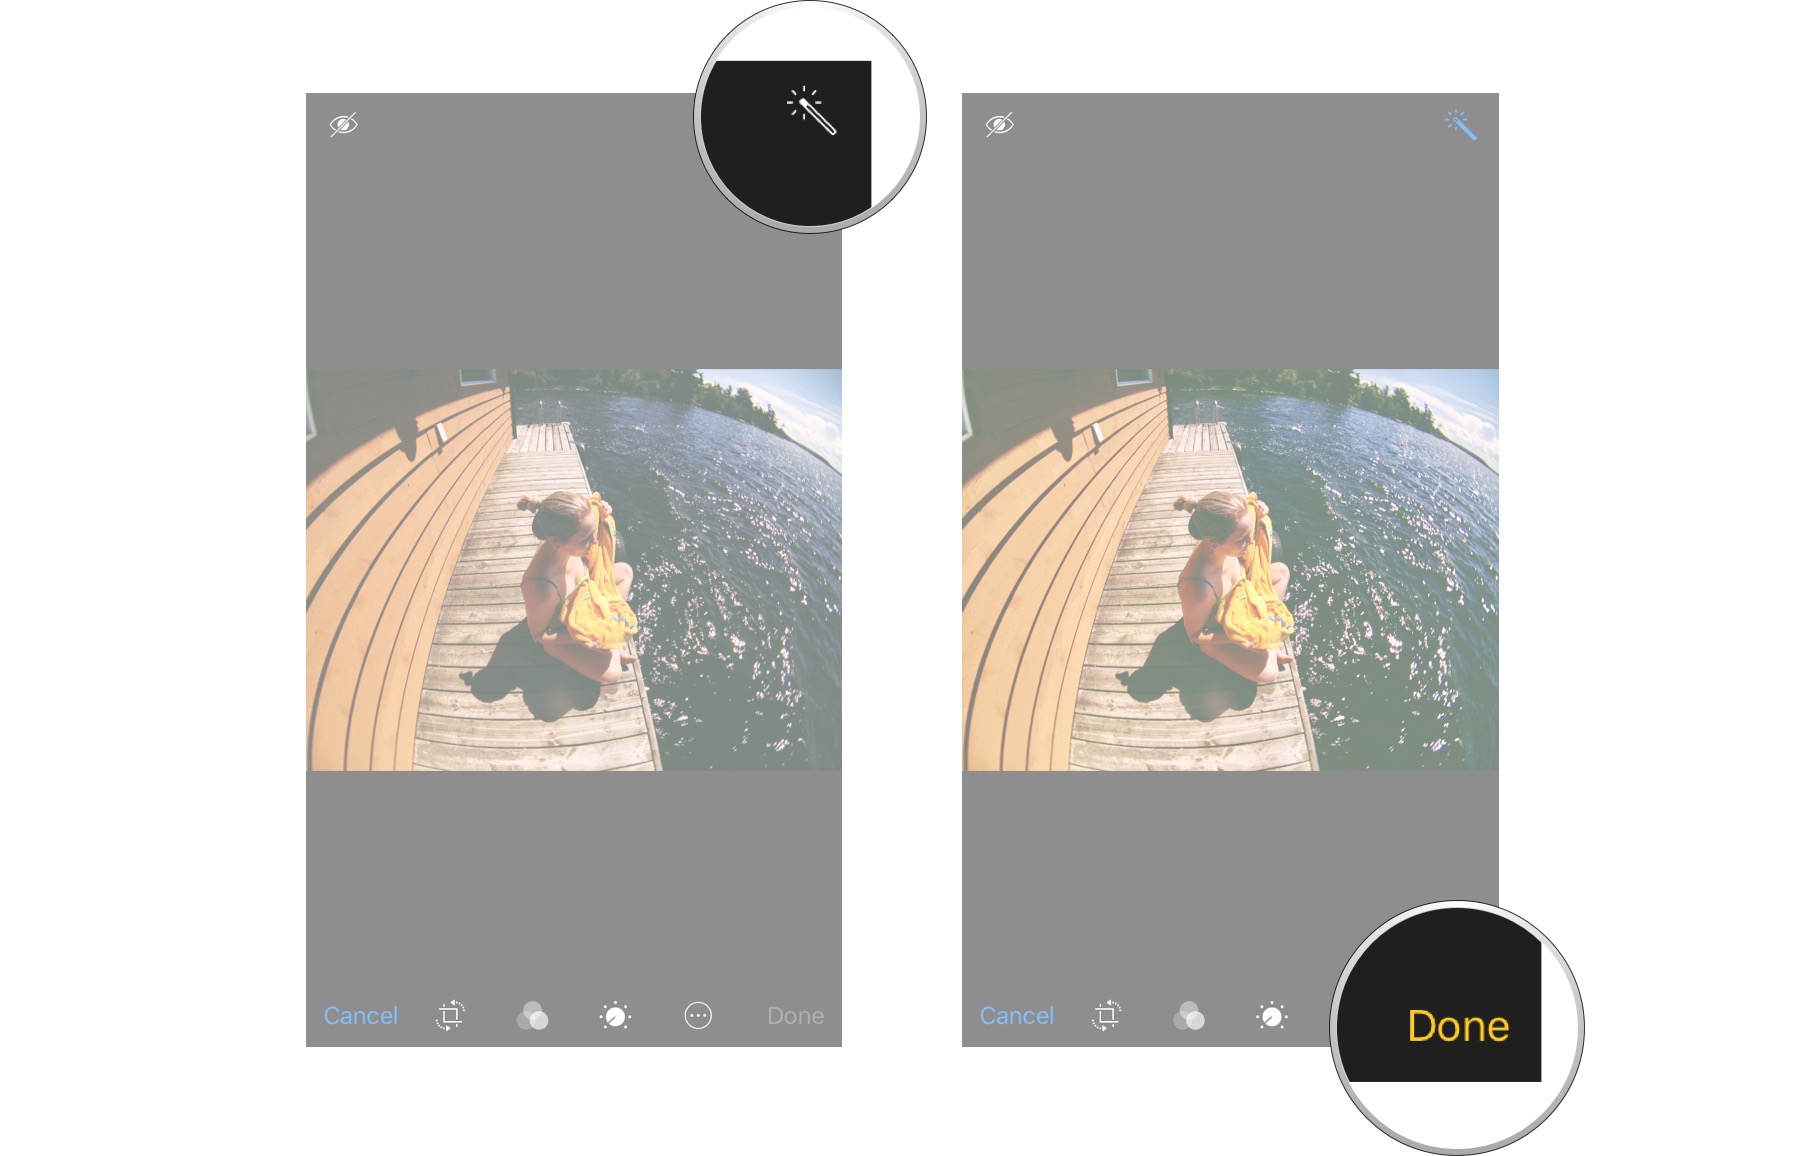
How to enhance images in Photos
- Launch the Photos app on your iPhone or iPad.
- Find the photo you’d like to enhance and tap on it to open it.
- Tap on the Edit button in the upper right corner of the screen.
- Tap on the Auto-Enhance button — it looks like a magic wand.
- You can toggle between Auto-Enhance by tapping on it again. This gives you a good idea of before and after.
-
Tap on Done, If you like the improvements the Auto-Enhance feature made.
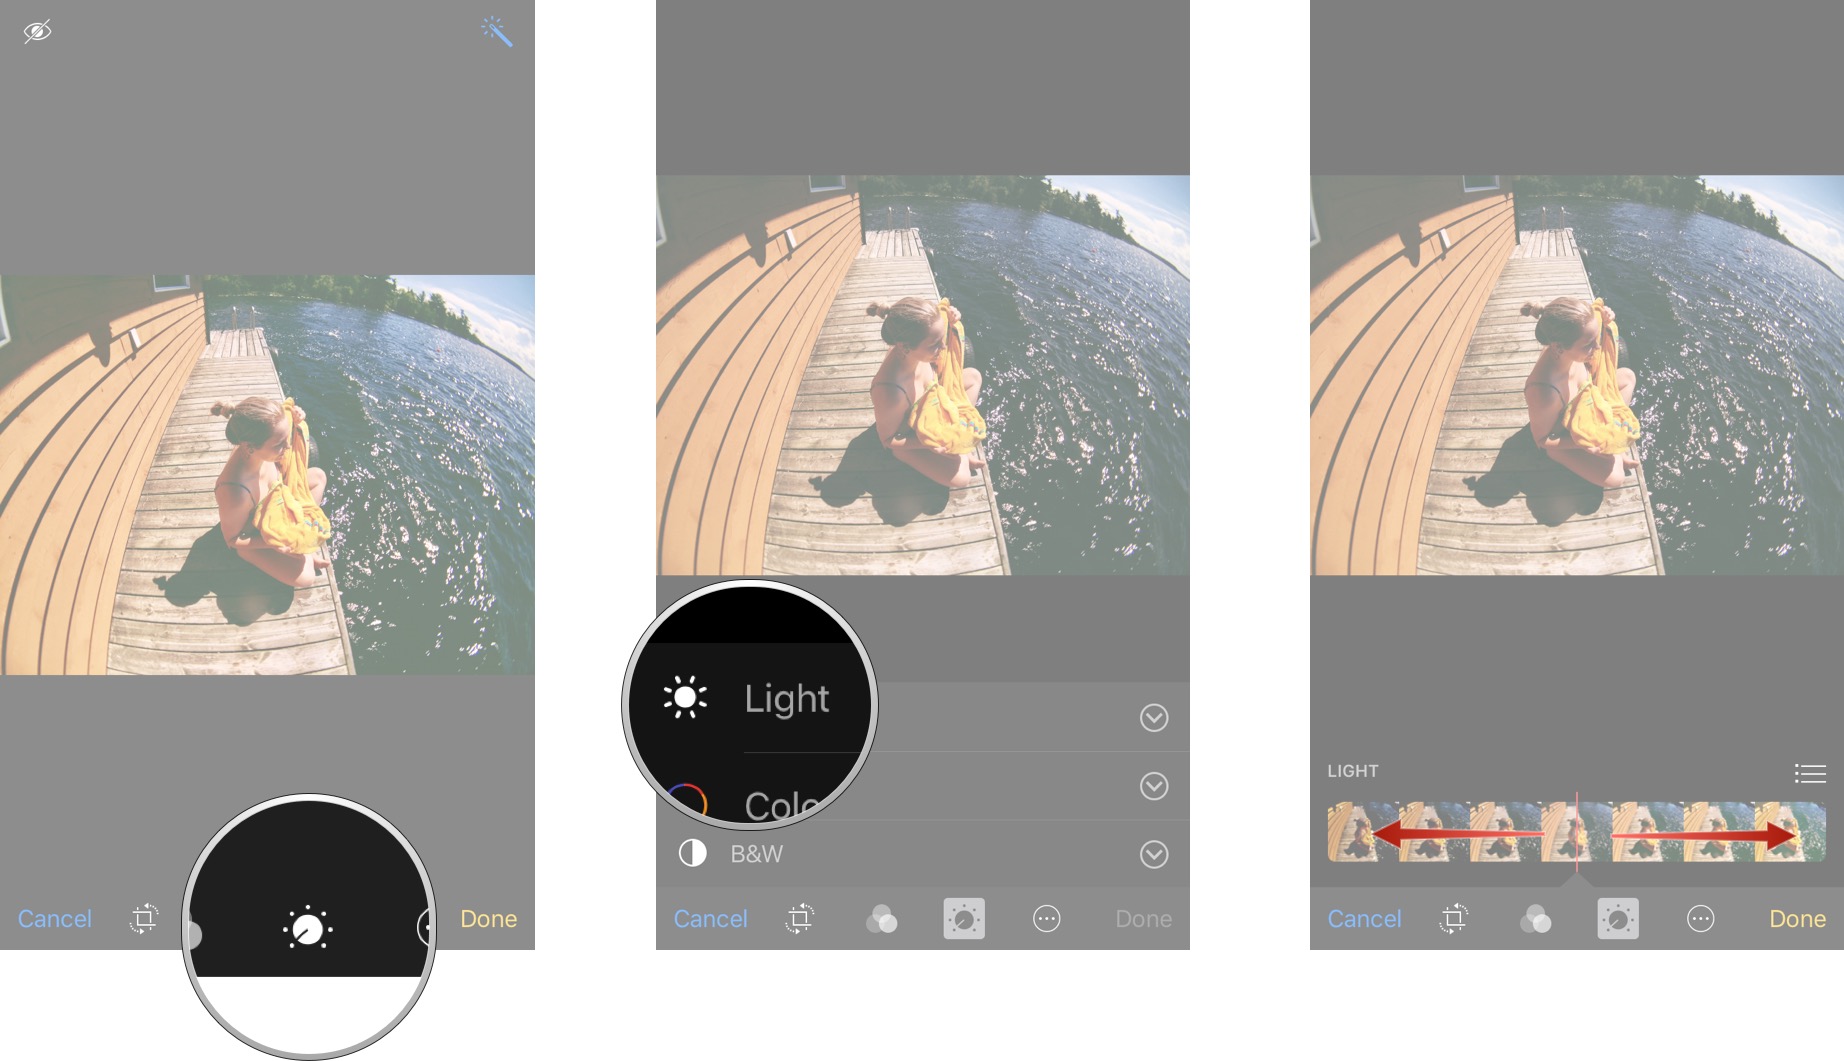
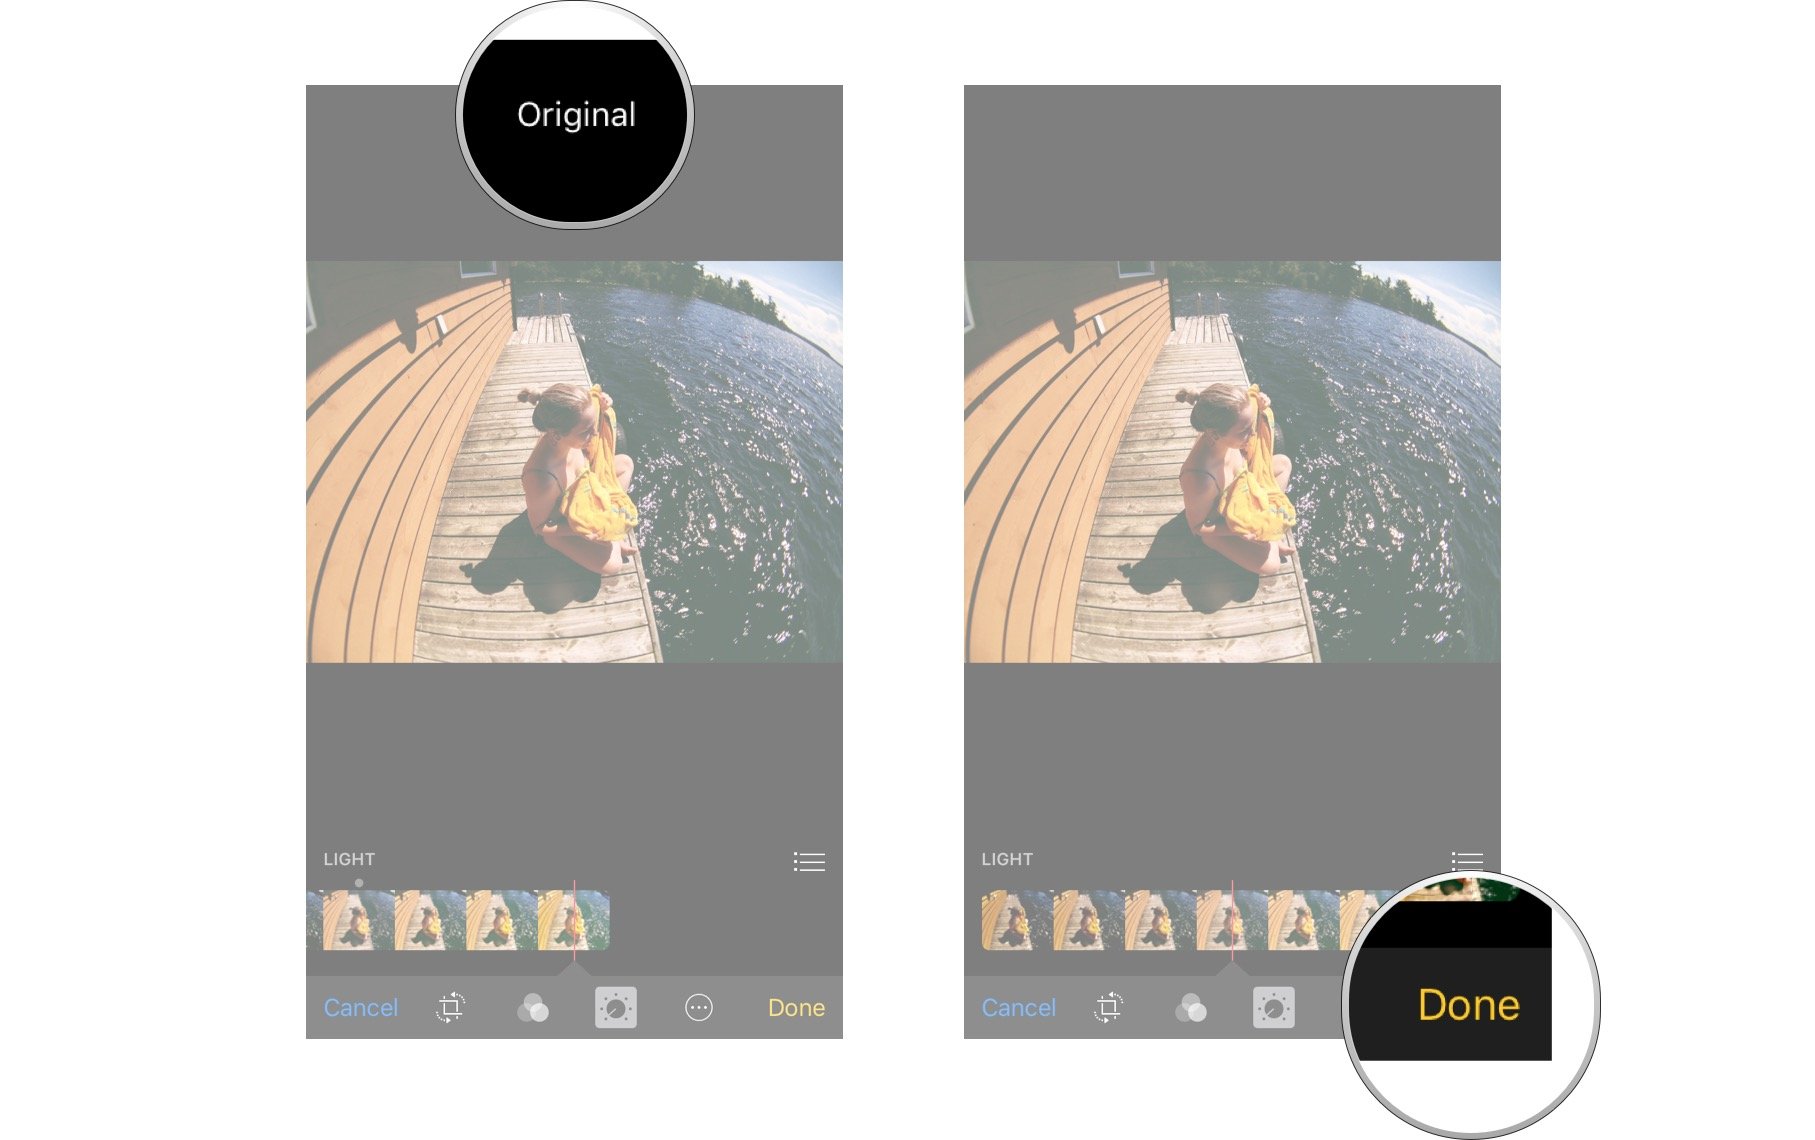
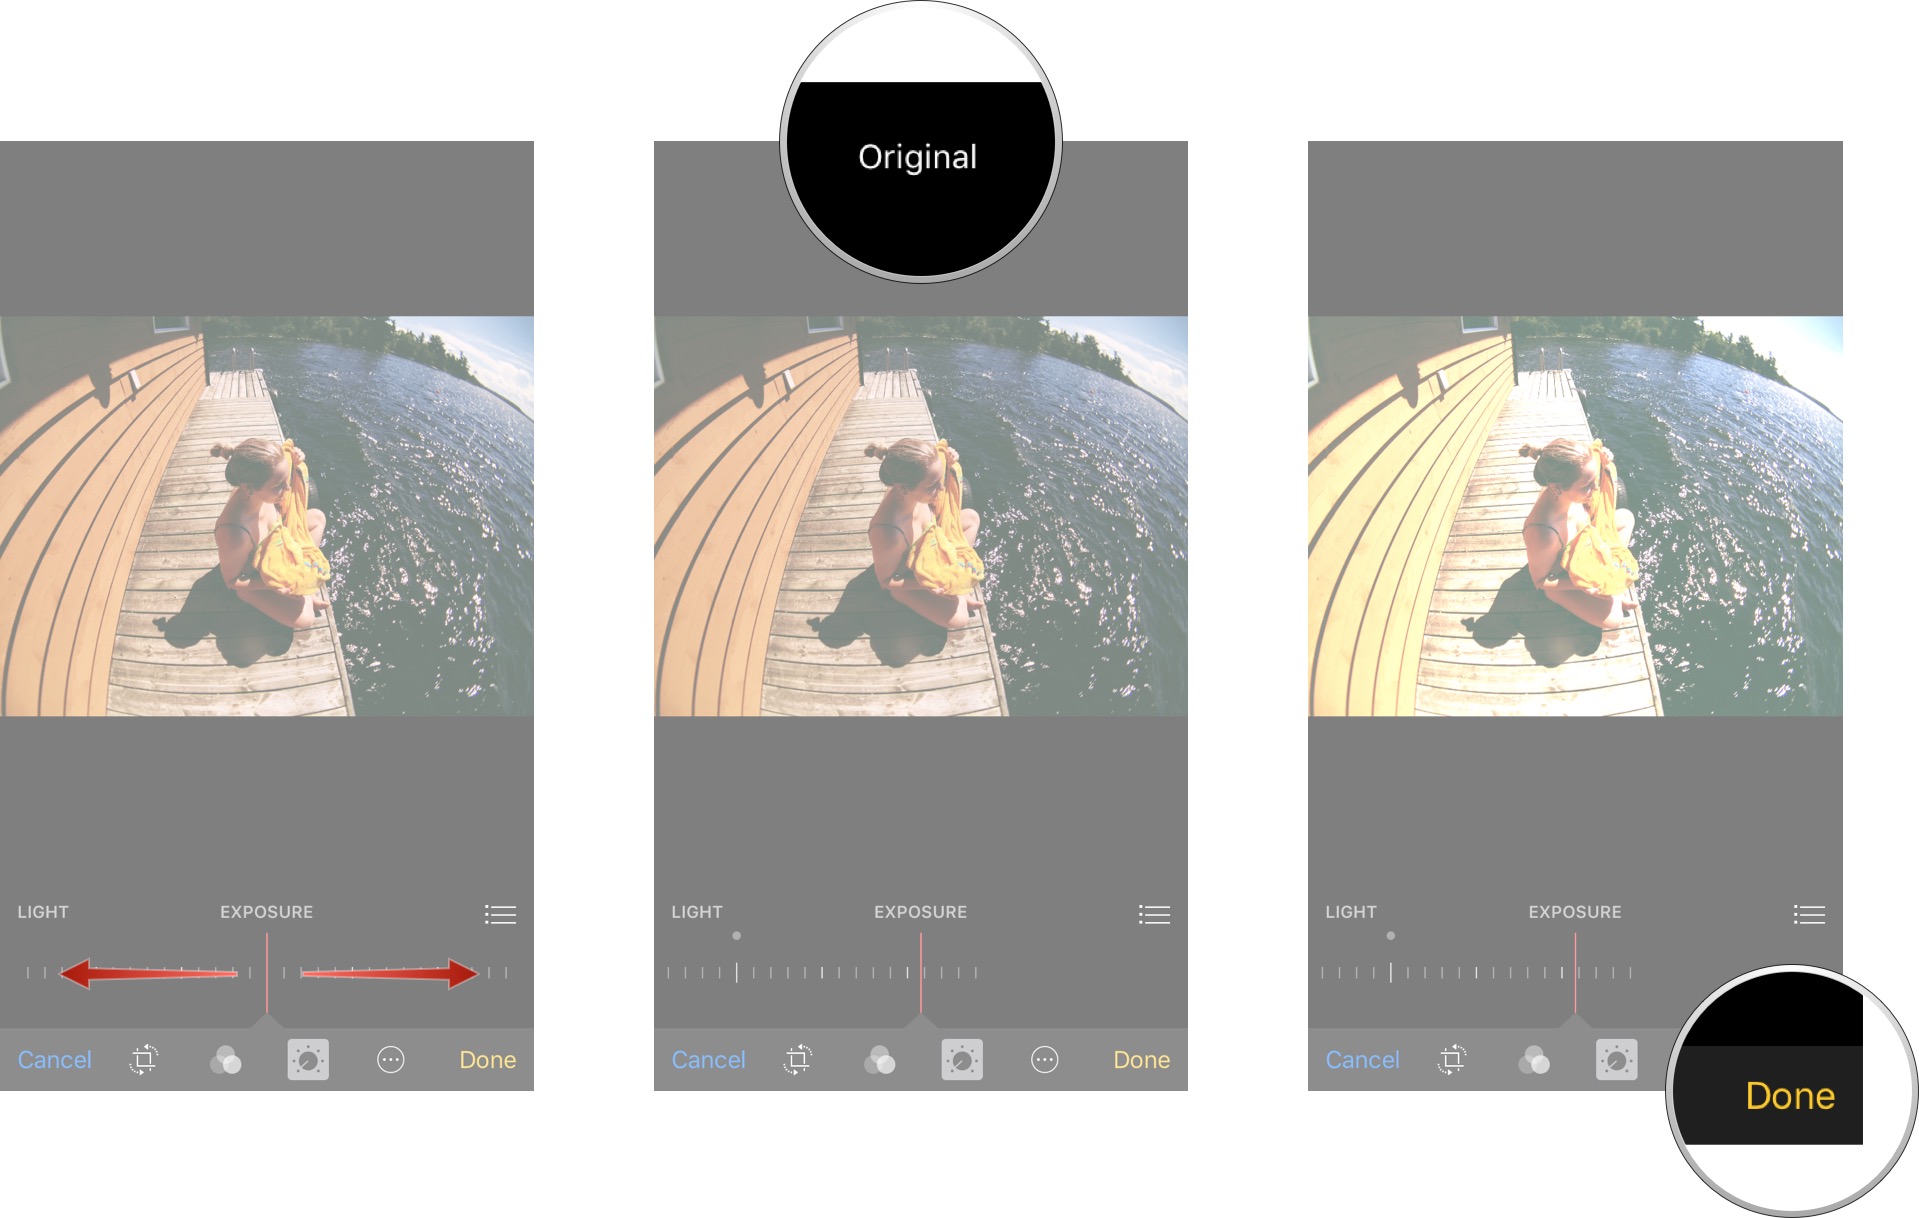
How to change lighting with smart adjustments in Photos
- Launch the Photos app on your iPhone or iPad.
- Find the photo you’d like to enhance and tap on it to open it.
- Tap on the Edit button in the upper right corner of the screen.
- Tap on the adjustments button in the bottom navigation — it looks like a dial with dots around it.
- Tap on Light.
-
Swipe left and right to move the slider to make changes to your photo. Lift up your finger when the photo looks as you would like it to.
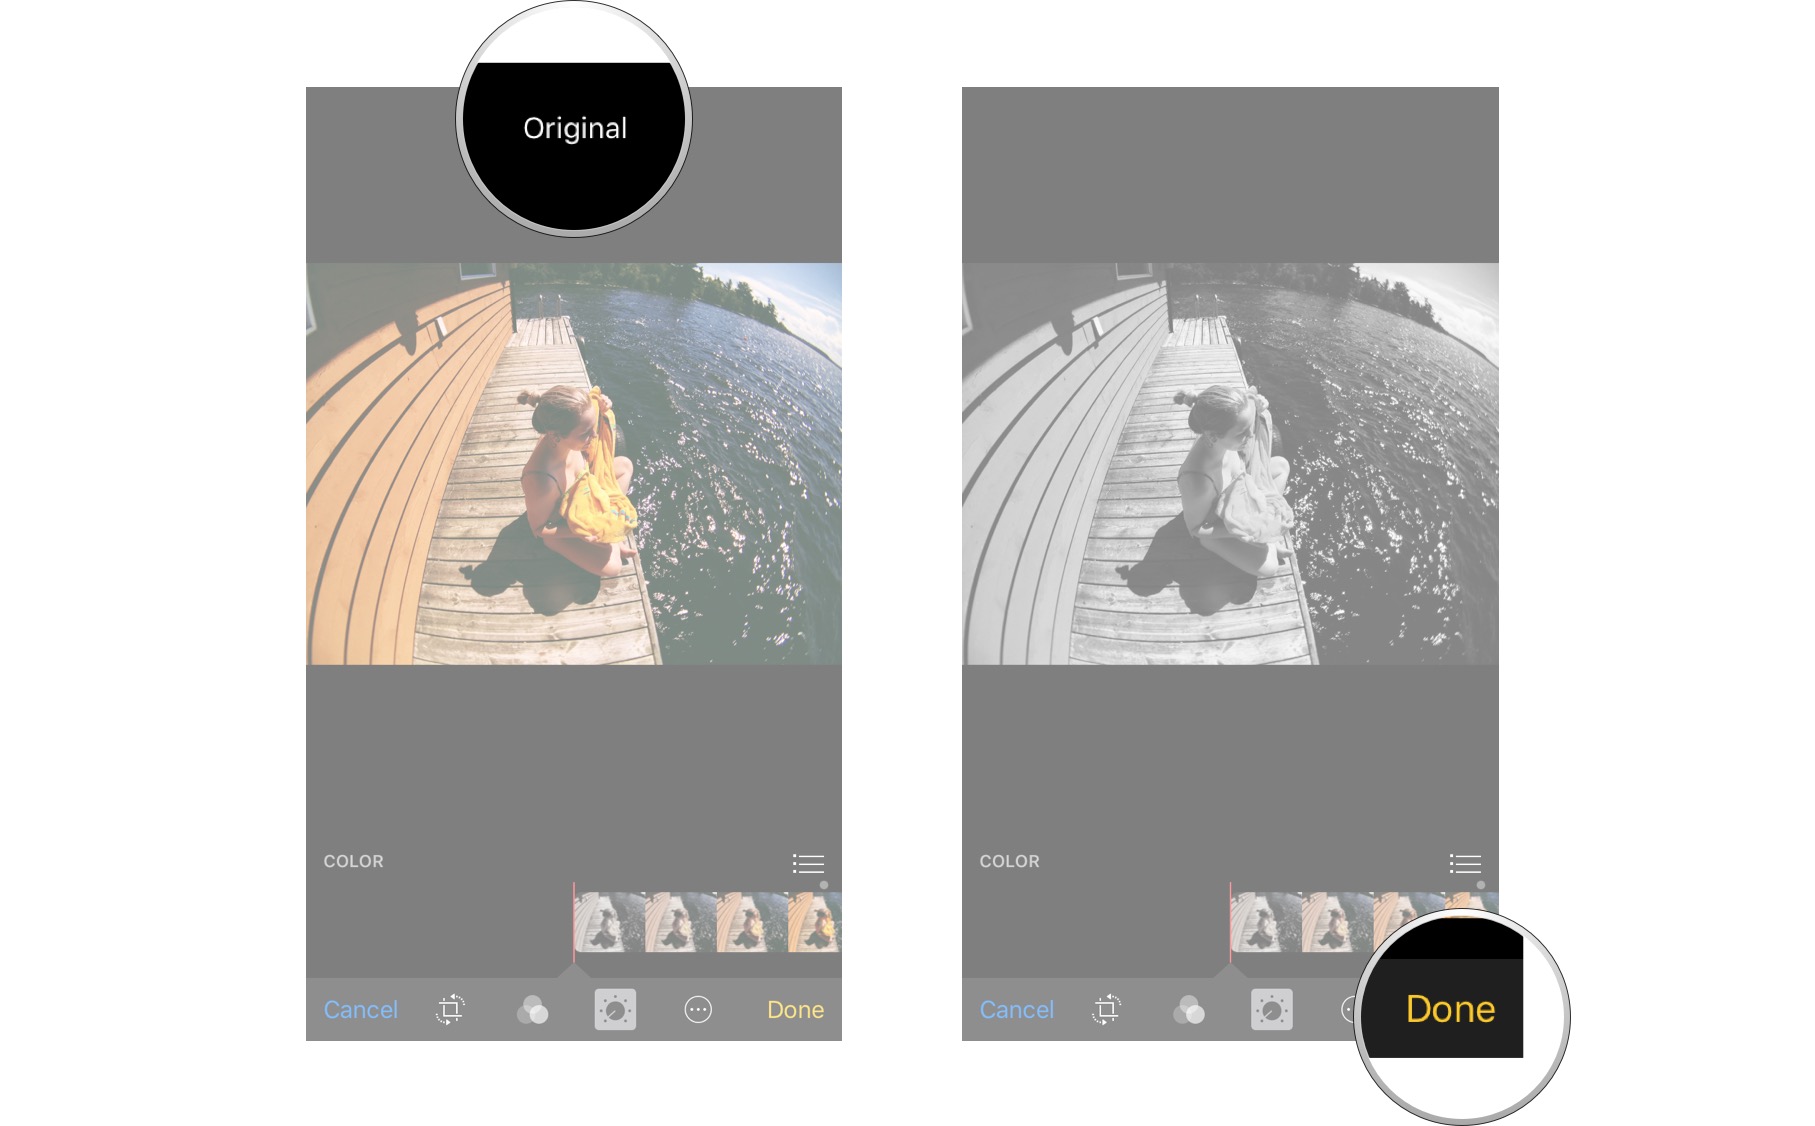
- Tap and hold on the photo to view the original in order to compare it to your edited version.
-
Tap on Done in the bottom right hand corner and your changes will be saved.
How to change color with smart adjustments in Photos
- Launch the Photos app on your iPhone or iPad.
- Find the photo you’d like to enhance and tap on it to open it.
- Tap on the Edit button in the upper right corner of the screen.
- Tap on the adjustments button in the bottom navigation — it looks like a dial with dots around it.
- Tap on Color.
-
Swipe left and right on the slider to make changes to your photo. Lift up your finger when the photo looks as you would like it to.
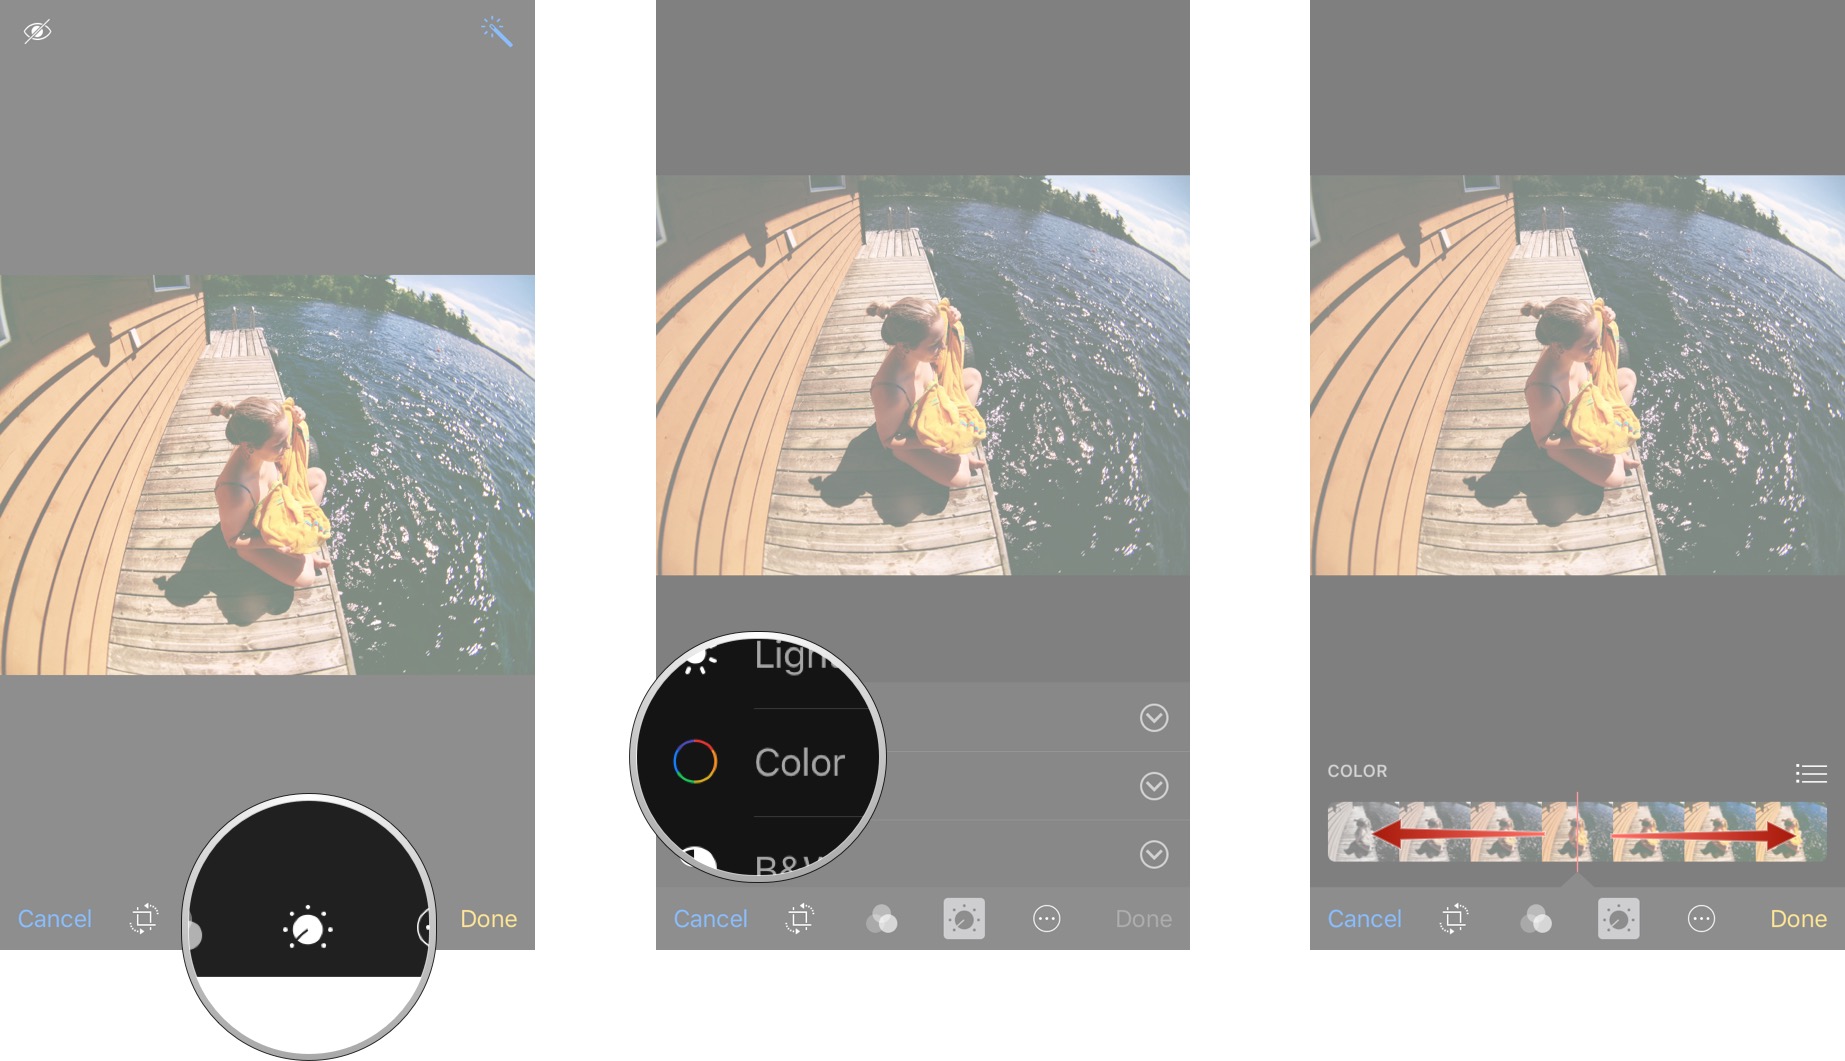
- Tap and hold on the photo to view the original in order to compare it to your edited version.
-
Tap on Done in the bottom right hand corner and your changes will be saved.
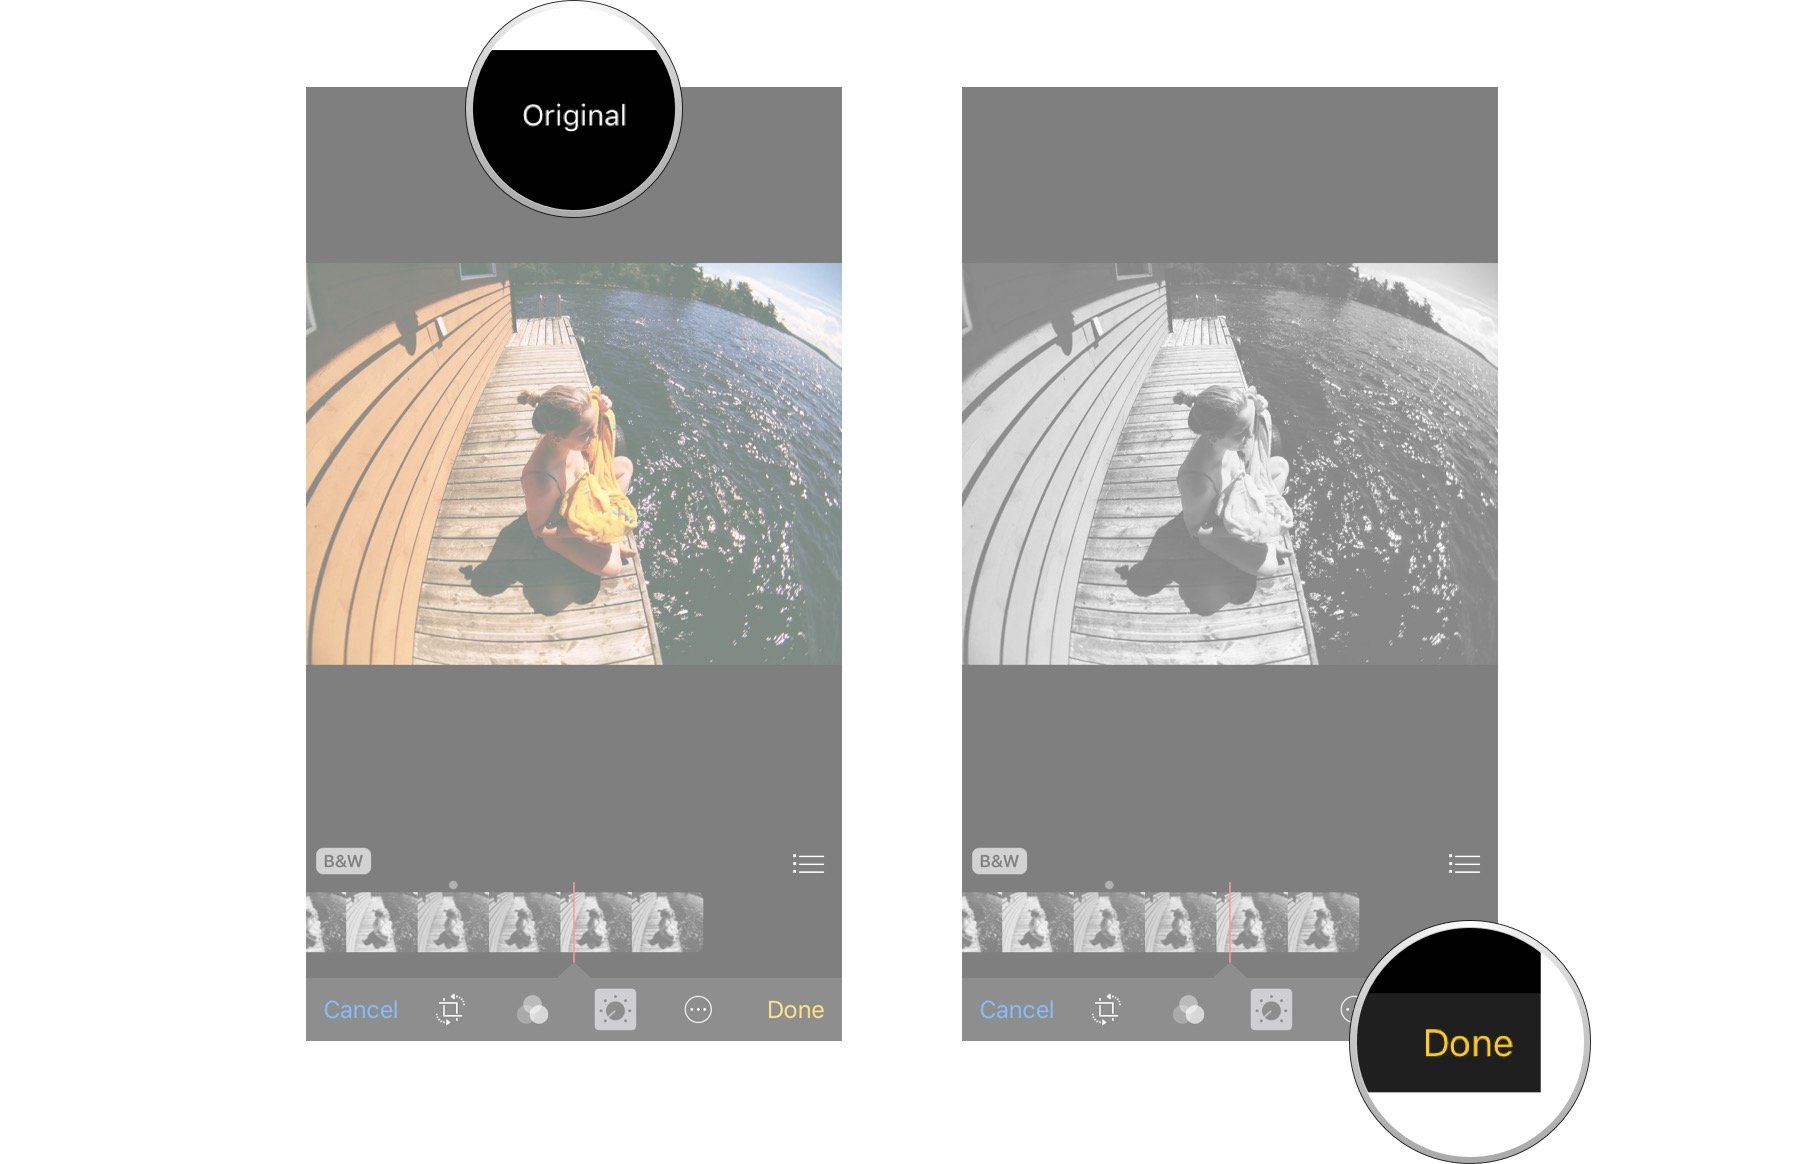
How to convert to black and white with smart adjustments in Photos
- Launch the Photos app on your iPhone or iPad.
- Find the photo you’d like to enhance and tap on it to open it.
- Tap on the Edit button in the upper right corner of the screen.
- Tap on the adjustments button in the bottom navigation — it looks like a dial with dots around it.
- Tap on B&W.
-
Swipe left and right on the slider to adjust the black and white. Lift up your finger when the photo looks as you would like it to.
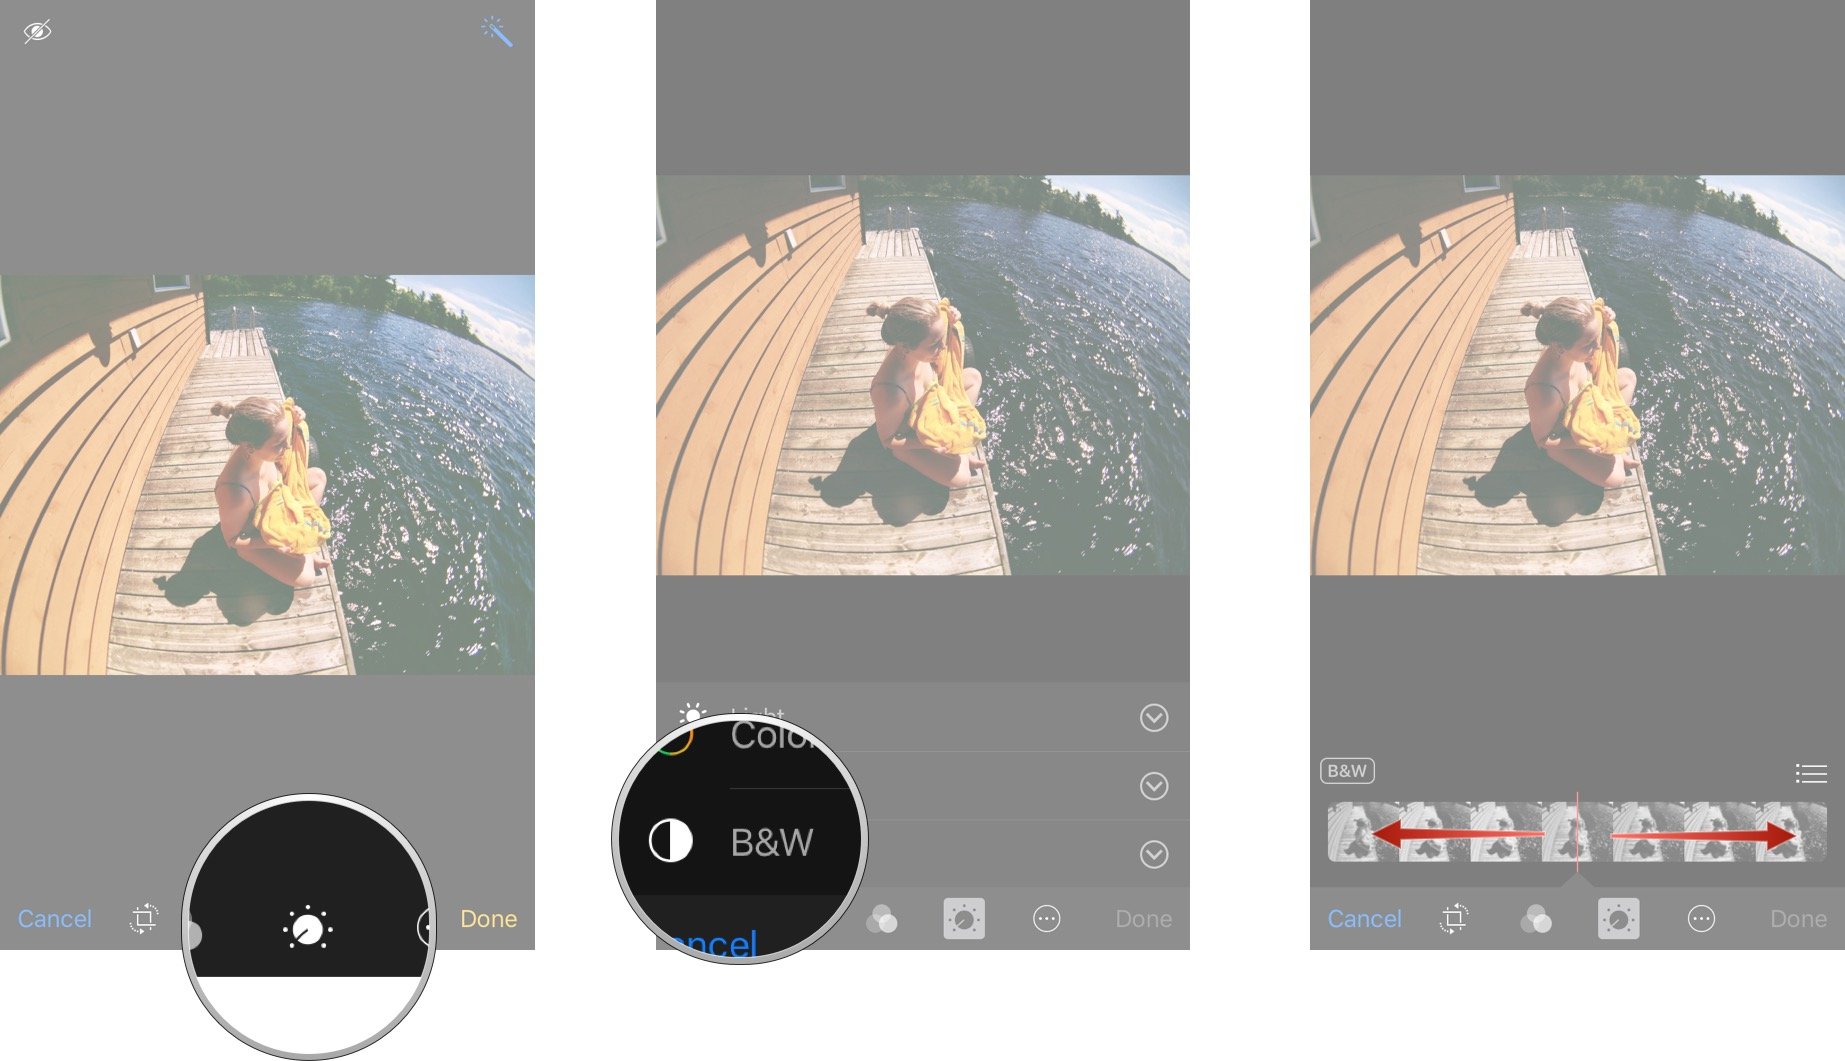
- Tap and hold on the photo to view the original in order to compare it to your edited version.
-
When you’re happy with the results, tap on Done in the bottom right-hand corner and your changes will be saved.
How to fine tune with smart adjustments in Photos
- Launch the Photos app on your iPhone or iPad.
- Find the photo you’d like to enhance and tap on it to open it.
- Tap on the Edit button in the upper right corner of the screen.
- Tap on the adjustments button in the bottom navigation — it looks like a dial with dots around it.
- Tap on the dropdown arrow next to Color, Light, or B&W.
-
Tap on the name of the adjustment that you’d like to make.
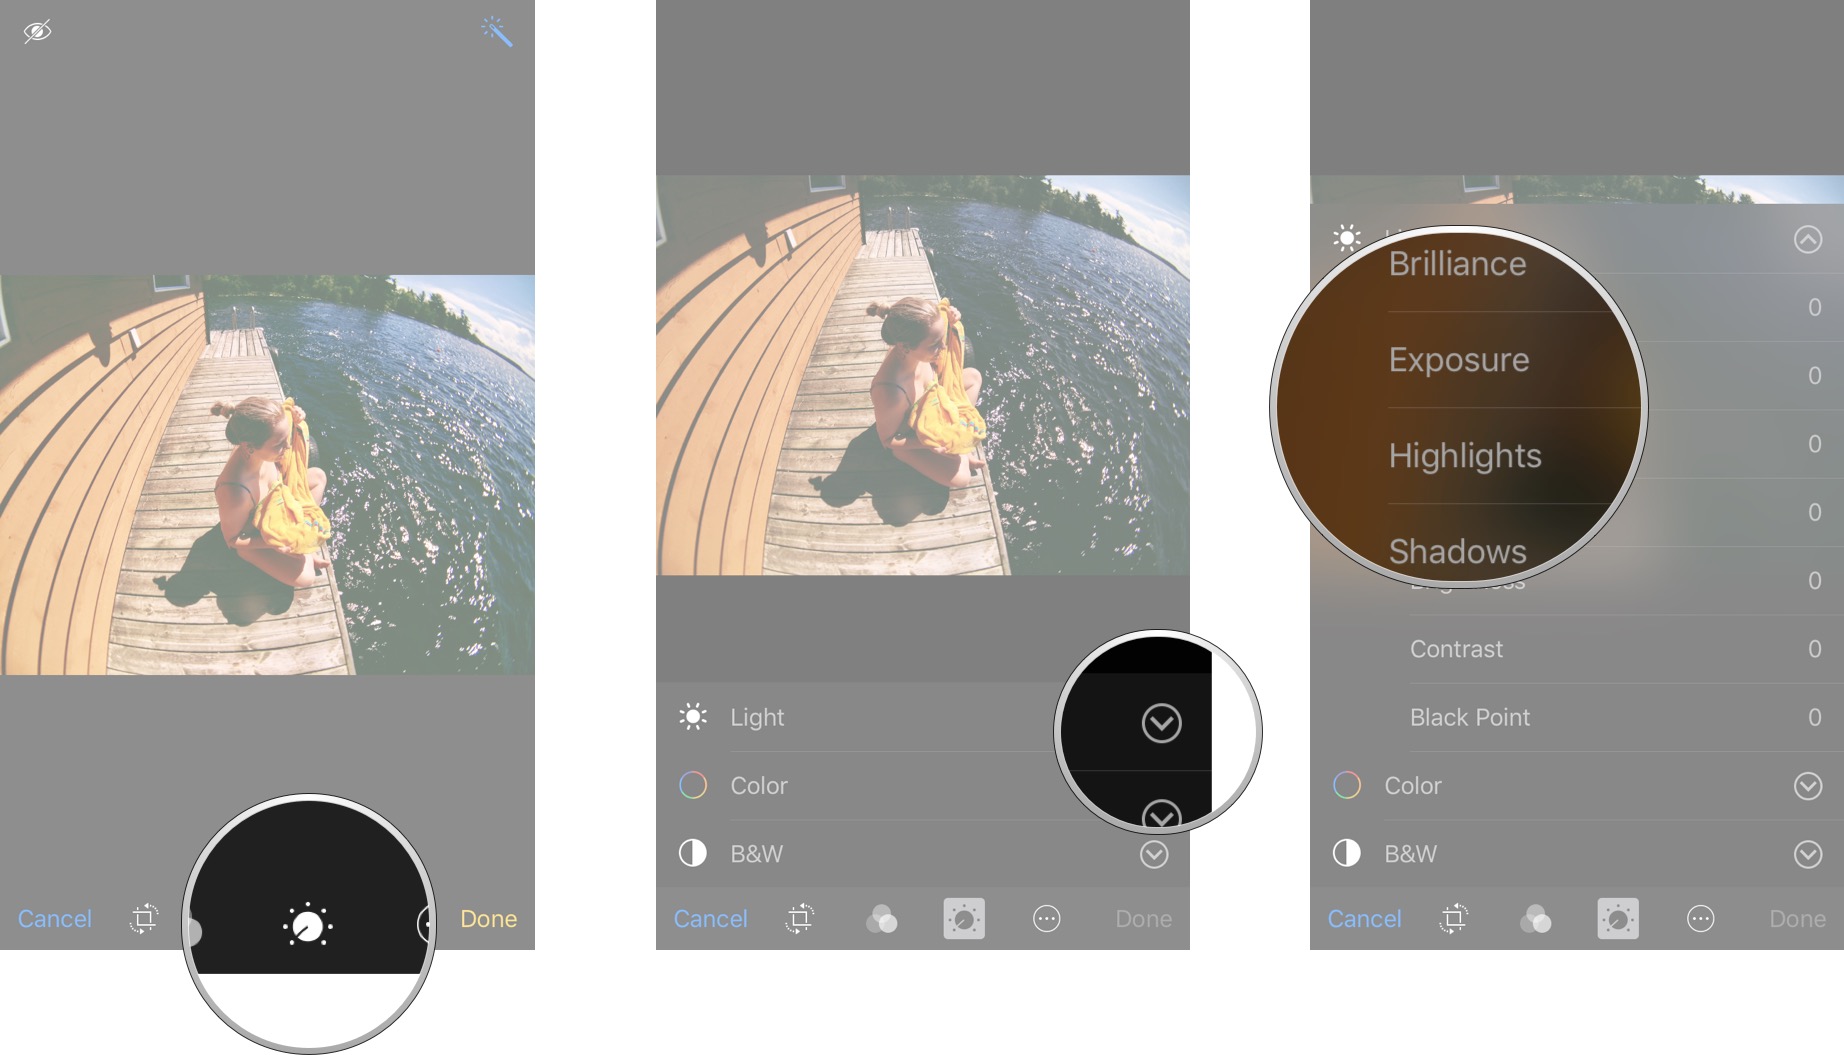
- Swipe left and right to move the slider from left to right in order to make an adjustment.
- Tap and hold on the photo to view the original in order to compare it to your edited version.
-
Tap on Done in the bottom right-hand corner and your changes will be saved.
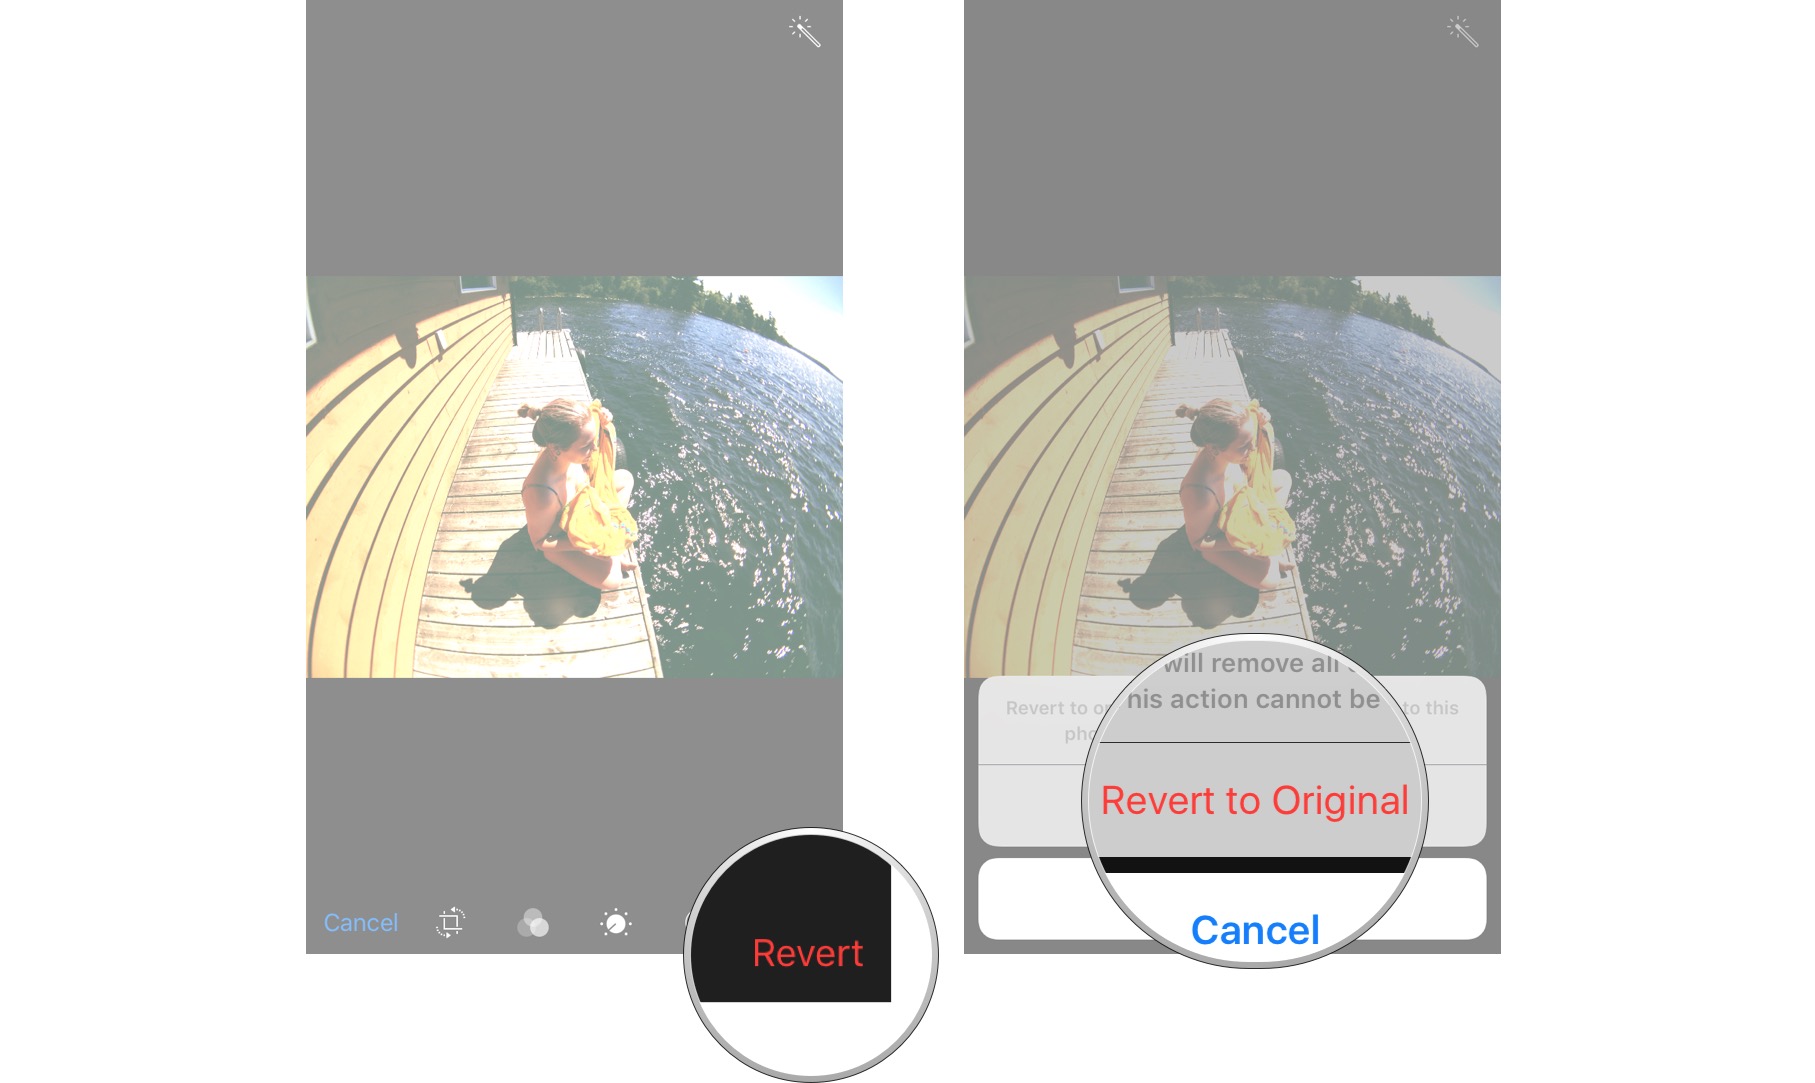
How to revert back to the original image in Photos
- Launch the Photos app on your iPhone or iPad.
- Find the photo you’d like to enhance and tap on it to open it.
- Tap on the Edit button in the upper right corner of the screen.
- Tap on Revert in the bottom right-hand corner.
-
Tap Revert to Original in the popup menu.
Any questions?
If you have any questions about photo editing, let me know in the comments!
Updated February 2019: Updated for iOS 12.


Recent Comments