
If you’re an avid user of Microsoft’s To-Do service or a big fan of Cortana’s Reminders feature, but you have a macOS device in the mix with all your Windows PCs, you’re probably super frustrated at the fact that there’s no app available for Mac that lets you organize your tasks. But did you know there is a way to utilize the built-in Reminders app on macOS to sync your To-Do and Cortana Reminders with ease? Here’s how.
Products used in this guide
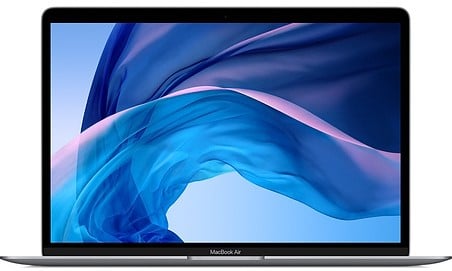
You’ll need a macOS device of some kind. We’re using a MacBook Air 2018, but any Mac that runs macOS Mojave and above should work just fine.
- Apple: MacBook Air 2018 (from $1,199)
How to sync your tasks and reminders
Getting your Microsoft To-Do and Cortana Reminders to sync with macOS is easy and doesn’t require any additional downloads on your part. The functionality for this is actually built-in to macOS, and it uses the Exchange account option in System Preferences to sync your Microsoft Account data to your Mac, which includes To-Do and Reminders information.
Enable the syncing
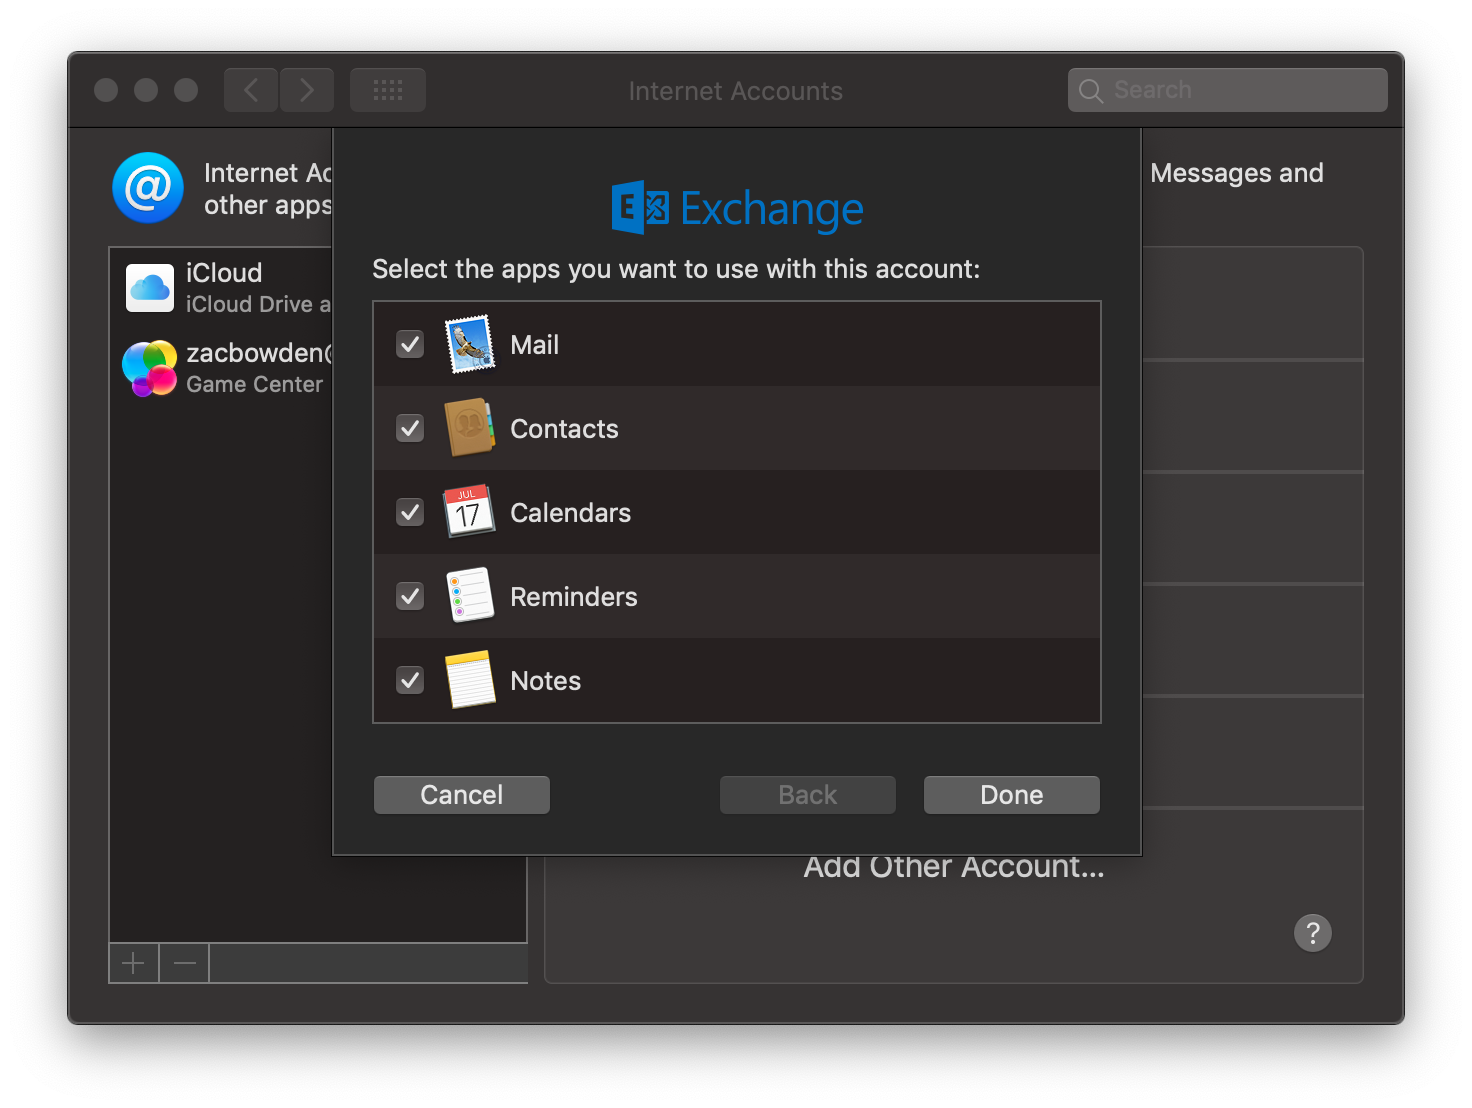
First, follow these steps:
-
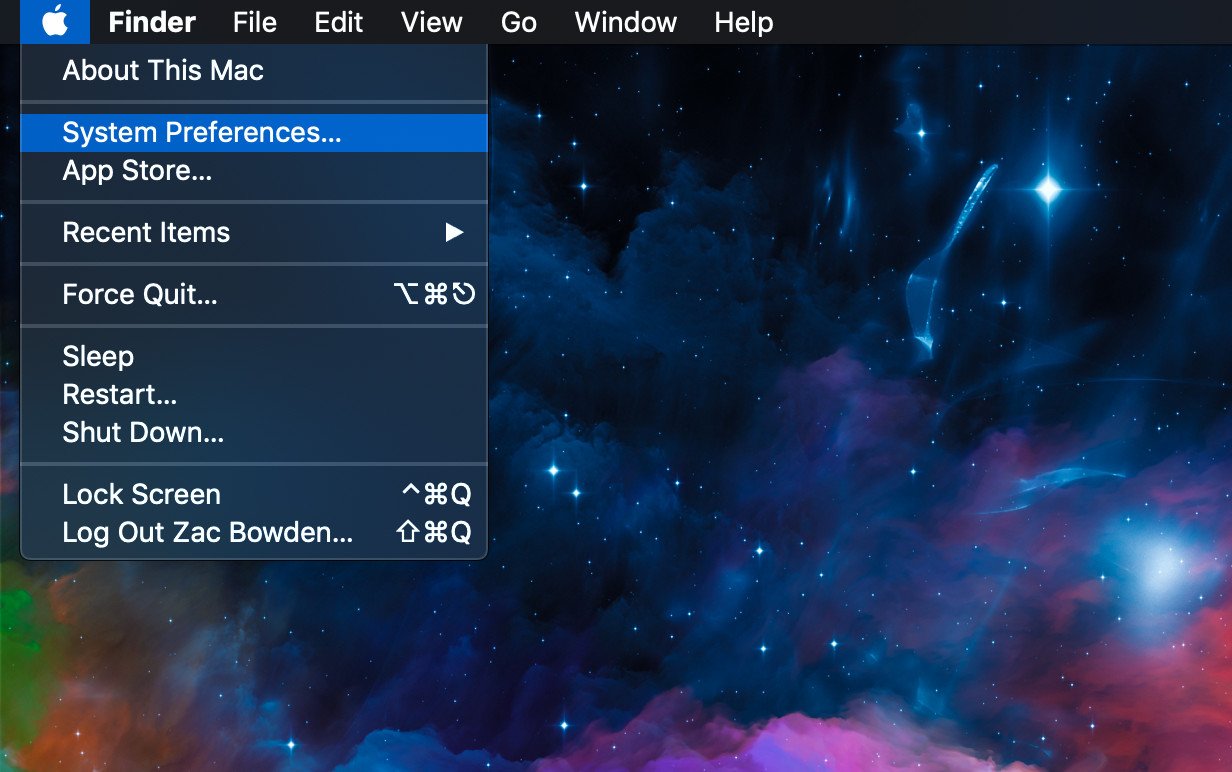
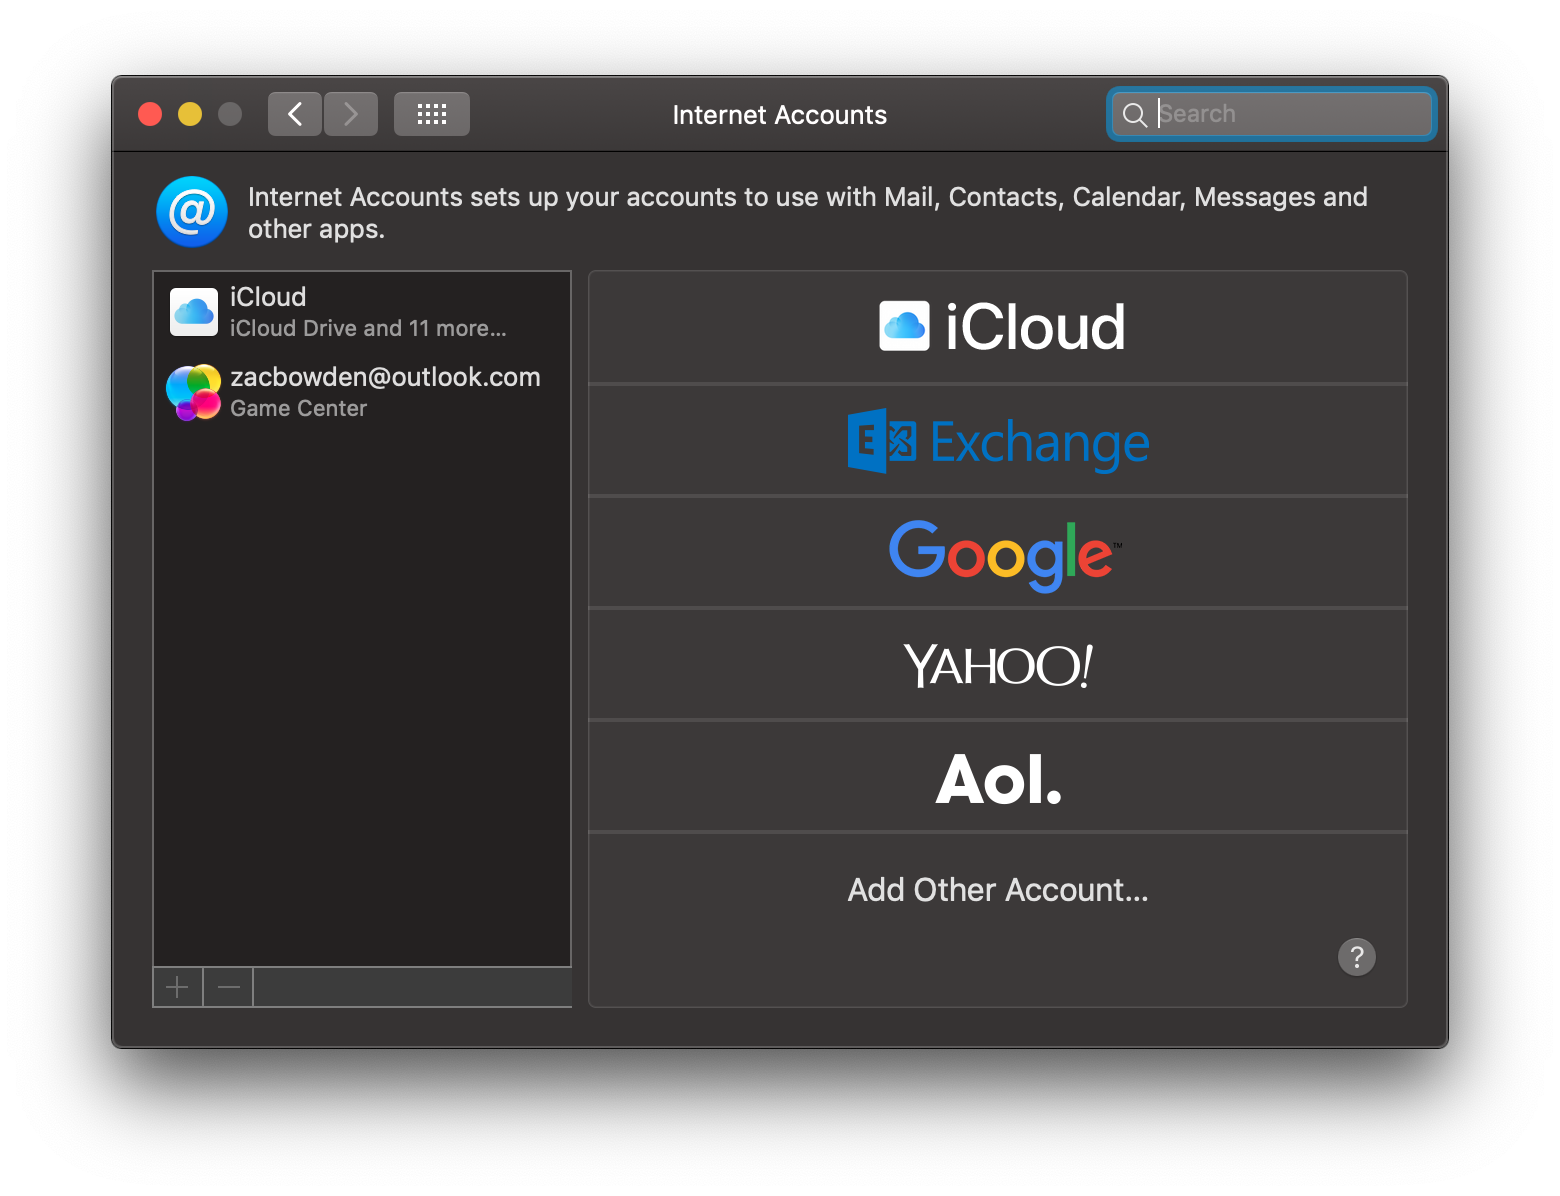
Open up System Preferences on macOS.
-
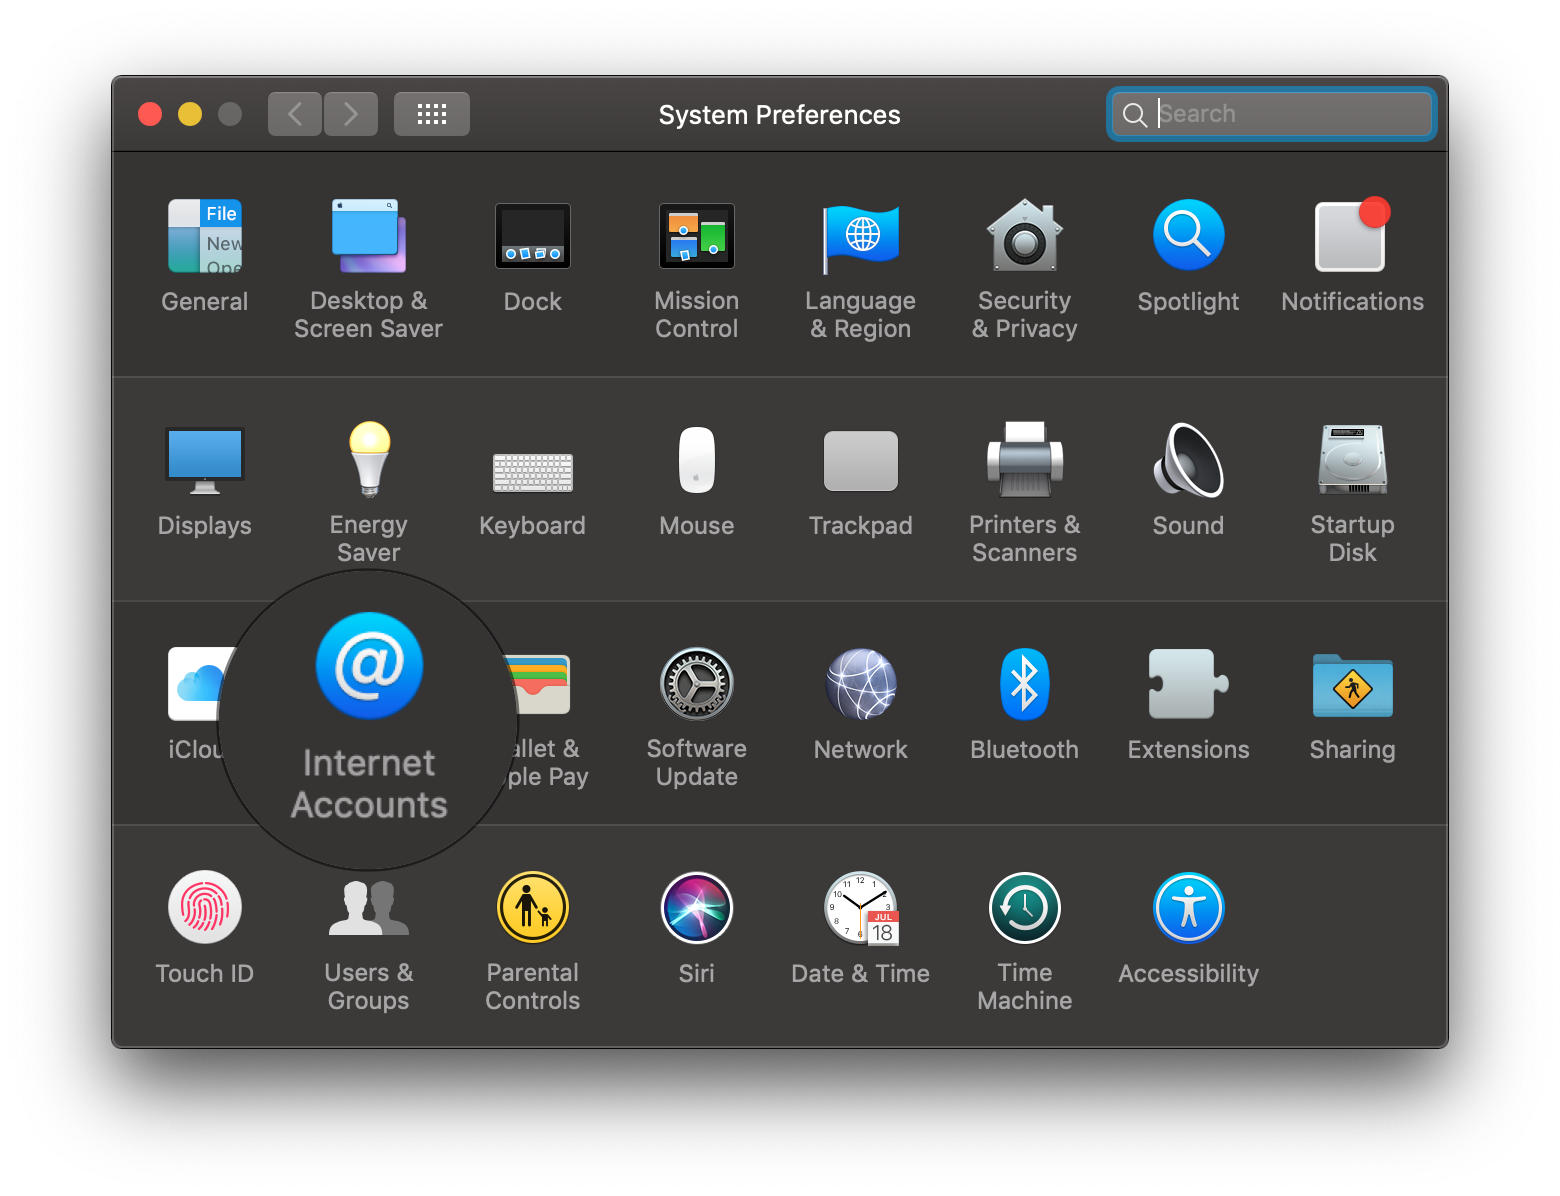
Select Internet Accounts.
-
Select the Exhange option.
-
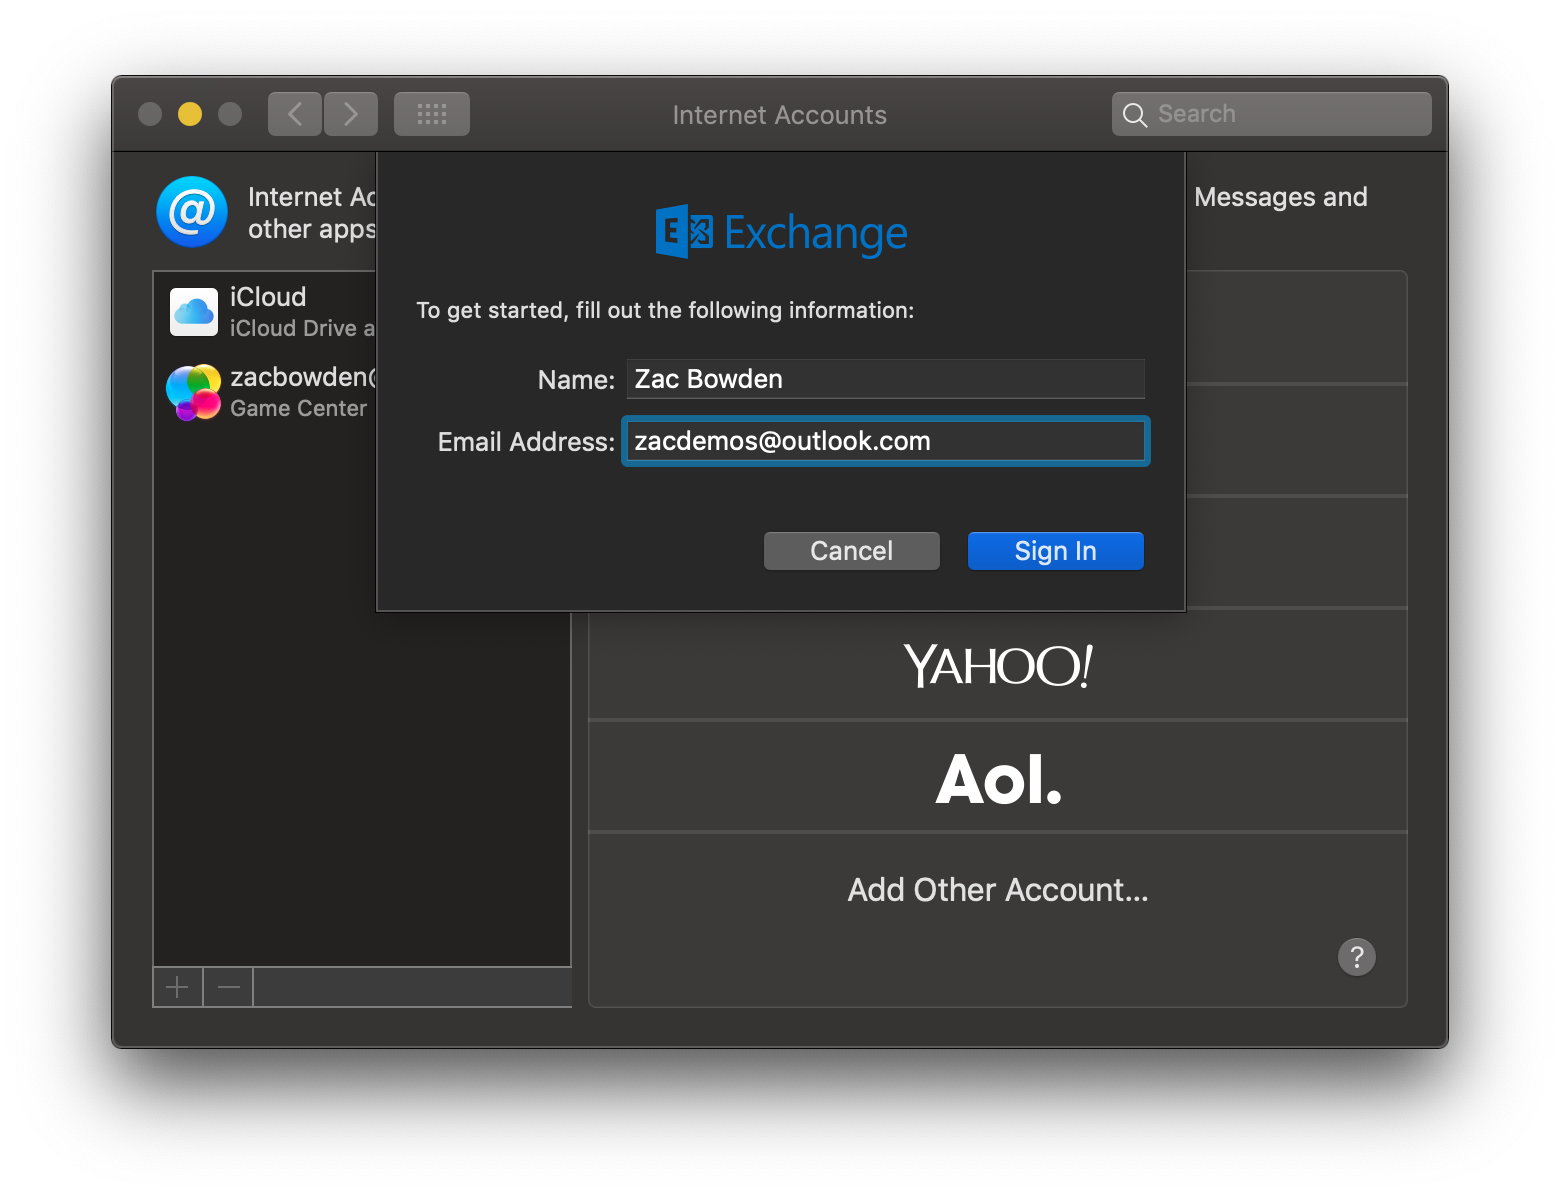
Type in your name and Microsoft Account email address and select sign in.
-
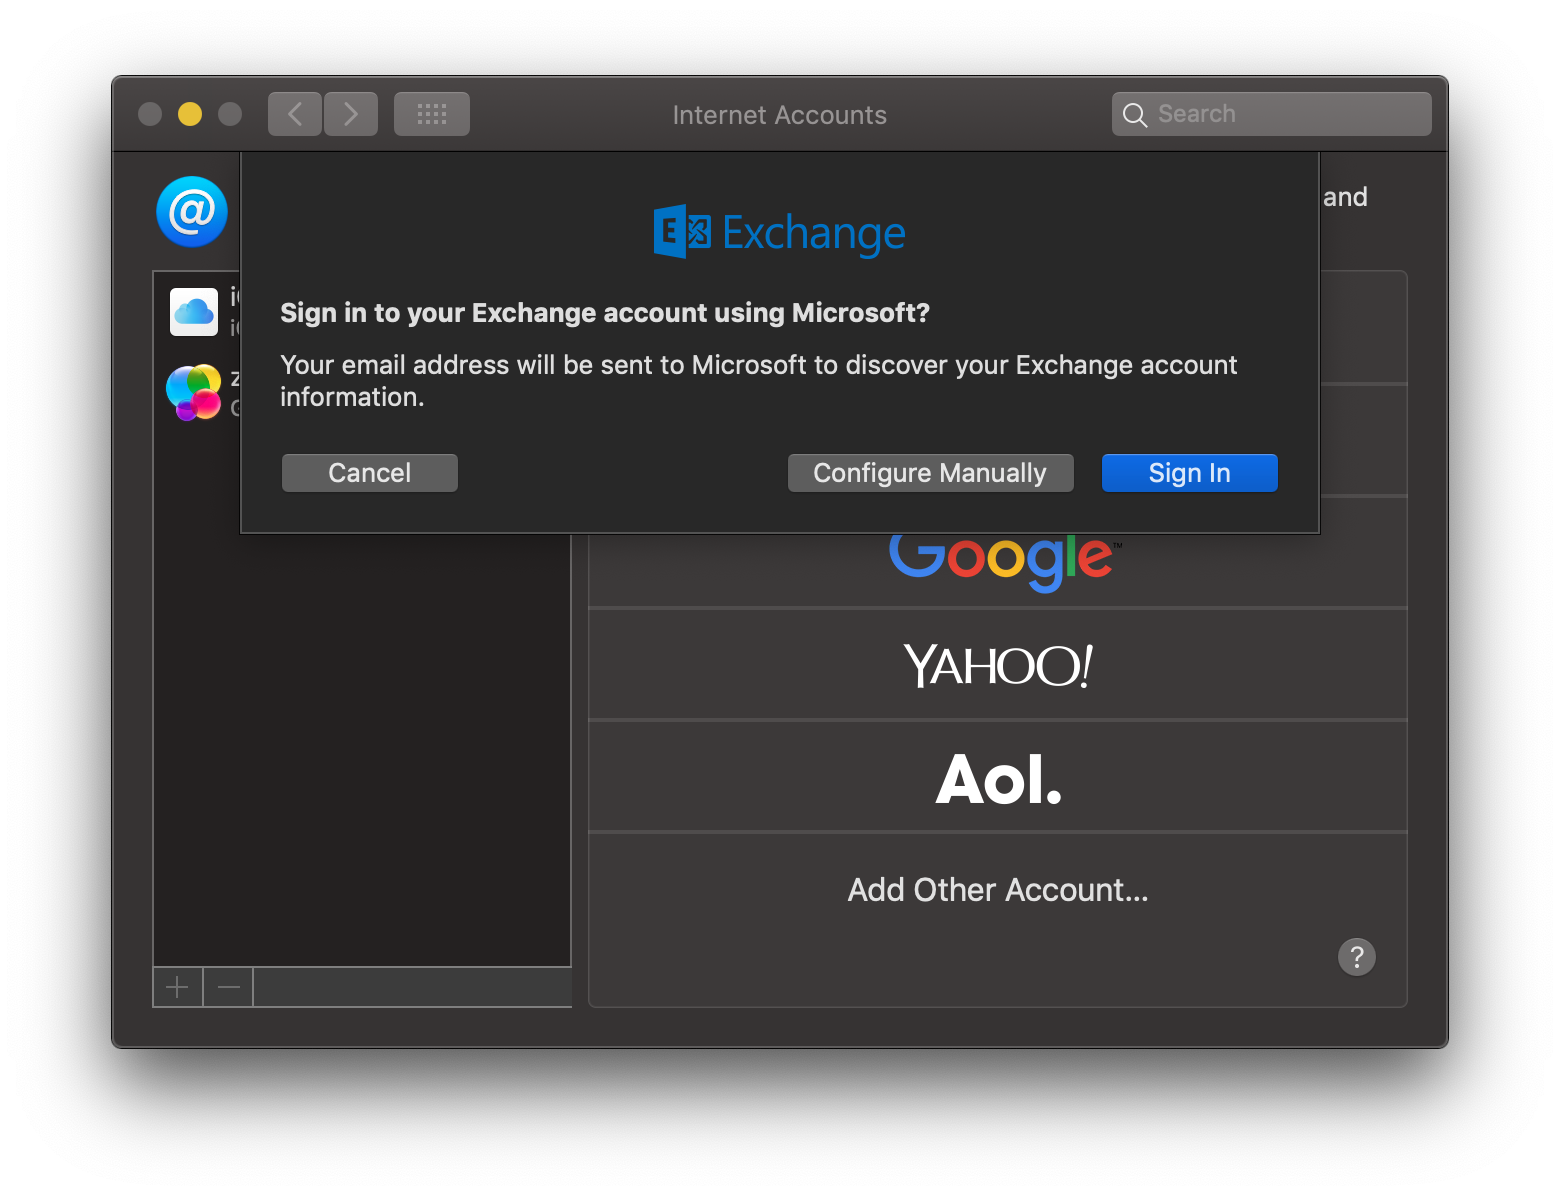
Select sign in once again.
-
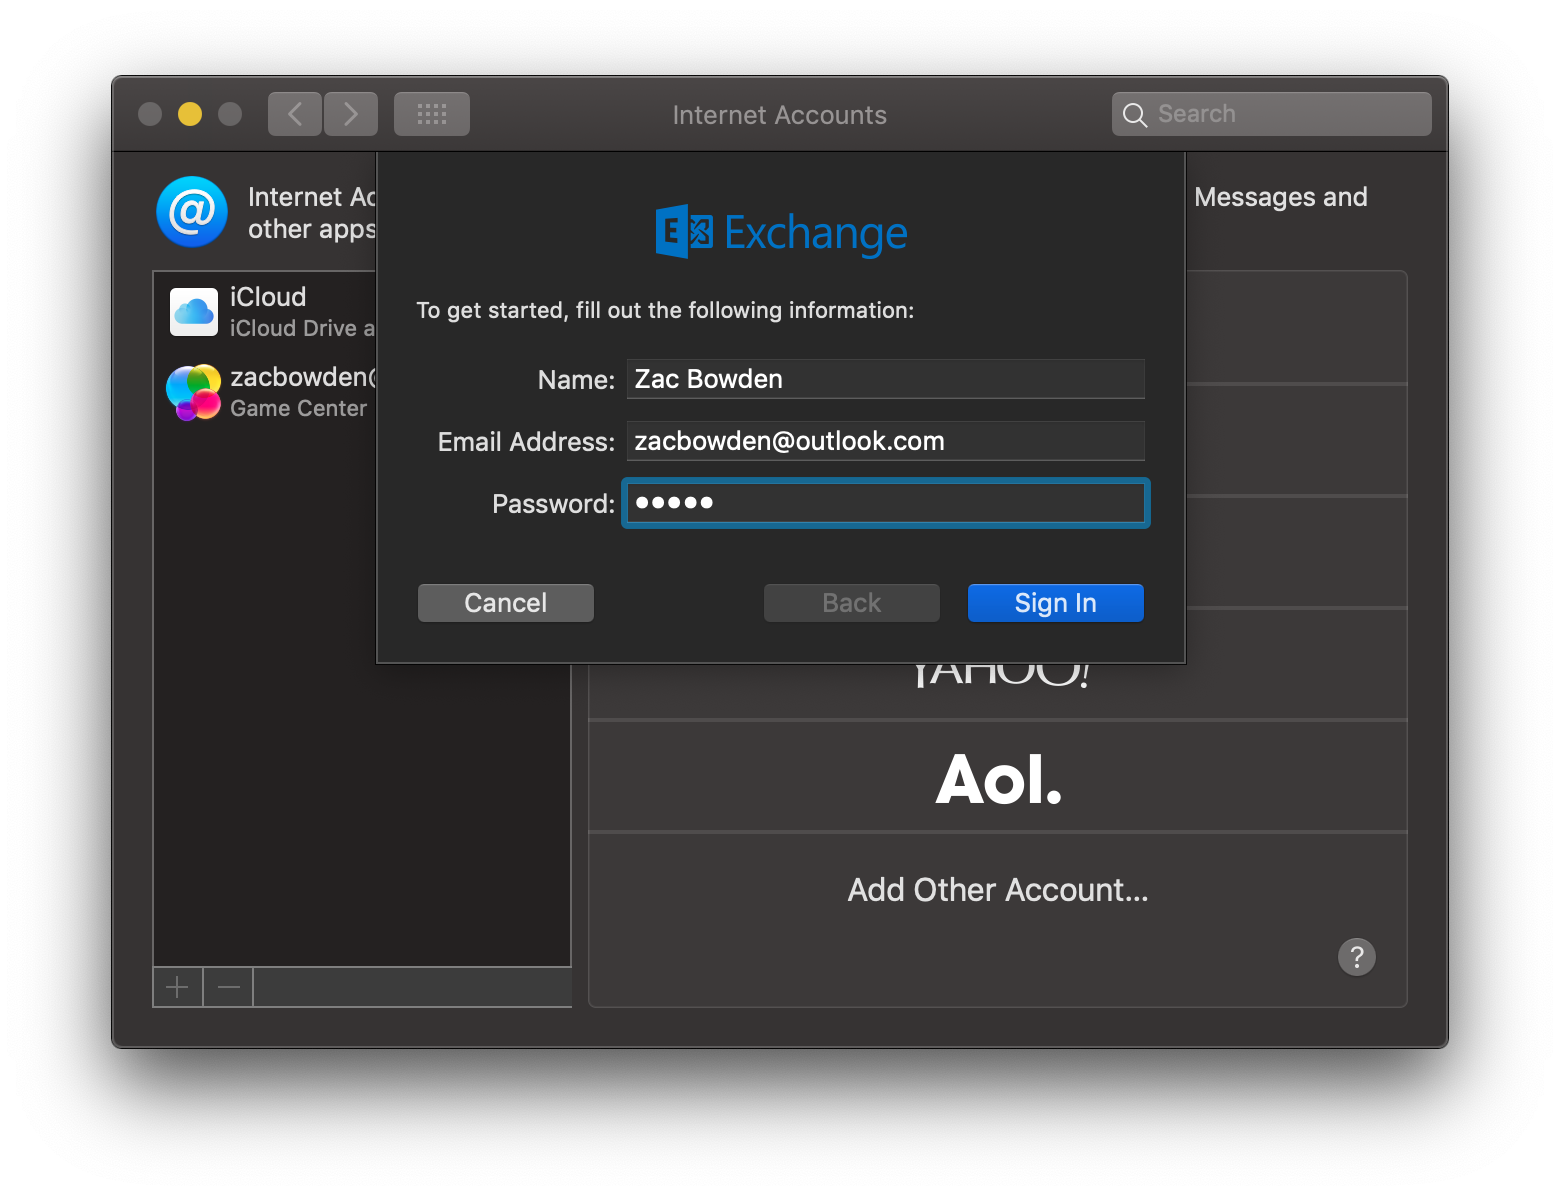
Type your Microsoft Account password and select sign in.
-
Once logged in, select done.
-
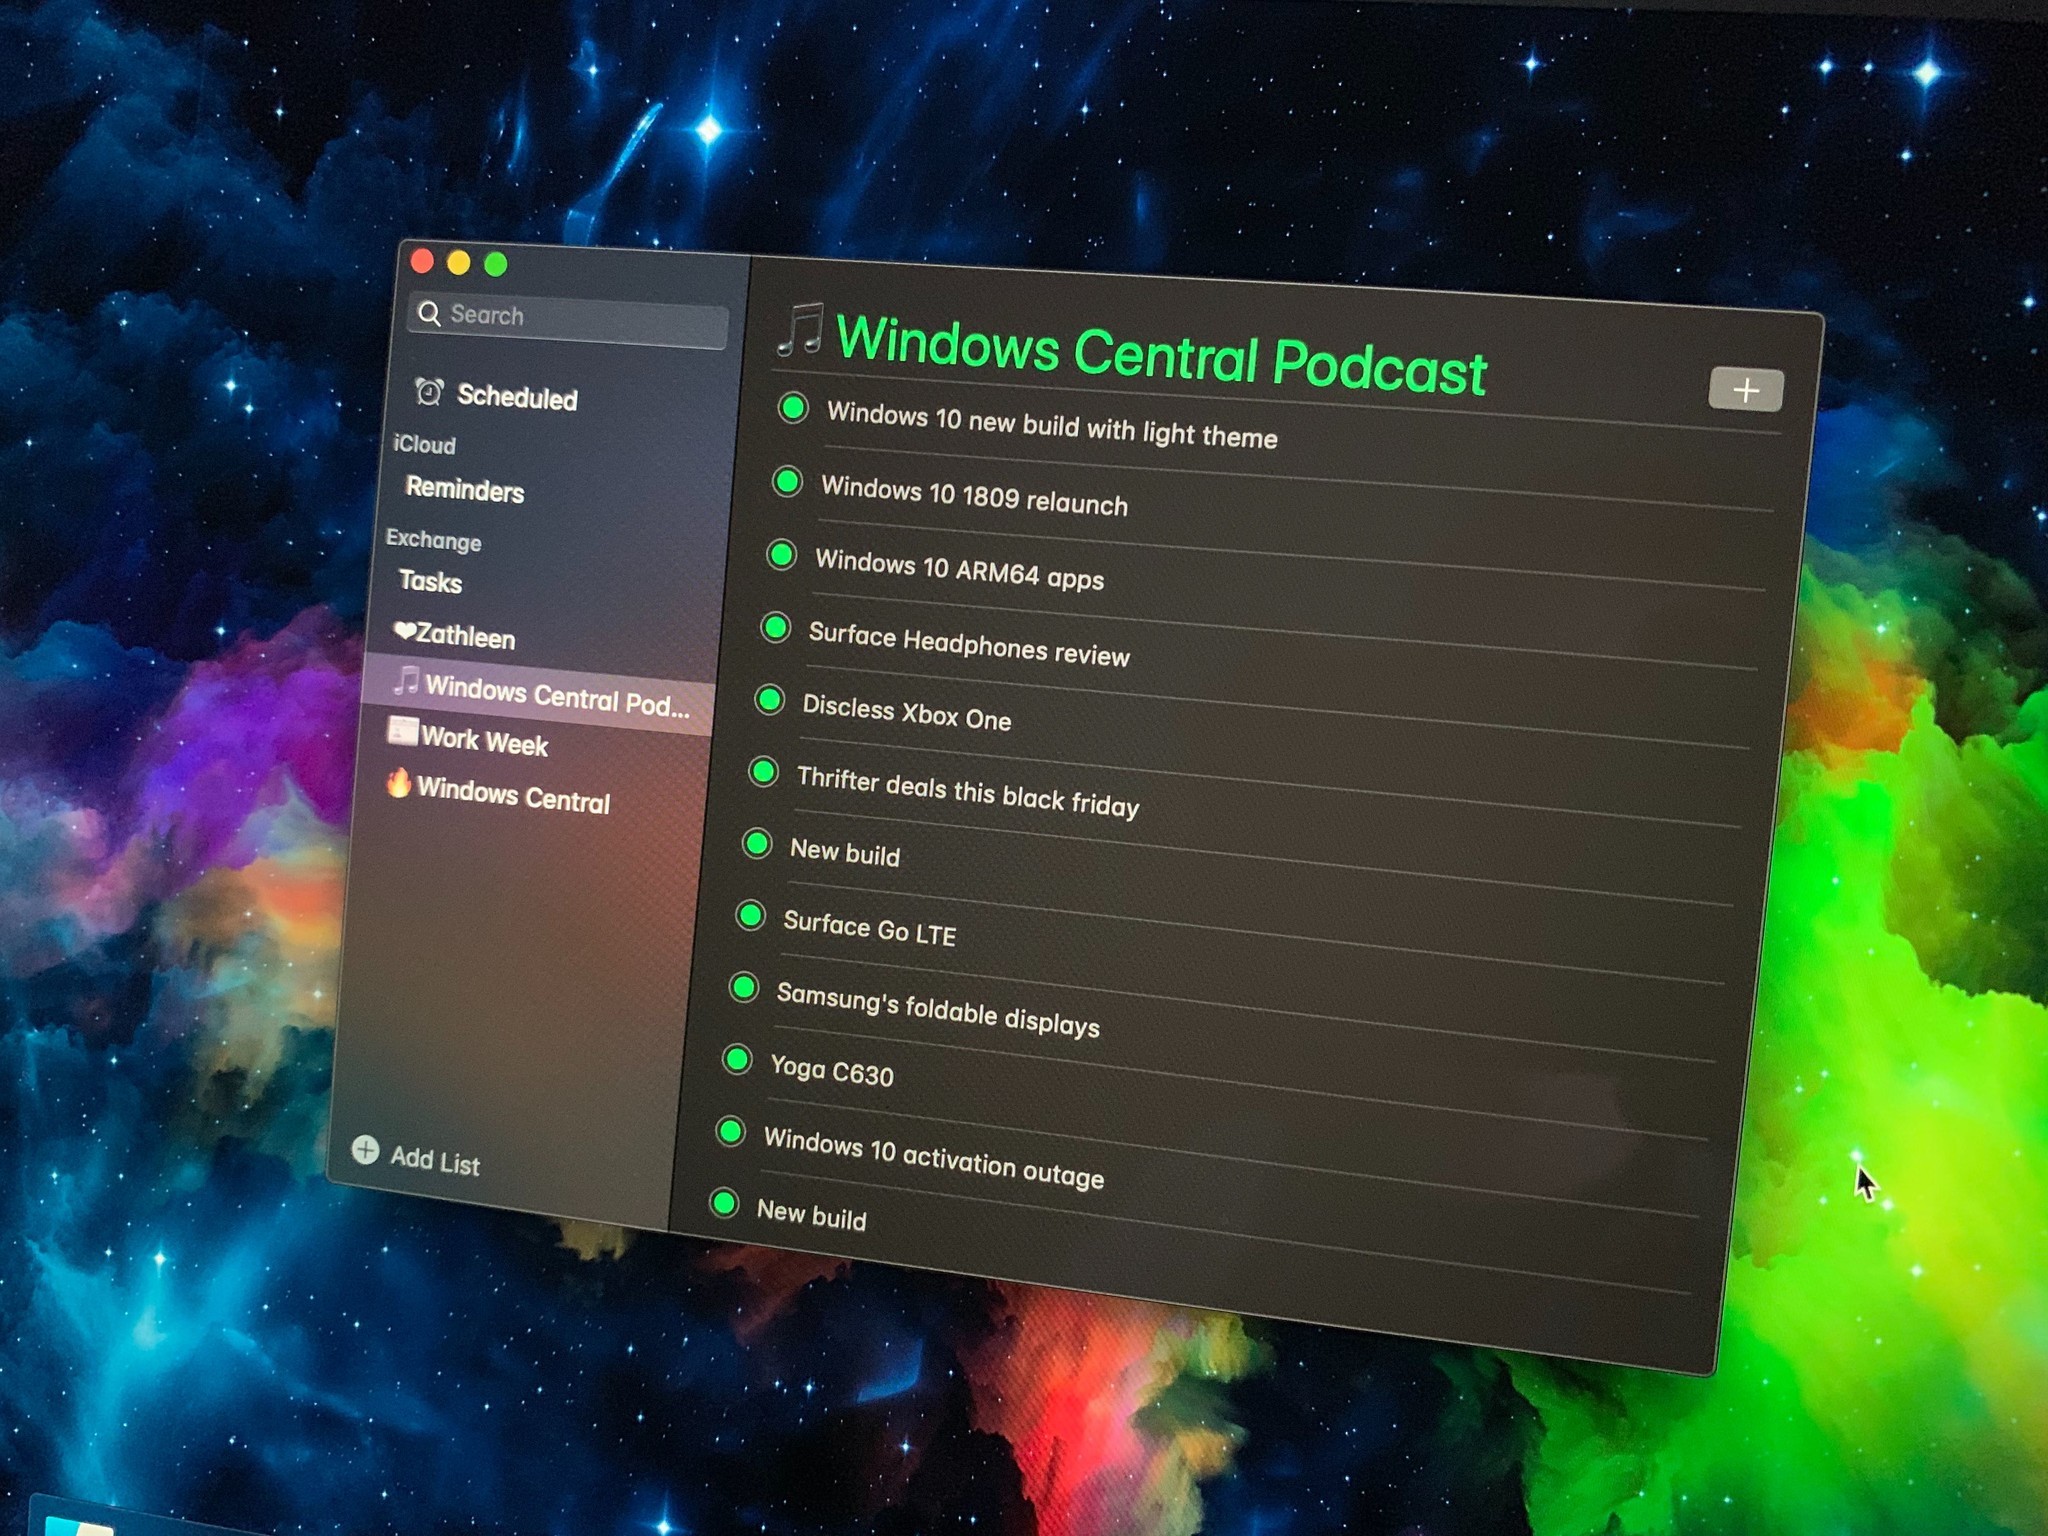
Open up the Reminders app on macOS.
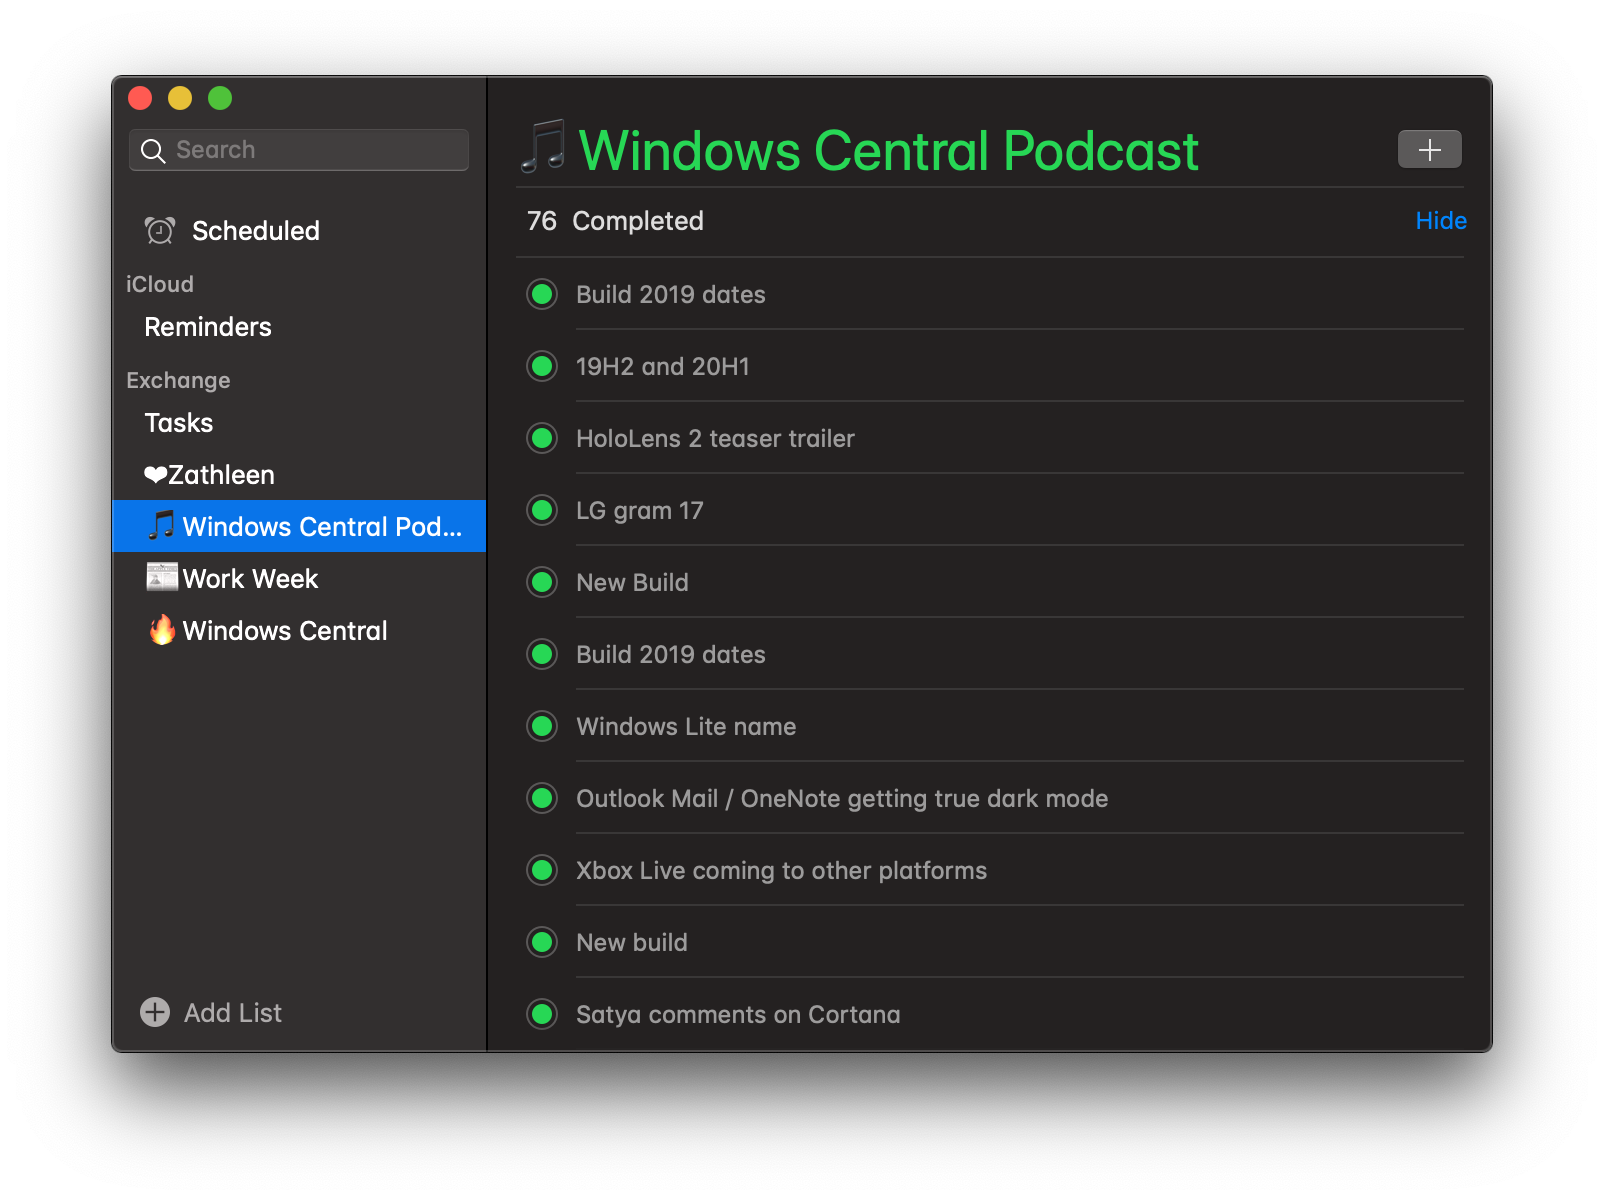
That’s all there is to it. Now, all your Microsoft To-Do and Cortana Reminders will sync up with your Mac using the Reminders app built into macOS. You can add to, complete, and delete tasks from Mac as well, so it acts just like a native client.
Why sync Microsoft To-Do with macOS?
Why should you even consider syncing your Microsoft To-Do and Cortana Reminders with your Mac? Well, if you’re someone who is forced to use macOS for work, or if you prefer Apple’s OS to Microsoft’s (gasp!), but continue to use Microsoft’s software and services, being able to sync your tasks straight to macOS without having to download anything extra is super handy.
Our top equipment picks
For this tutorial, we used the latest MacBook Air from Apple, but any macOS device that runs the latest version can follow this guide.
What we used
MacBook Air 2018
The MacBook to buy for most people
If you want something you can take everywhere, do everything on, and not have to pay … quite so much of a premium for it as a MacBook Pro, get the MacBook Air. It’s the new normal.
Thanks to Dominic Maas for the tip about this!


Recent Comments