
As of February 27, 2019, Apple is requiring that all Developer accounts with an Account Holder role be secured with two-factor authentication in order to ensure that only the account owner is able to sign into the account.

Two-factor authentication involves a pop-up code being generated on trusted devices linked to an Apple ID any time a login attempt is made unless you’ve logged with that same browser within the past 30 days and selected the option to trust it. That verification code from the trusted device must then be entered for the login to be approved.
The requirement has caused some confusion among developers who have multiple Apple IDs, particularly those who use a dedicated Apple ID for their Developer account that is separate from their primary iCloud account used on their devices.
Apple has posted a developer support document that outlines a few ways to enable two-factor authentication on a non-primary Apple ID, but Apple’s suggestion for iOS involves signing out of your primary iCloud account. That can be a hassle as your phone unsyncs and tries to delete content associated with that account, so it’s better to use other methods if you can.
Turning on two-factor authentication for an alternate Apple ID and getting it to work properly with trusted iOS devices without signing out of your primary Apple ID requires a few steps, but once they’re done the feature should work seamlessly.
Activating Two-Factor Authentication on an Alternate Apple ID
For this portion of the process, you’ll need access to a Mac where you have permissions to create new user accounts.
- Open System Preferences and click on Users & Groups.
- Click the lock at the bottom left corner and enter your administrator password to allow changes.
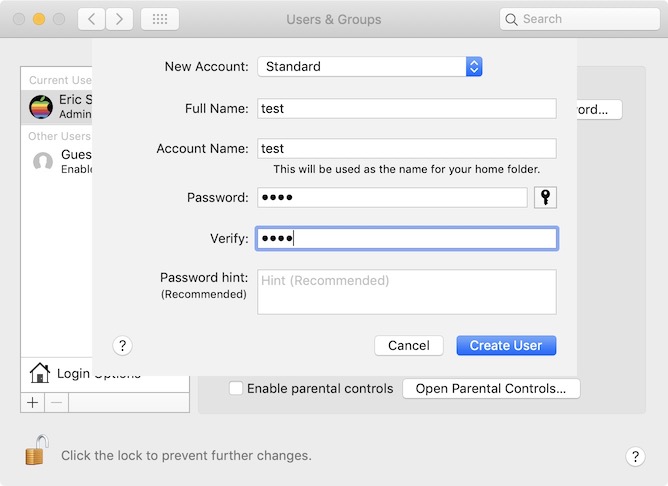
- At the bottom of the user list on the left, click the + button and set up a new Standard user account, entering a name, account name, and password and clicking on "Create User."
- If you have fast user switching activated, click on your name or icon near the right side of the menu bar, and choose the new user account you just set up. If fast user switching is not active, you’ll need to either turn it on in the Login Options section of Users & Groups in System Preferences or completely log out of your current account and then choose the new account.

- Enter the password to log into the new account, and skip through the setup steps as quickly as possible, unchecking options or selecting "set up later" for various features whenever possible.
- Once the user account is configured and you’ve reached the Mac desktop, head to System Preferences and click on iCloud.
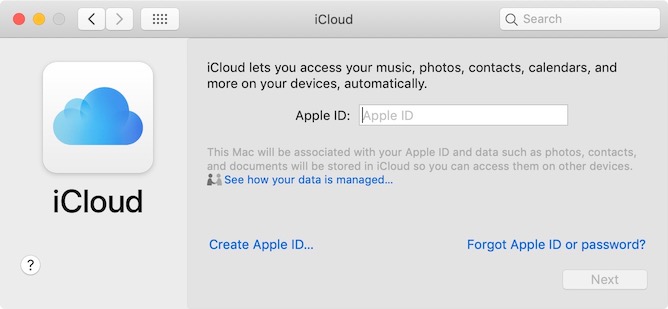
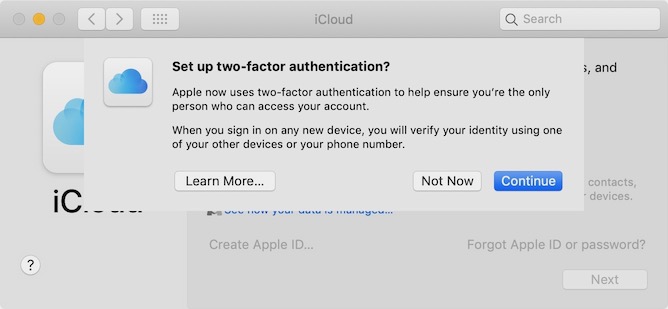
- Sign in with the Apple ID you want to activate two-factor authentication for. Once you’ve entered the password, the system will ask if you want to set up two-factor authentication. Select Continue.
- Enter a phone number where you can receive a text message or phone call to verify your identity.
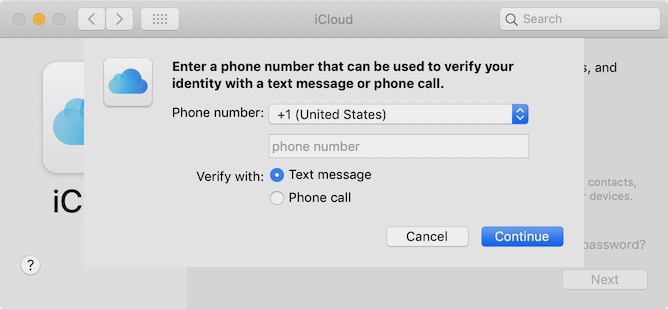
- When you receive a verification code at that number, enter it on your Mac and finish the setup steps, unchecking all options. Two-factor authentication is now up and running on your Mac for your desired Apple ID. Keep this user account open on your Mac for the next step unless you want to use a text message verification code to the phone number you entered as a fallback.
Setting Up an iPhone or iPad as a Trusted Device
You don’t want to leave this unneeded user account up and running on your Mac as the only method for approving logins that doesn’t require a text message, so you’ll want to set up an iPhone or iPad as a trusted device for this Apple ID.
- Open the Settings app on your iOS device and tap on Passwords & Accounts
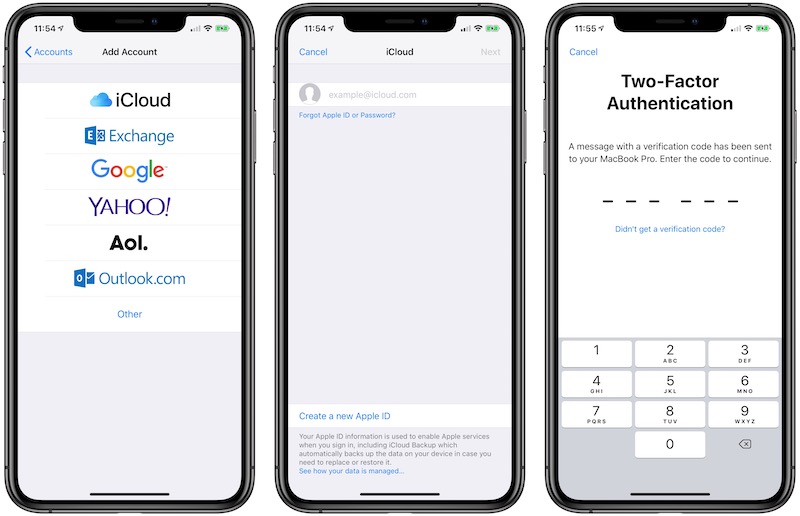
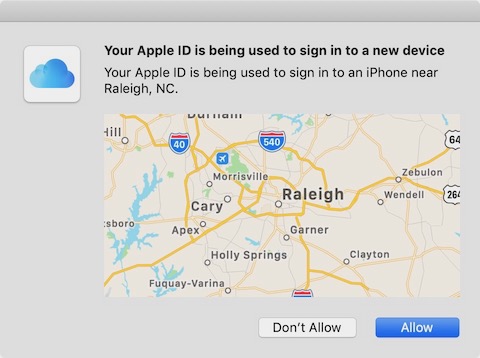
- Tap on Add Account and choose iCloud, then enter the Apple ID and password for the account you just set up two-factor authentication for on your Mac. You’ll be prompted for verification, which should pop up on your Mac where you can allow the login and view the verification code to enter on your iOS device. (If you already logged out of or deleted the Mac user account, you can choose the "Didn’t get a verification code" option and select "Text Me" to receive a code via SMS.)
- Once you’re authenticated, the Apple ID login will finish and you’ll be offered a list of iCloud features including Mail, Contacts, Calendars, and Reminders on your iOS device. Turn all of these toggles off and tap Save.
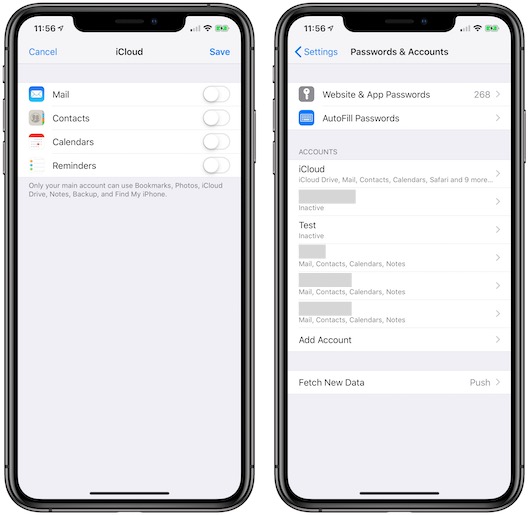
- Your Developer Apple ID account is now logged in on your iOS device and it can receive verification requests whenever you try to log into that Apple ID. It will show as "Inactive" in the account list on your device because all of the iCloud features of the account have been toggled off.
The final step of the process is to clean up the Mac you used to turn on two-factor authentication. Log out of the account on the Mac, switch to an account with administrator privileges, head back to the Users & Groups section of System Preferences, click on the lock to allow changes, highlight the temporary account you agreed, and hit the minus button. Choose to delete the account entirely rather than archiving it, and you’re done.
This article, "How to Set Up Two-Factor Authentication for Multiple Apple IDs on One Device" first appeared on MacRumors.com
Discuss this article in our forums


Recent Comments