One nice feature of the Mail app on iOS and Mac is that you can add several different types of email accounts to it. This lets you manage your inbox and send emails from every account you have, all in one spot.
If you haven’t set up additional accounts yet, we’re here to help. Here’s how to add an email account to Mail on iPhone, iPad, and Mac.
Add an email account to Mail on iPhone and iPad
To add an email account on your iPhone or iPad, begin by opening your Settings and then do the following.
1) On the Settings screen, select Passwords & Accounts.
2) Scroll to the bottom and pick Add Account.
3) Select the type of account you would like to add from options like iCloud, Exchange, and Google. You can also choose Other to set it up manually.
4) Follow the prompts to connect the account which depend on the type of account you choose.
When you finish, you will see that account added on the Passwords & Accounts screen. And when you open the Mail app, you’ll see the account listed under Mailboxes.
Add an email account to Mail on Mac
To add an email account on Mac, open the Mail app and then follow these steps.
1) Click Mail > Preferences from the menu bar.
2) Choose the Accounts tab.
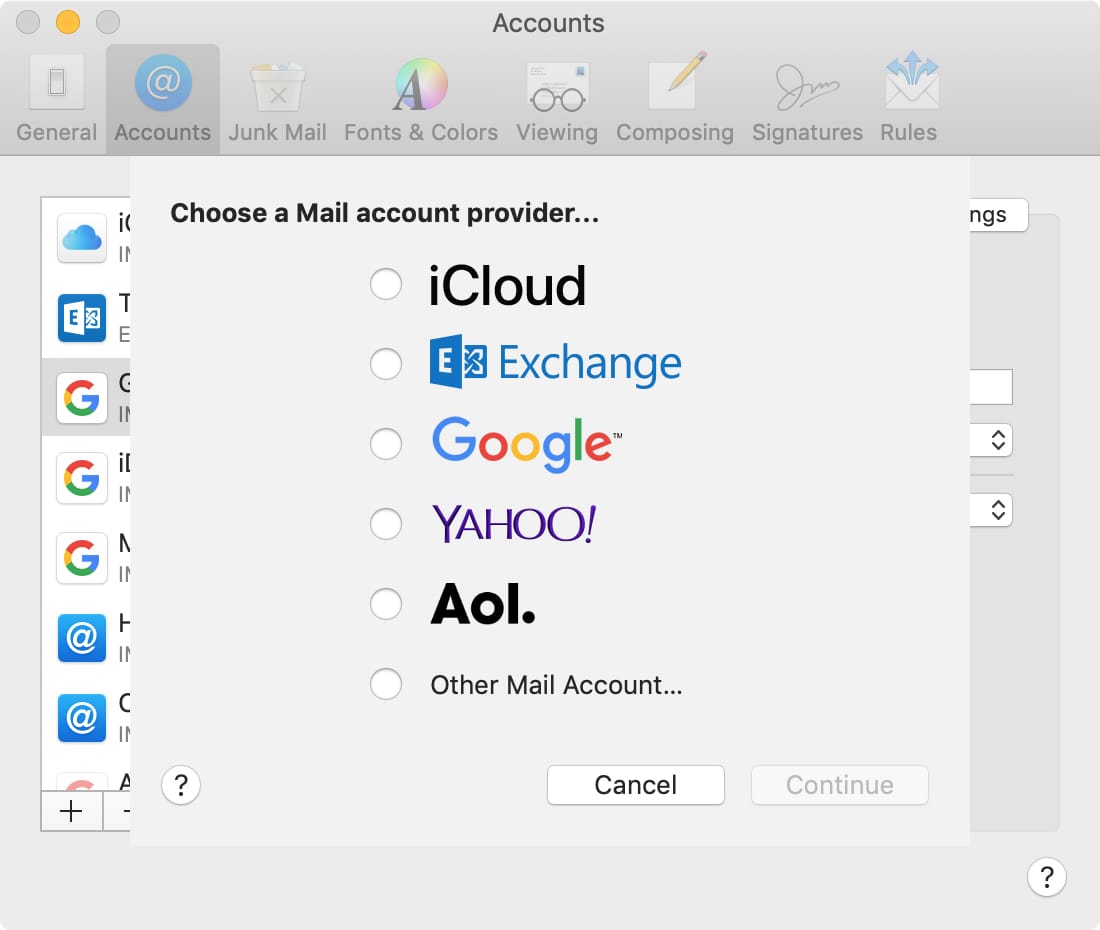
3) On the left, you should see your current mail account. At the bottom of that area, click the plus sign.
4) Select the type of account you would like to add from options like iCloud, Exchange, and Google. Click Continue.
5) Follow the prompts to connect the account which depend on the type of account you choose.
When you finish, you will see that account added on the left side. And when you go back to the Mail app, you’ll see the account listed under Mailboxes in the sidebar.
Wrapping it up
Being able to access all of your email accounts in one spot is super convenient. Are you going to add your other email accounts to the Mail app?
For additional how-tos like this, head over to our tutorials section.


Recent Comments