


There’s nothing quite like that moment when you open an Apple box and see your fresh new iPhone for the first time, but what comes next? In this article, we’ll teach you how to set up a new iPhone with a new Apple ID or with an existing Apple ID and data from an older device. Whether you’re a first-time user or upgrading your current iPhone to a new device, we’ve got you covered. Read on to learn how to transfer data from an existing device, restore your settings from iCloud, or create your very first Apple ID for your brand new iPhone.
Related: How to Back Up Your iPhone to iCloud
- How to Set Up Your New iPhone from Scratch
- Getting Your Apple Watch Ready for Backup
- Quick Start Method
- iCloud Backup Method
- iTunes Backup Method
How to Set Up Your New iPhone if You’ve Never Owned One Before
If this is your first iPhone, the setup process will be straightforward. Before we get started, there are a few things to consider. If you’ve ever used iTunes in the past, whether on a PC, Mac, or an iPod, then you already have an Apple ID. Using that ID to complete this process will sync your device with any music or apps that you bought with your existing Apple ID. If you haven’t created an Apple ID yet, or if you want to start over from scratch, we’ll cover that as well. We’ll also go over a headache-proof method for transferring some of your most valuable data, such as contacts, from an Android phone to your iPhone.
- If you are transferring a sim card from an existing device, do that first.
- You might want to move data from an Android, Windows, or Blackberry device. If so, visit your app store and download the Move to iOS app.
- Turn on your new iPhone by pressing the On/Off button on the upper-right edge until the Apple logo appears. If the screen stays black, you may need to charge your device and try again in a few minutes.
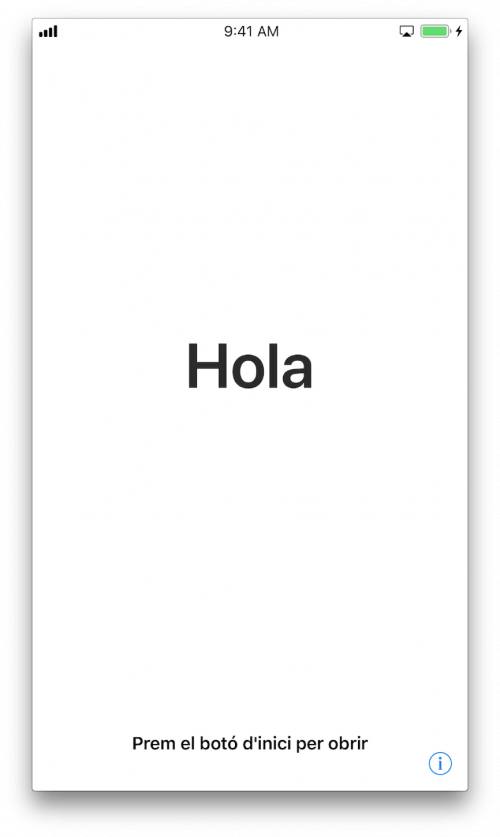
- Once your iPhone has turned on for the first time, you will see the word "Hello" cycle through in several languages. If your iPhone has a home button, press it to continue. If your iPhone doesn’t have a Home button, then just tap the screen.
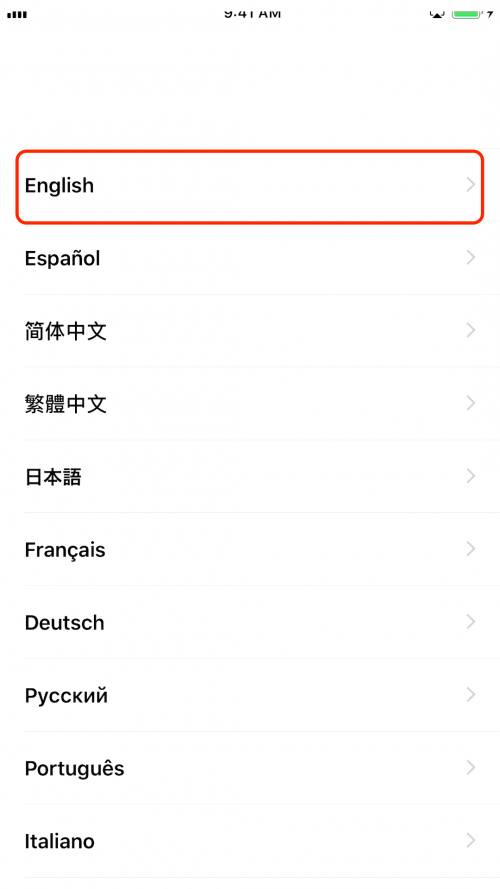
- Tap the language you’d like to use on your iPhone, then tap the country or region where you live.
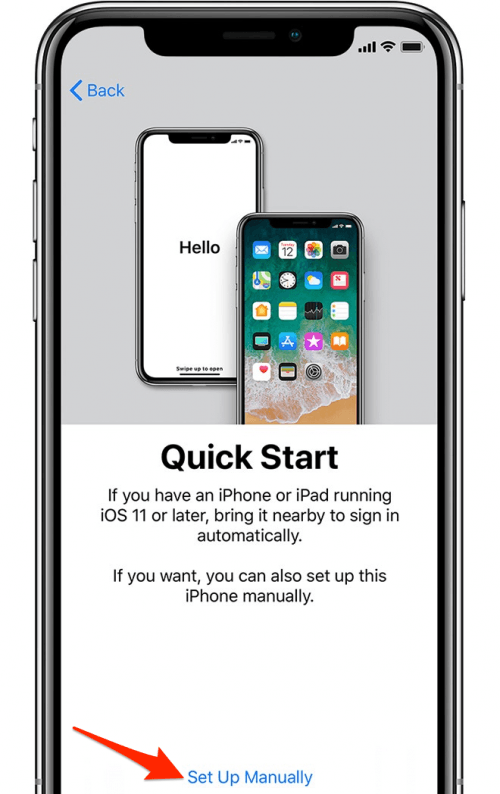
- Next, you’ll see the Quick Start screen. Whether this is your first smartphone or you are transferring data from a non-Apple device, tap Set Up Manually.
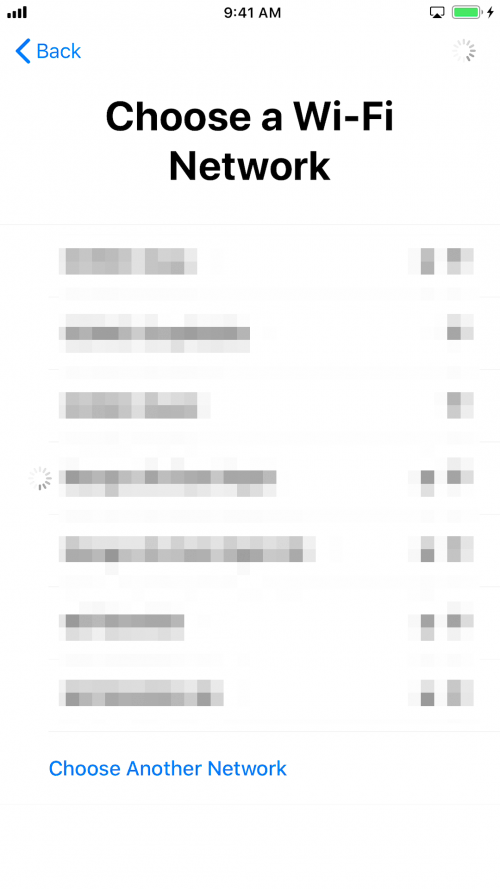
- Choose your Wi-Fi network to continue or tap Use Cellular Connection if you’d rather use your data plan.
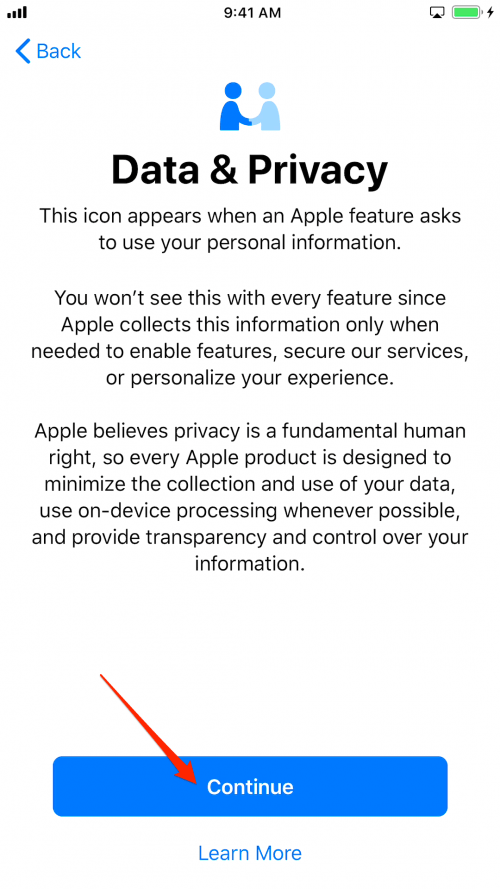
- The Data & Privacy disclaimer will now appear. Tap Continue to move to the next screen.
- Next, you’ll be prompted to set up either Touch ID or Face ID, depending on your model of iPhone. Follow the prompts to set up your ID.
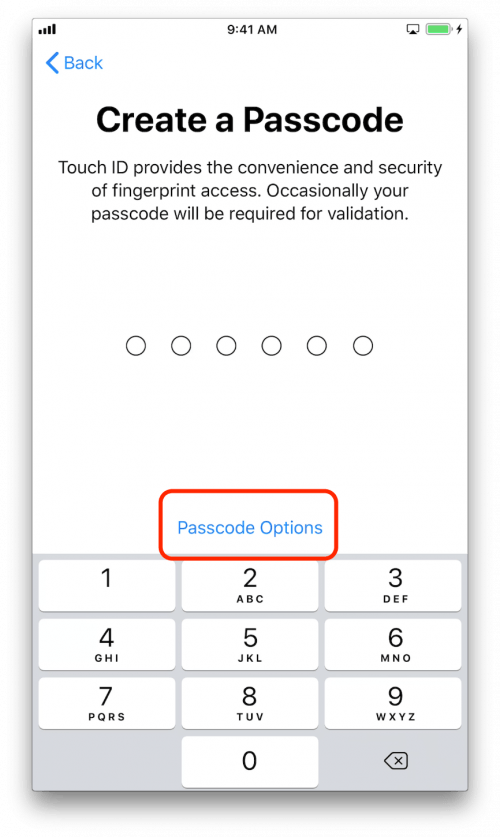
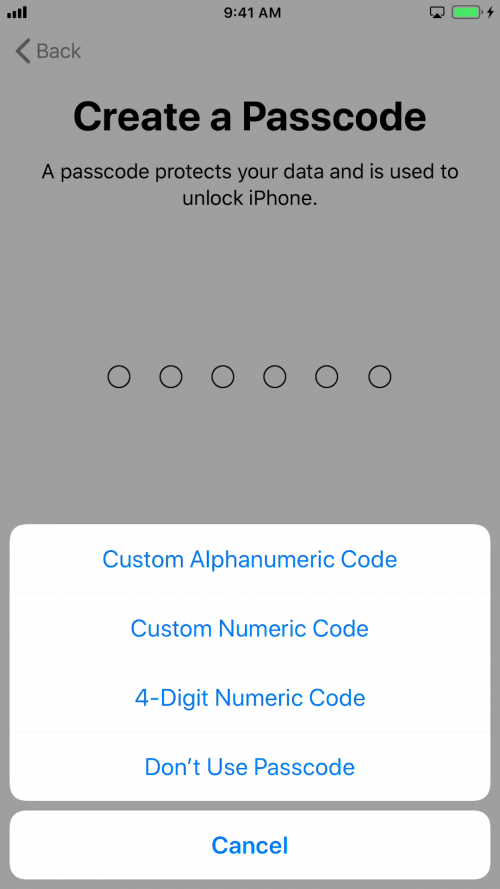
- After you’ve set up either Face or Touch ID, it’s time to create your passcode. You can create a six-digit passcode, or tap Passcode Options for options such as 4-Digit Numeric Code (the least secure), Custom Numeric Code, or Custom Alphanumeric Code (the most secure). Whichever Passcode Option you pick, you’ll be prompted to re-enter the Passcode on the next screen.
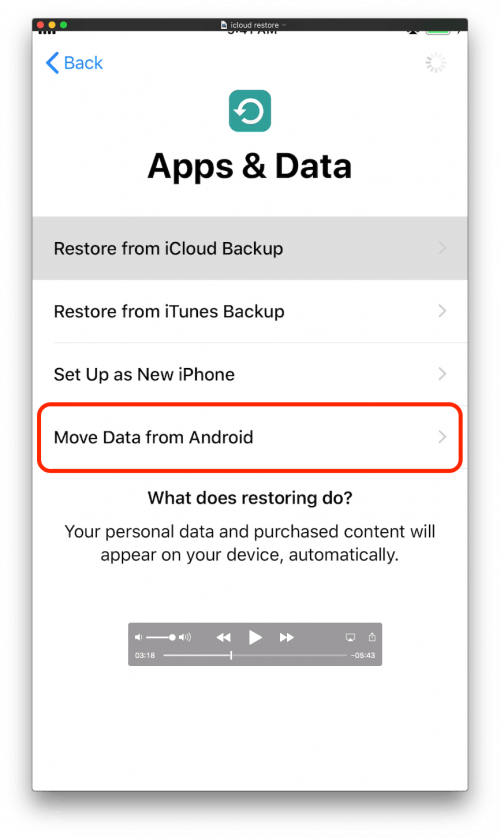
- On the Apps & Data screen, tap Set Up as New iPhone or Move Data From Android.
- If you are migrating from Android, open the Move to iOS app on your old device and follow the prompts to complete the migration.
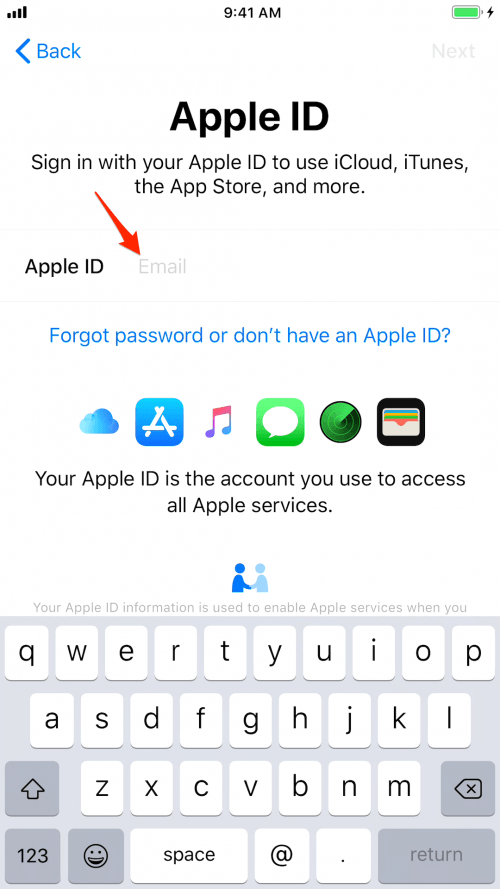
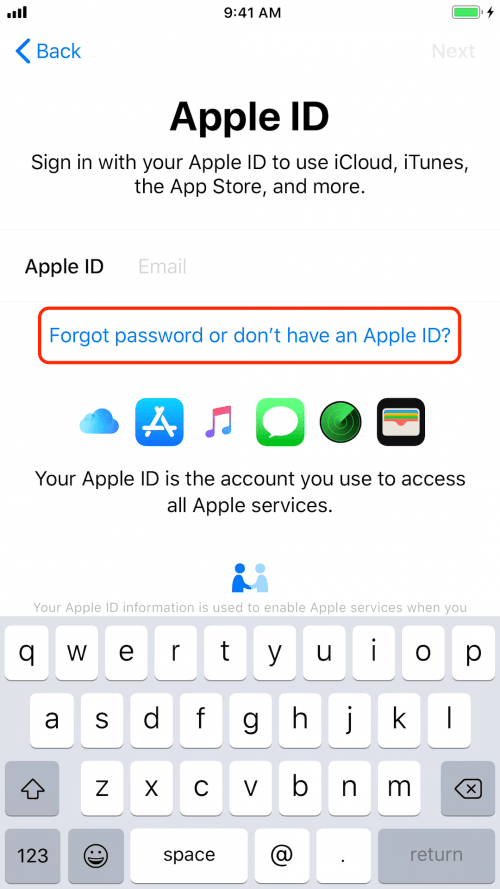
- Whether or not you’ve migrated from Android, the Apple ID sign-in will be the next screen. Here, you can sign in with your existing ID. If you don’t have one, you can create one by tapping Forgot Password or Don’t Have an Apple ID to create an ID.
- Once you’ve created and/or signed in with your Apple ID, you’ll be given a set of prompts regarding Siri voice recognition, Apple Pay, Location Services, etc. You can set these options up now or opt to set them up later.
Preparing Your Apple Watch to Pair With a New iPhone
Before we continue, if you have an Apple Watch paired to an existing iPhone then you’ll need to follow these steps to be able to pair your watch to your new iPhone. Regardless of which method you choose to transfer your data, you’ll need to first backup your old iPhone and then unpair your Apple Watch from that device.
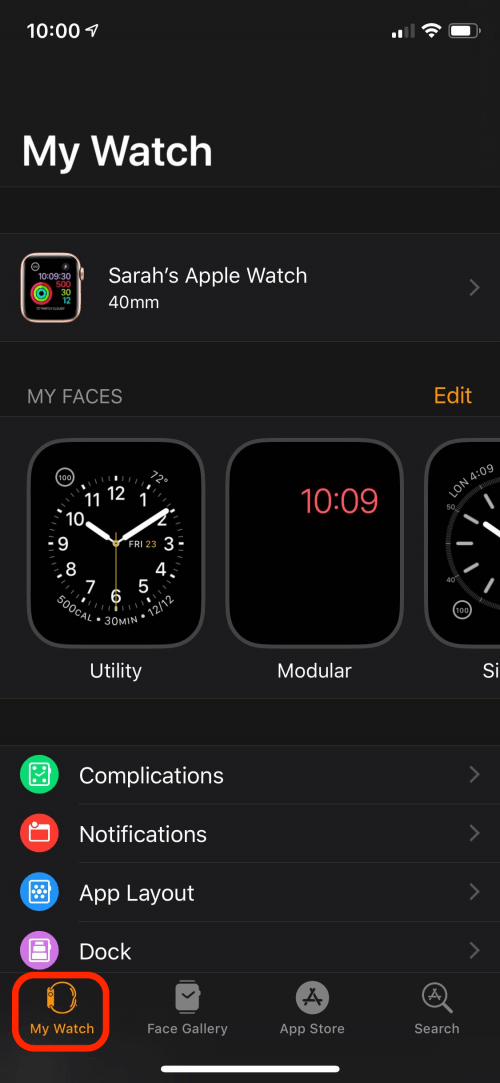
To unpair your Apple Watch from your old iPhone:
- If you haven’t already, make sure your old iPhone has a current backup.
- Open the Watch app and go to the My Watch tab.
- Tap the name of your Apple Watch.
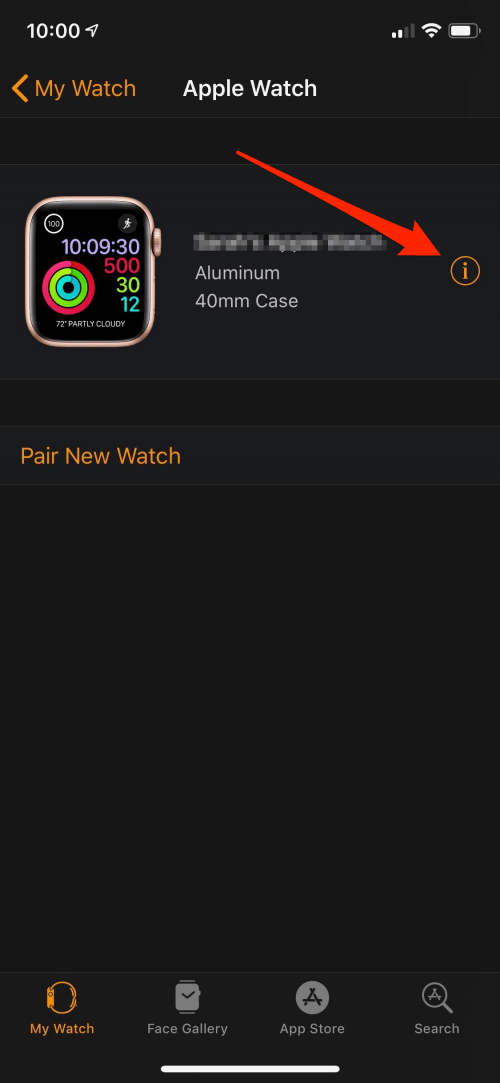
- Tap Unpair Apple Watch.
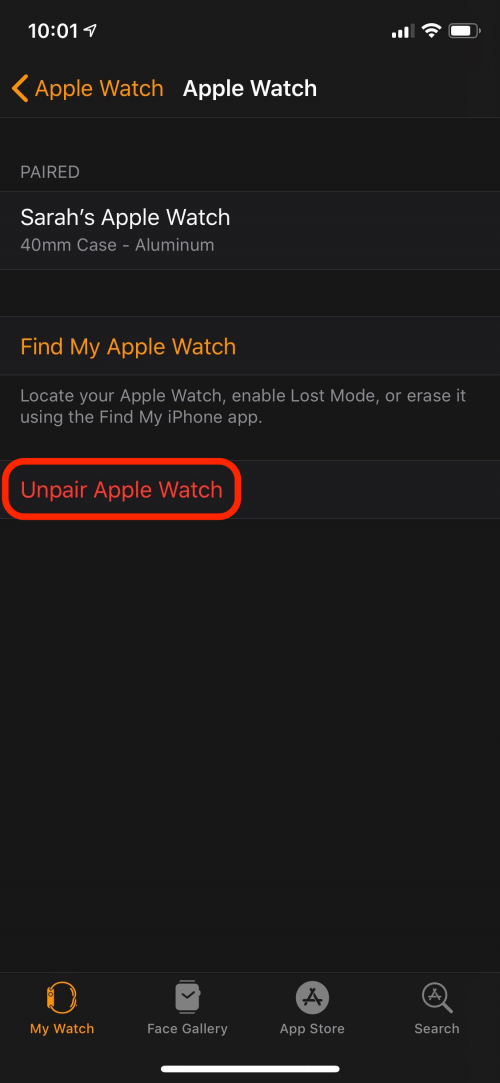
- Tap Confirm to finish unpairing your Apple Watch from your old device.
Quick Start from an Old Device
By far the easiest method, Quick Starting an iPhone from an old device simply requires both your new and old iPhone as well as a secure Wi-Fi connection. This method will transfer most of your settings with the least amount of hassle.
- If you haven’t already, make sure your old device has a current backup.
- Transfer your sim card to your new device and/or contact your carrier to verify whether you’ll need a new sim card.
- Make sure both devices are charged and in front of you. Make sure you’ve enabled Bluetooth on your old device.
- Turn on your new device by pressing the On/Off button on the upper right edge until the Apple logo appears.
- Once your new iPhone has turned on for the first time, you will see the word "Hello" cycle through in several languages. If your iPhone has a home button, press it to continue. If your iPhone doesn’t have a Home button, then just tap the screen.
- Tap the language you’d like to use on your iPhone, then tap the country or region you’re where you live.
- Next, you’ll see the Quick Start screen pop up on your old iPhone. Tap Continue below the option to set up manually.
- Wait for an animation to appear on your new iPhone.
- When prompted, hold your old iPhone over the new iPhone until you’ve centered the animation in the viewfinder.
- Wait for the Finish on New [Device] message to appear.
- Next, your new iPhone will ask for the passcode from your old iPhone. Enter that passcode now.

- Choose your Wi-Fi network to continue or tap Use Cellular Connection if you’d rather use your data plan. You should be aware that this method uses a lot of data and that a secured Wi-Fi network is recommended.
- The Data & Privacy disclaimer will now appear. Tap Continue to move to the next screen.
- Next, you’ll be prompted to set up either Touch ID or Face ID, depending on your model of iPhone. Follow the prompts to set up your ID.
- After you’ve set up either Face or Touch ID, re-enter your passcode or create a new passcode.
- On the Apps & Data screen, select your preferred method to restore your iOS from the most recent backup.
- Following the transfer, you’ll be given a set of prompts regarding Siri voice recognition, Apple Pay, Location Services, etc. By default, these settings will be the same settings as your previous device. You can edit these settings now if you’d like to update any information such as your credit card or home address.
- Keep the devices close to each other while your information is transferred.
Restore an iOS Backup from iCloud
- If you haven’t already, make sure your old device has a current backup.
- Transfer your sim card to your new device and/or contact your carrier to verify whether you’ll need a new sim card.
- Turn on your new iPhone by pressing the On/Off button on the upper-right edge of your iPhone until the Apple logo appears. If the screen stays black, you may need to charge your device and try again in a few minutes.
- Once your iPhone has turned on for the first time, you will see the word "Hello" cycle through in several languages. If your iPhone has a home button, press it to continue. If your iPhone doesn’t have a Home button, then just tap the screen.
- Tap the language you’d like to use on your iPhone, then tap the country or region where you live.
- Next, you’ll see the Quick Start screen. Tap Set Up Manually.
- Choose your Wi-Fi network to continue or tap Use Cellular Connection if you’d rather use your data plan.
- The Data & Privacy disclaimer will now appear. Tap Continue to move to the next screen.
- Next, you’ll be prompted to set up either Touch ID or Face ID, depending on your model of iPhone. Follow the prompts to set up your ID.
- Now it’s time to create your new passcode. You can create a six-digit passcode, or tap Passcode Options for options such as 4-Digit Numeric Code (the least secure), Custom Numeric Code, or Custom Alphanumeric Code (the most secure). Whichever passcode option you pick, you’ll be prompted to re-enter the Passcode on the next screen.
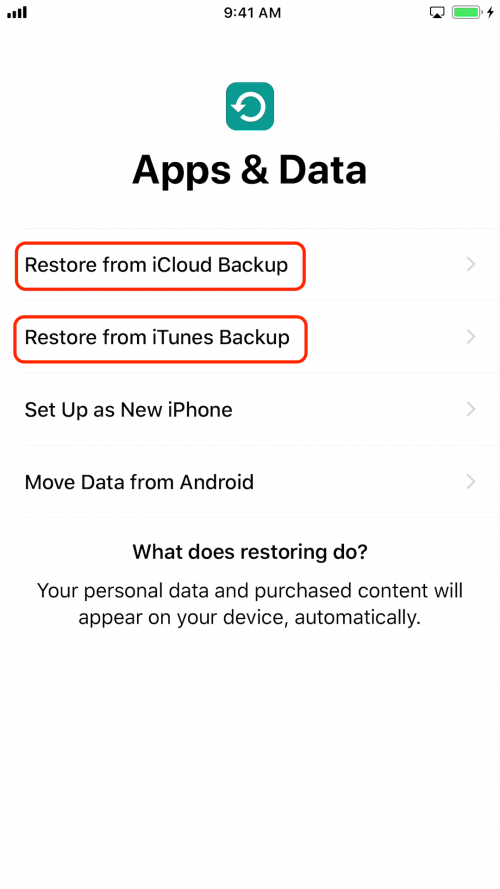
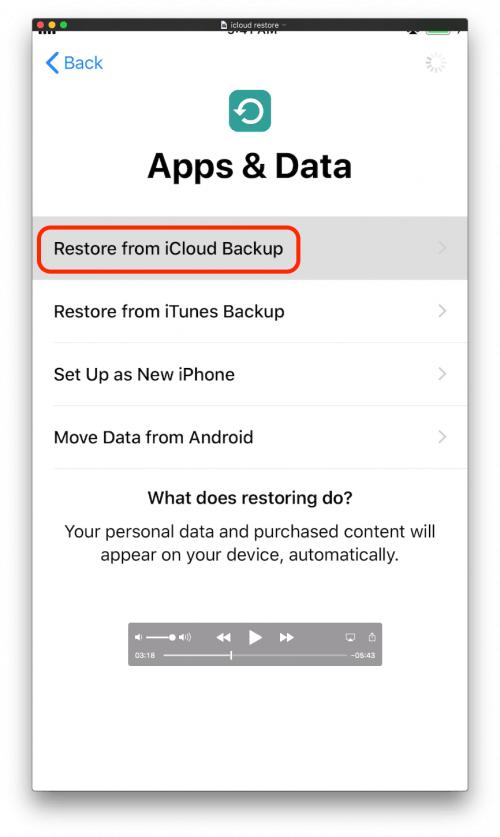
- On the Apps & Data screen, tap Restore from iCloud Backup.
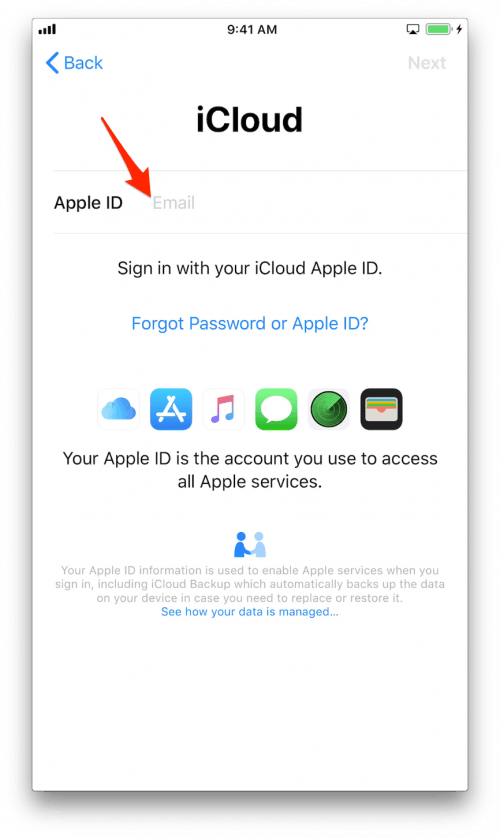
- Sign-in with your Apple ID and password. This will be the same Apple ID and password you used on your old device for services such as iTunes, the App Store, and iCloud.
- When prompted, select your most recent backup. Make sure you have the right one by checking the date.
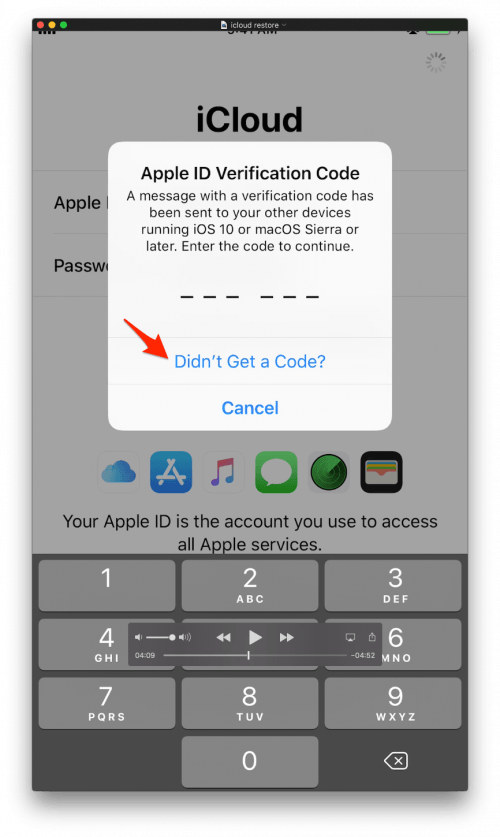
- Apple will send a verification code to your old iOS or MacOS devices, such as an iPad or a Mac. Enter that verification code on your new iPhone to continue. If you don’t see a code on your other devices, tap Didn’t Get a Code to prompt Apple to send a new code.
- You may be prompted to sign in to iTunes or the Apple Store to finish restoring your previous purchases. If so, sign in again using your Apple ID.
- Stay connected to Wi-Fi and wait for the restoration to finish.
- Following the restoration, you’ll be given a set of prompts regarding Siri voice recognition, Apple Pay, Location Services, etc. By default, these settings will be the same settings as your previous device. You can edit these settings now if you’d like to update any information such as your credit card or home address.
Restore an iOS Backup from iTunes
This process requires you have iTunes installed on a computer and a valid Apple ID. If both of these things are true, and you prefer to manage your backups via desktop, then this is the method for you. To back up and restore your iOS settings from iTunes, follow these steps:
Preparing Your iTunes Backup
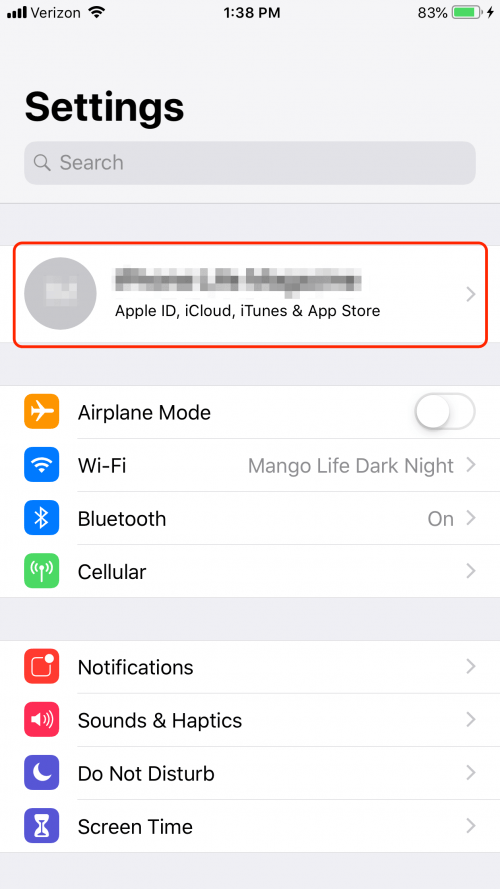
- On your old device, open Settings. Tap your Apple ID.
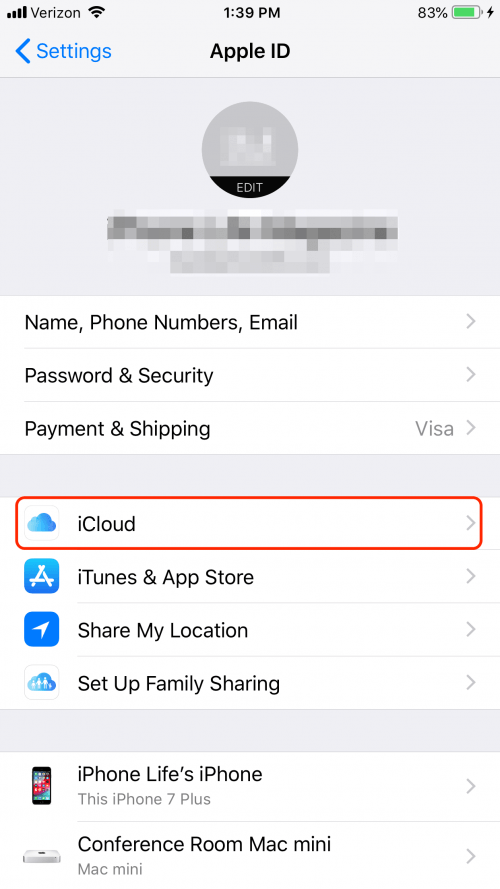
- Tap iCloud.
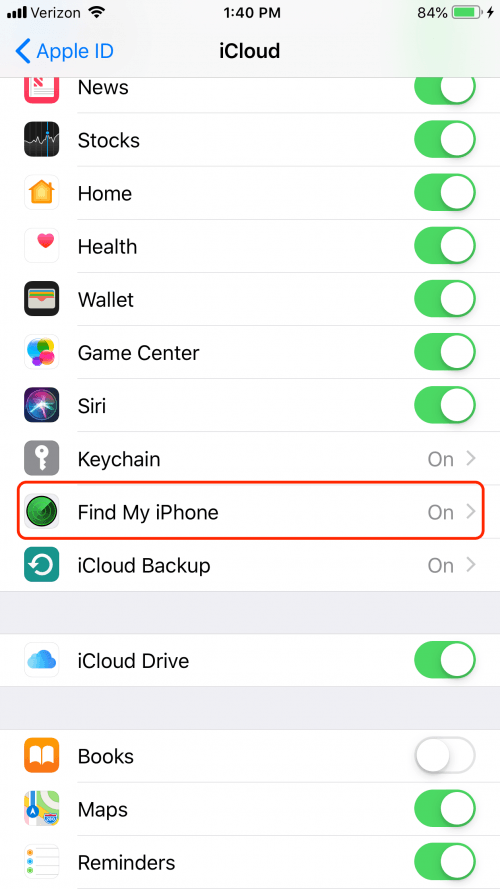
- Tap Find My iPhone and make sure the toggle is set to Off.
- Connect your old device to your computer.
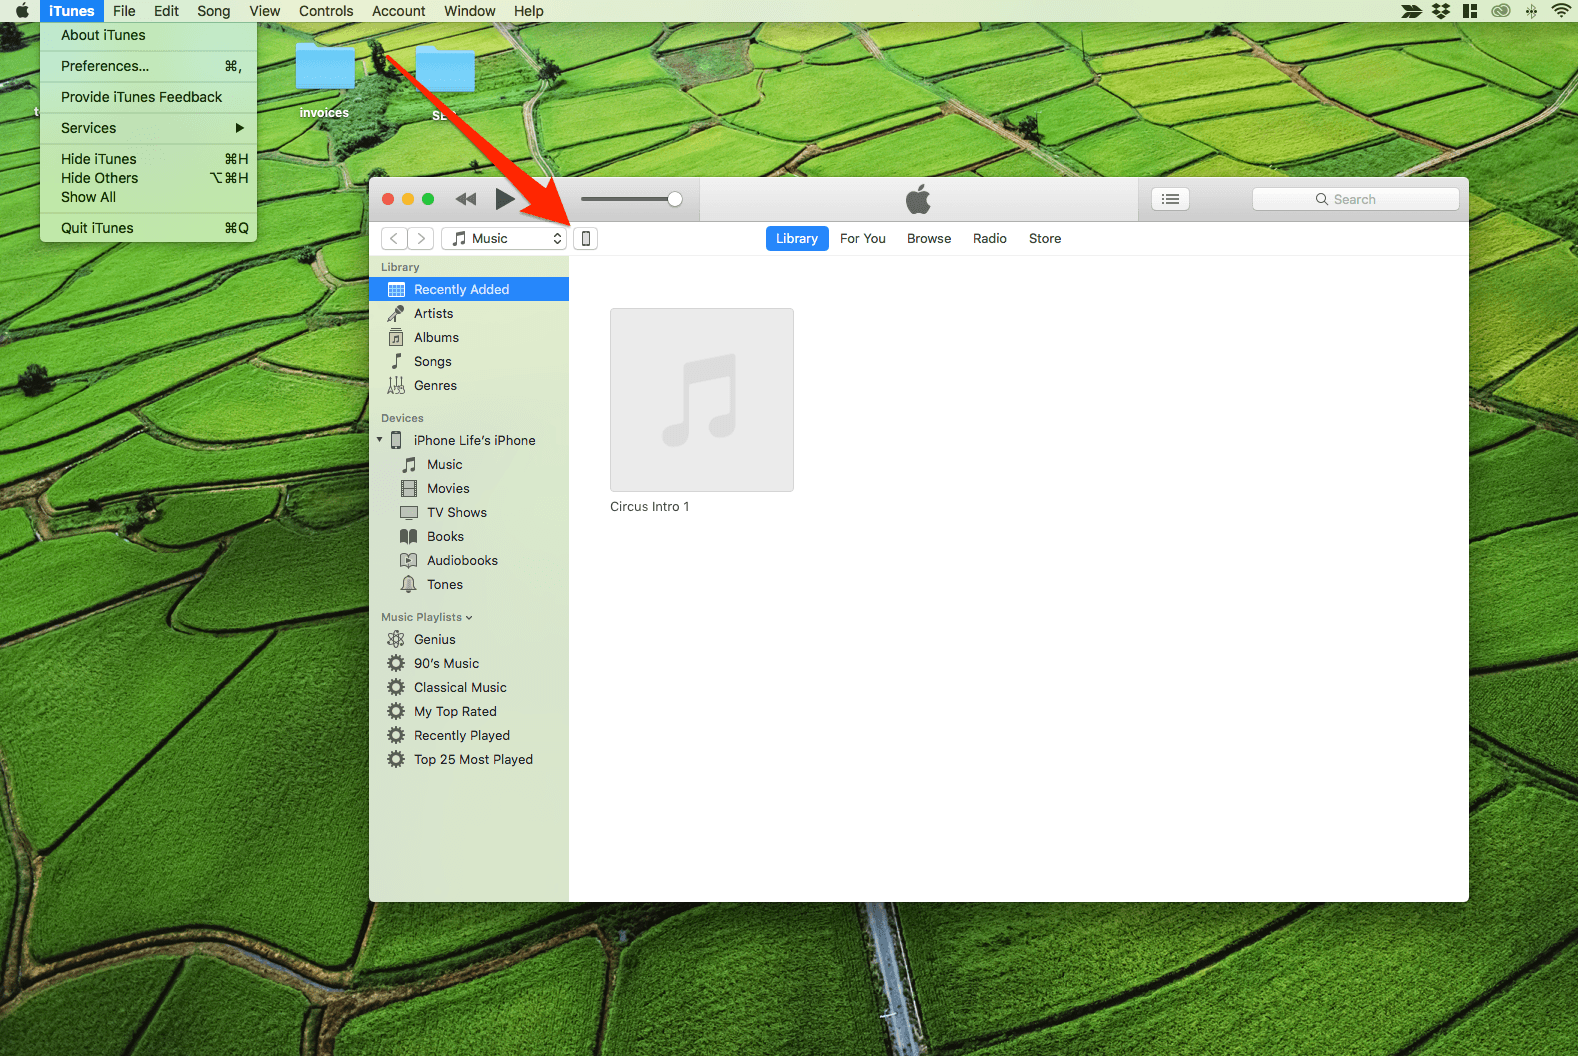
- Open iTunes on your computer and make sure you have the latest version.
- On the desktop version of iTunes, tap the iPhone icon on the top left menu.
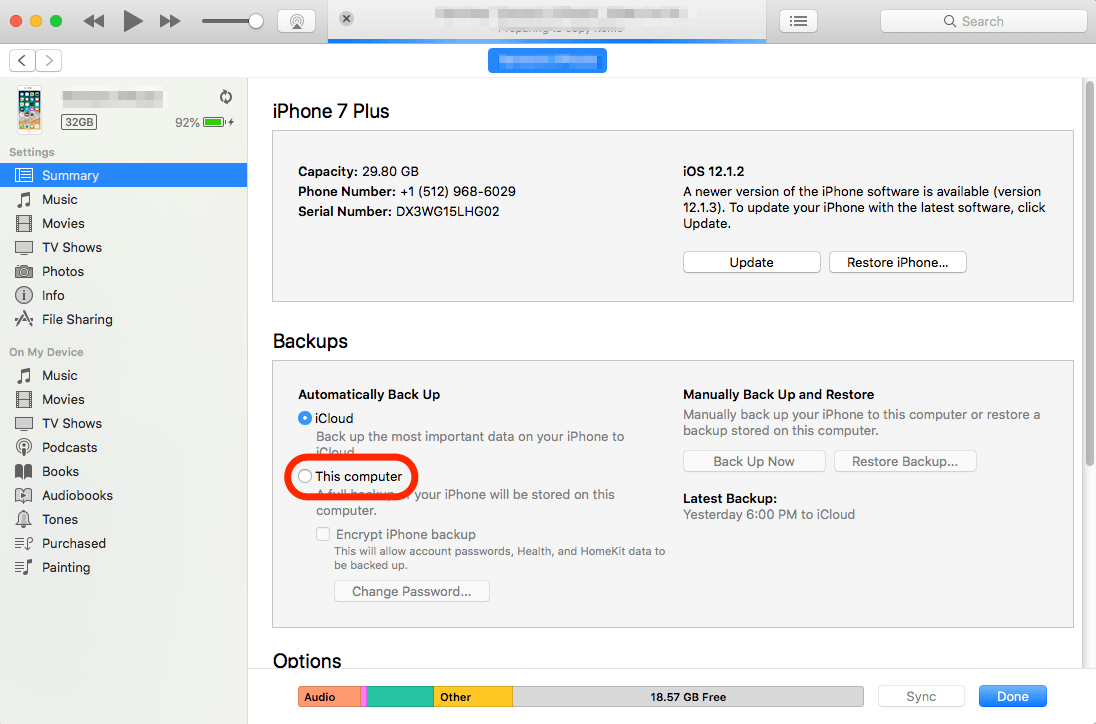
- The default for storing your backup is iCloud. If you’d like to keep your backup on your computer, select This Computer.
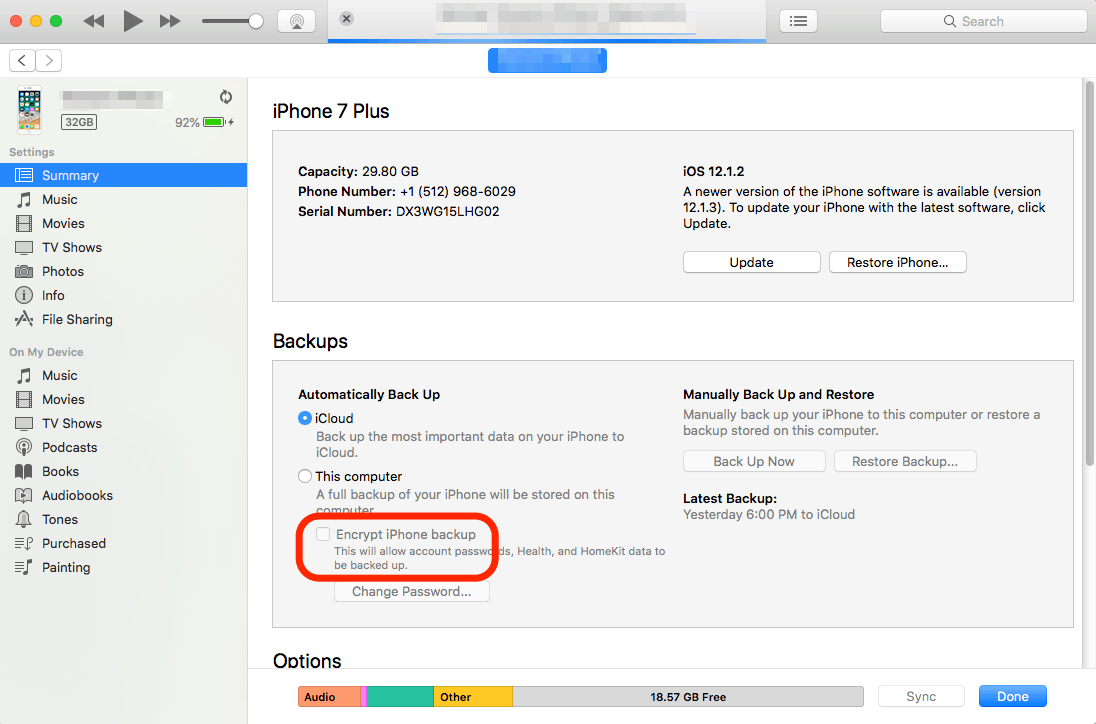
- You will need to encrypt your backup if you want to save Health and Activity or Apple Watch data. To encrypt, select Encrypt iPhone Backup and create a password.
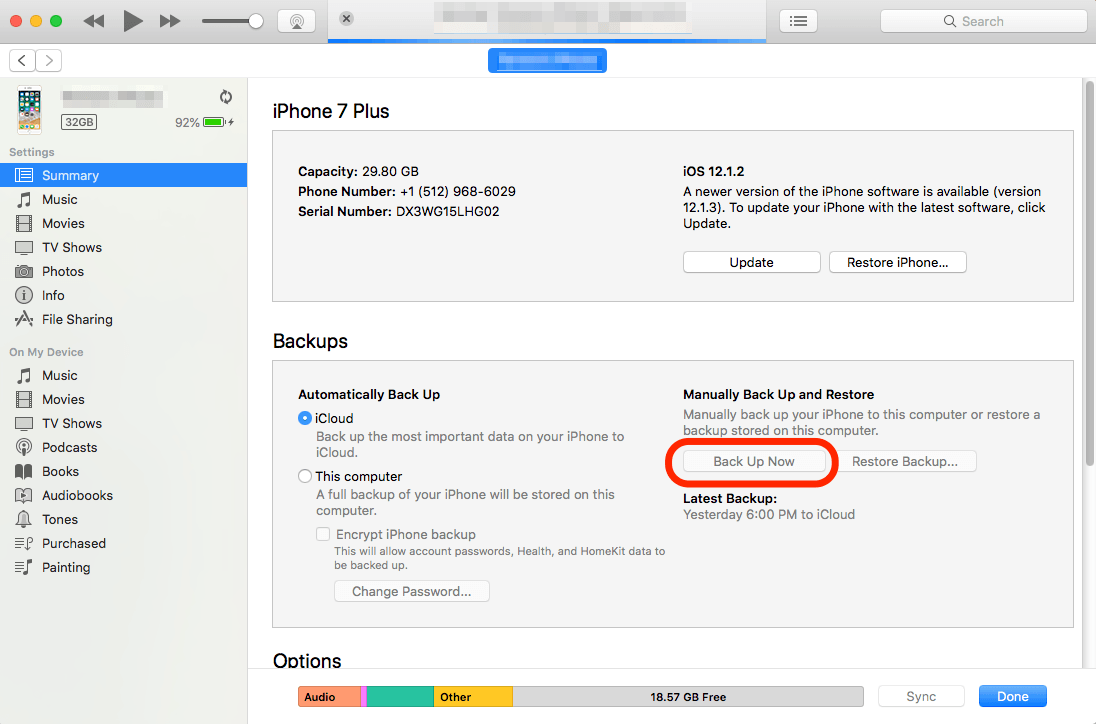
- Whether you’ve completed encrypting your data or skipped that step, select Back Up Now to continue.
Setting Up Your New iPhone via iTunes Backup
- Turn on your new iPhone by pressing the On/Off button on the upper-right edge of your iPhone until the Apple logo appears. If the screen stays black, you may need to charge your device and try again in a few minutes.
- Once your iPhone has turned on for the first time, you will see the word "Hello" cycle through in several languages. If your iPhone has a home button, press it to continue. If your iPhone doesn’t have a Home button, then just tap the screen.
- Tap the language you’d like to use on your iPhone, then tap the country or region where you live.
- Next, you’ll see the Quick Start screen. Tap Set Up Manually.
- Choose your Wi-Fi network to continue or tap Use Cellular Connection if you’d rather use your data plan.
- The Data & Privacy disclaimer will now appear. Tap Continue to move to the next screen.
- Next, you’ll be prompted to set up either Touch ID or Face ID, depending on your model of iPhone. Follow the prompts to set up your ID.
- After you’ve set up either Face or Touch ID, it’s time to create your passcode. You can create a 6-digit passcode, or tap Passcode Options for options such as 4-Digit Numeric Code (the least secure), Custom Numeric Code, or Custom Alphanumeric Code (the most secure). Whichever Passcode Option you pick, you’ll be prompted to re-enter the Passcode on the next screen.
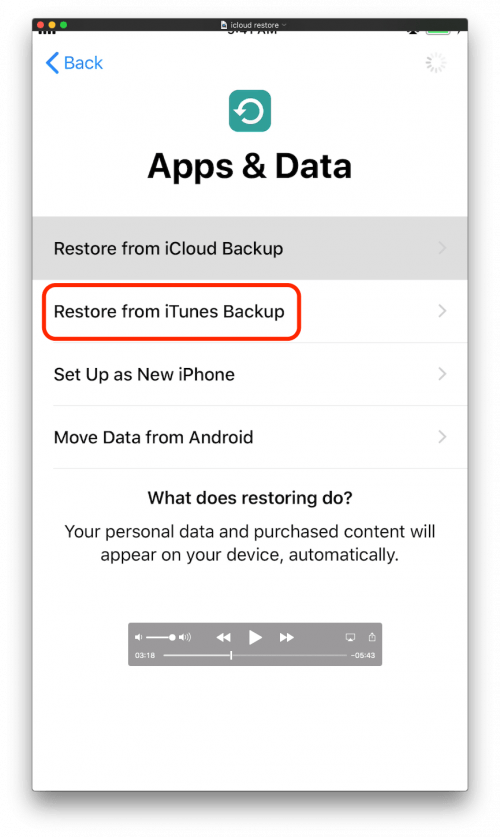
- On the Apps & Data screen, tap Restore from iTunes Backup.
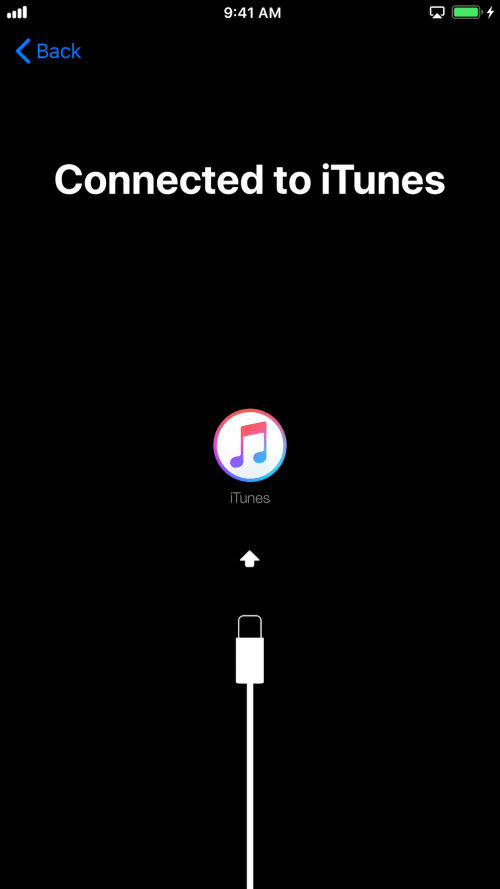
- You will now be prompted to connect your device to your computer. The message will change to indicate when you have successfully connected your iPhone to your computer.
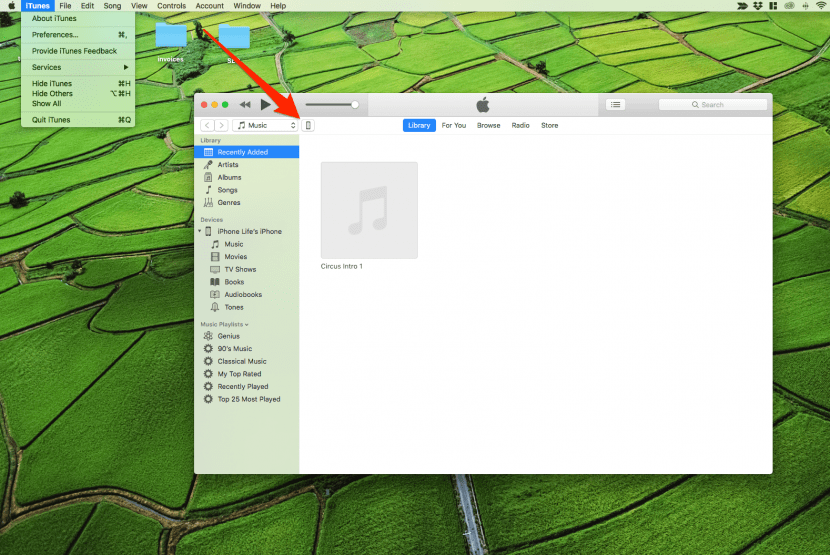
- On your desktop, open iTunes if the program is not open already.
- Select the iPhone icon on the top left menu.
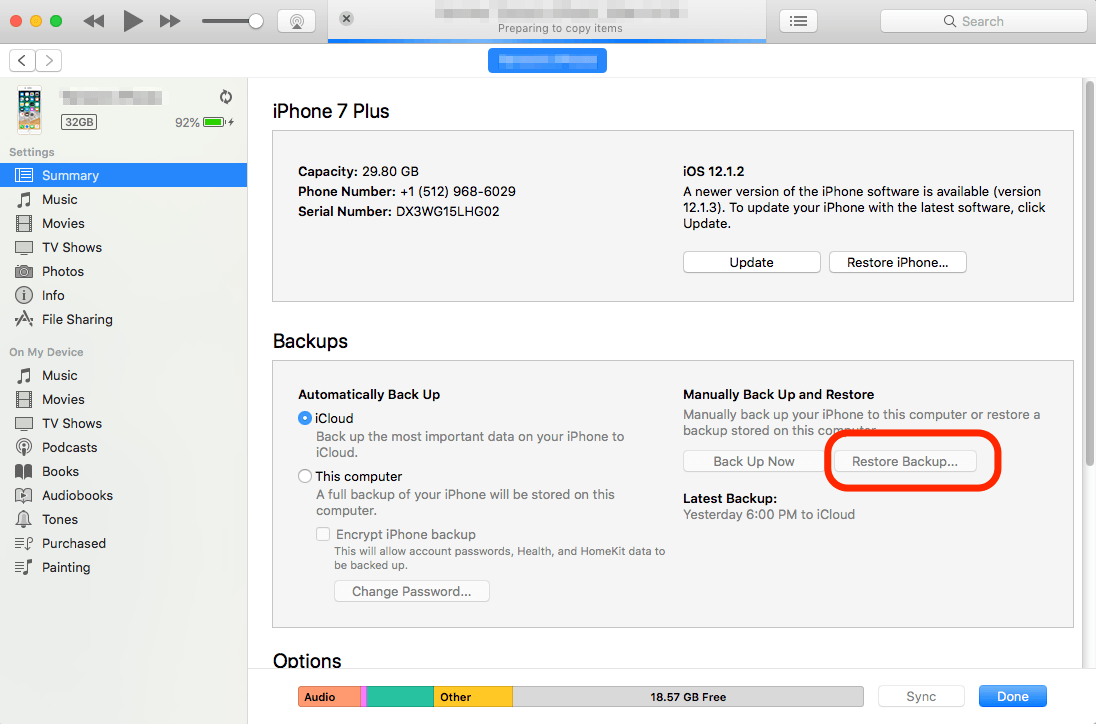
- Select Restore Backup.
- If you encrypted your data then you will be prompted for a password. Enter your encryption password and select Continue.
- Wait for the restoration process to complete.
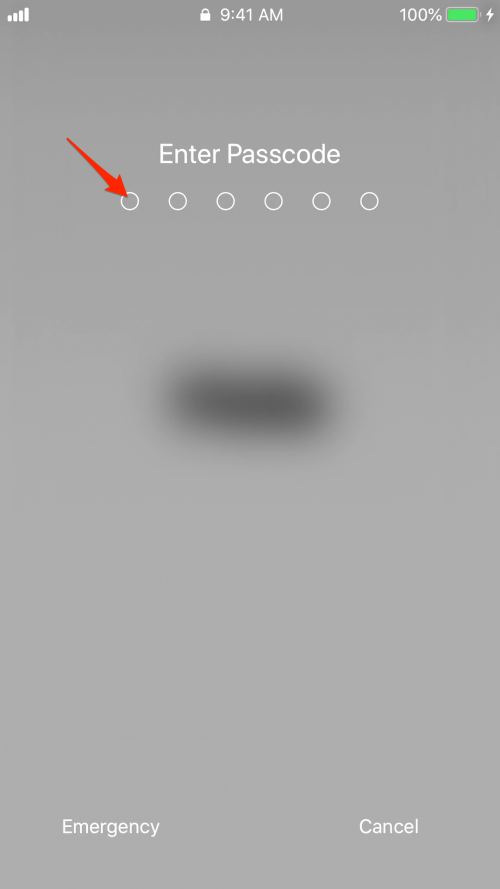
- The Hello screen will appear again. Tap the screen or press the Home Button. When prompted, enter the Passcode you used when opening your old device.
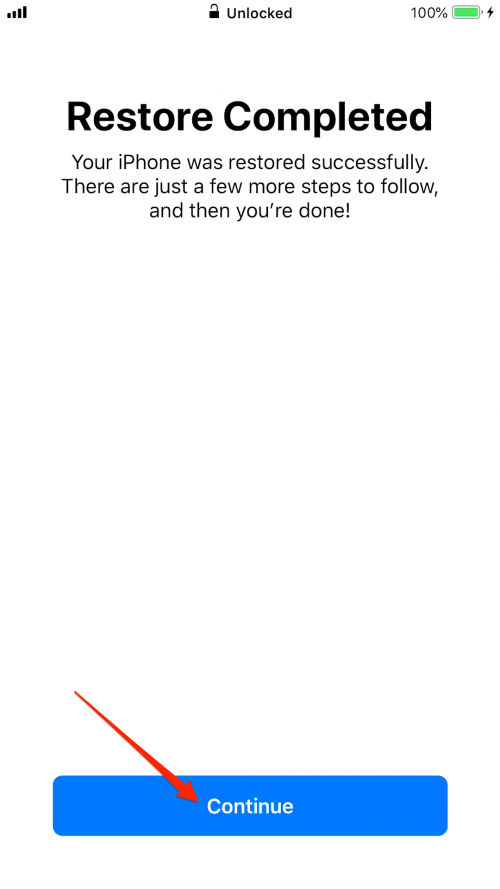
- Your iPhone will indicate that the restoration is complete. Tap Continue.
- When prompted, sign in to your Apple ID.
- Apple will send a verification code to your old iOS or MacOS devices, such as an iPad or a Mac. Enter that verification code on your new iPhone to continue. If you don’t see a code on your other devices, tap Didn’t Get a Code to prompt Apple to send a new code.
- On your new iPhone, you may be prompted to sign in to iTunes or the Apple Store to finish restoring your previous purchases. If so, sign in again using your Apple ID.
- Finally, you’ll be given a set of prompts on your new iPhone regarding Siri voice recognition, Apple Pay, Location Services, etc. By default, these settings will be the same settings as your previous device. You can edit these settings now if you’d like to update any information such as your credit card or home address.
Master your iPhone in one minute a day: Sign up here to get our FREE Tip of the Day delivered right to your inbox.


Recent Comments