The Apple Pencil 2 is way better than version 1.0. It’s always charged. It’s always there on the side of your iPad, ready to use. And now that it supports tap gestures, it’s also a lot more powerful. But it doesn’t stop there.
Check out these excellent Apple Pencil 2 tips and tricks to take your Apple stylus usage to the next level.
Apple Pencil 2 tips
Customize the double-tap
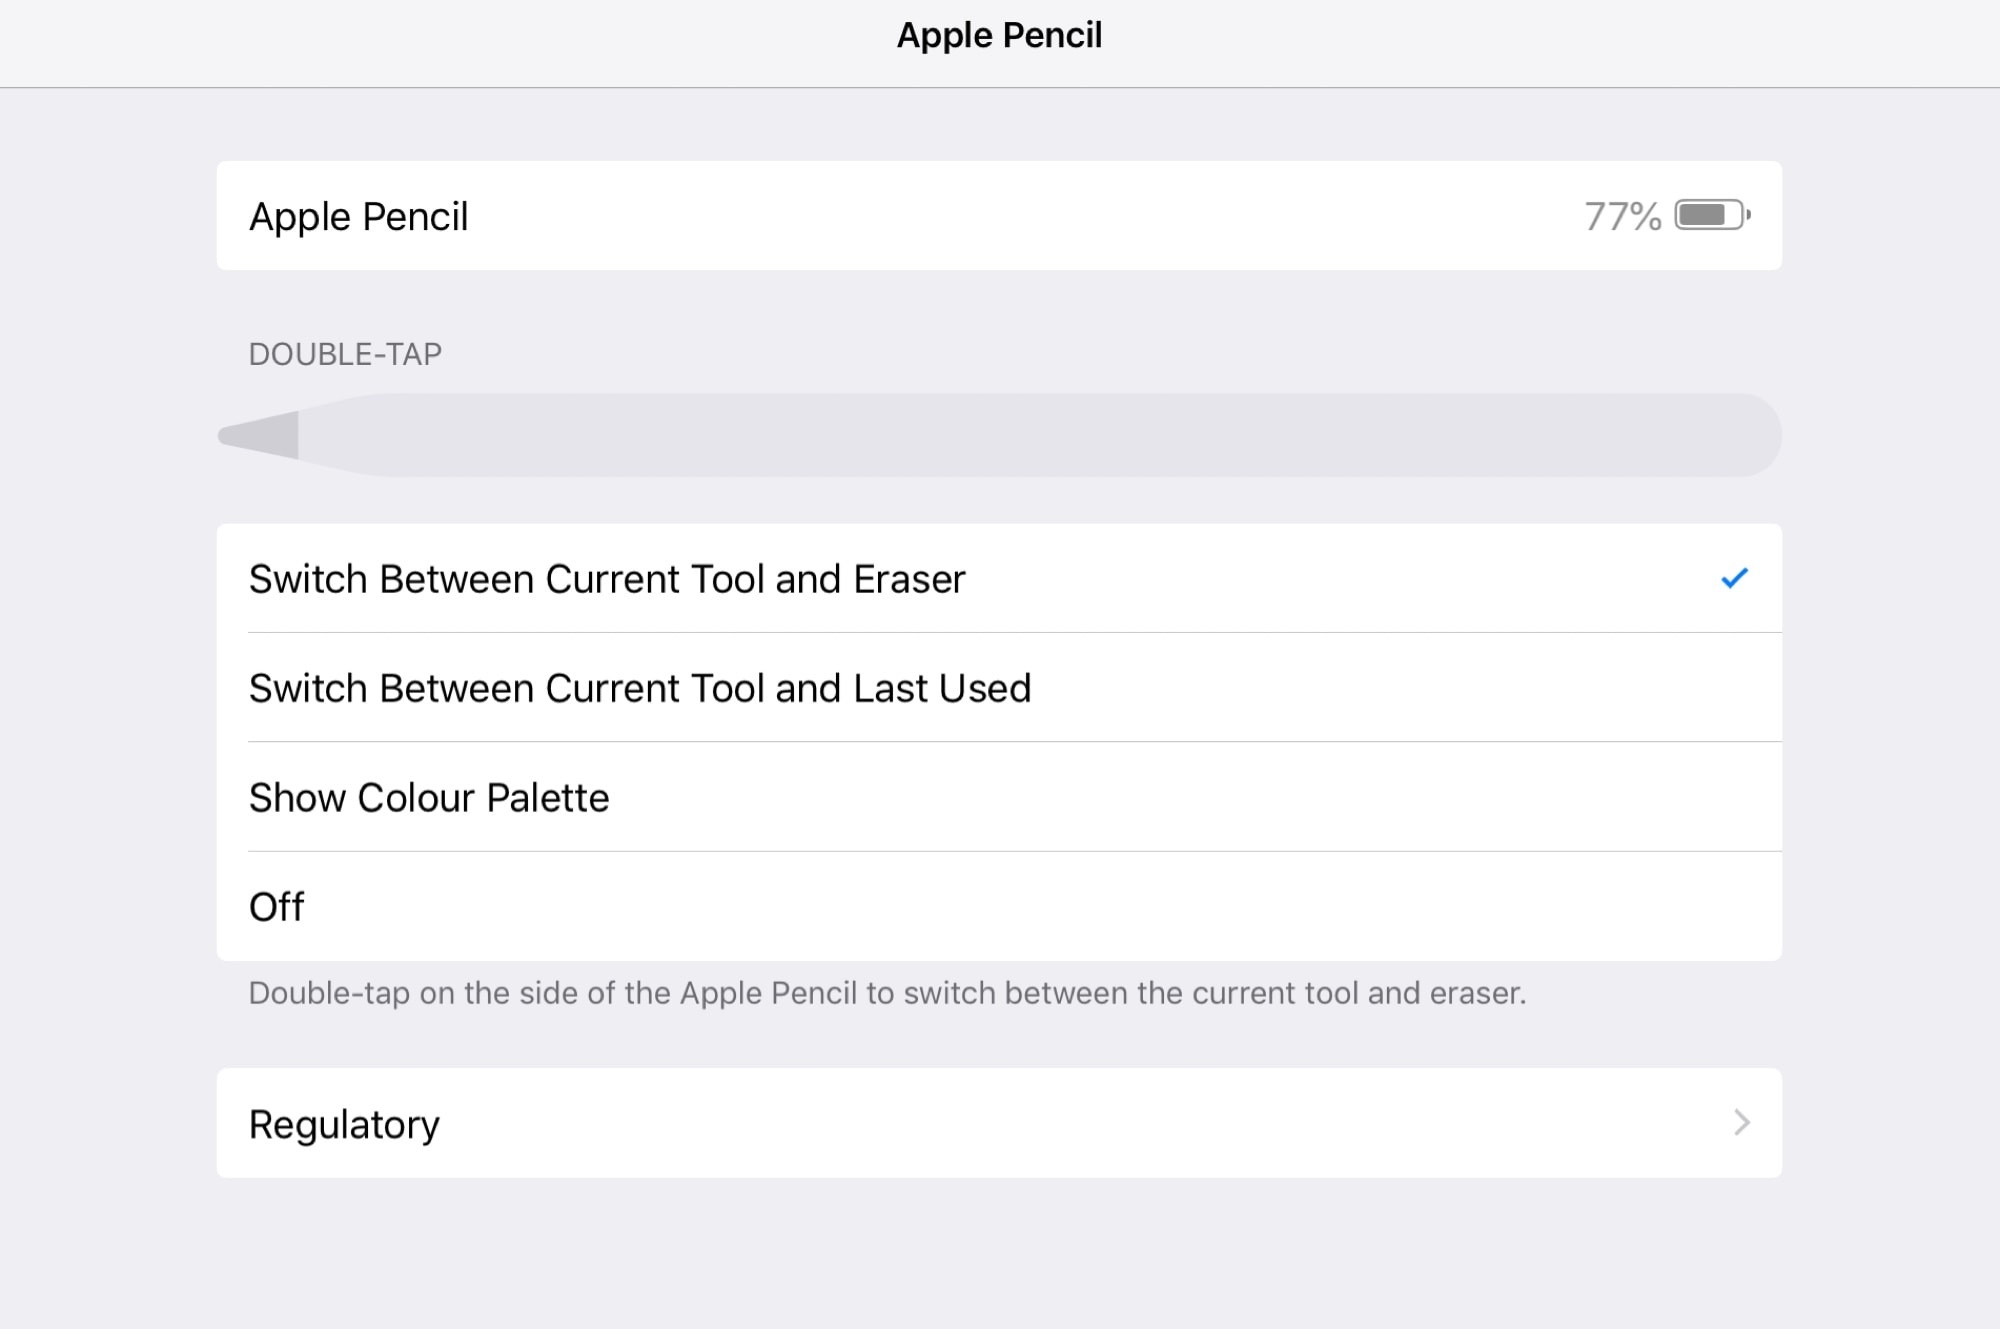
Photo: Cult of Mac
This is the first thing you should do when you get a new Apple Pencil: Customize the double-tap settings in the Settings app. You can choose from several tool-switching options, or have the double-tap activate the eraser.
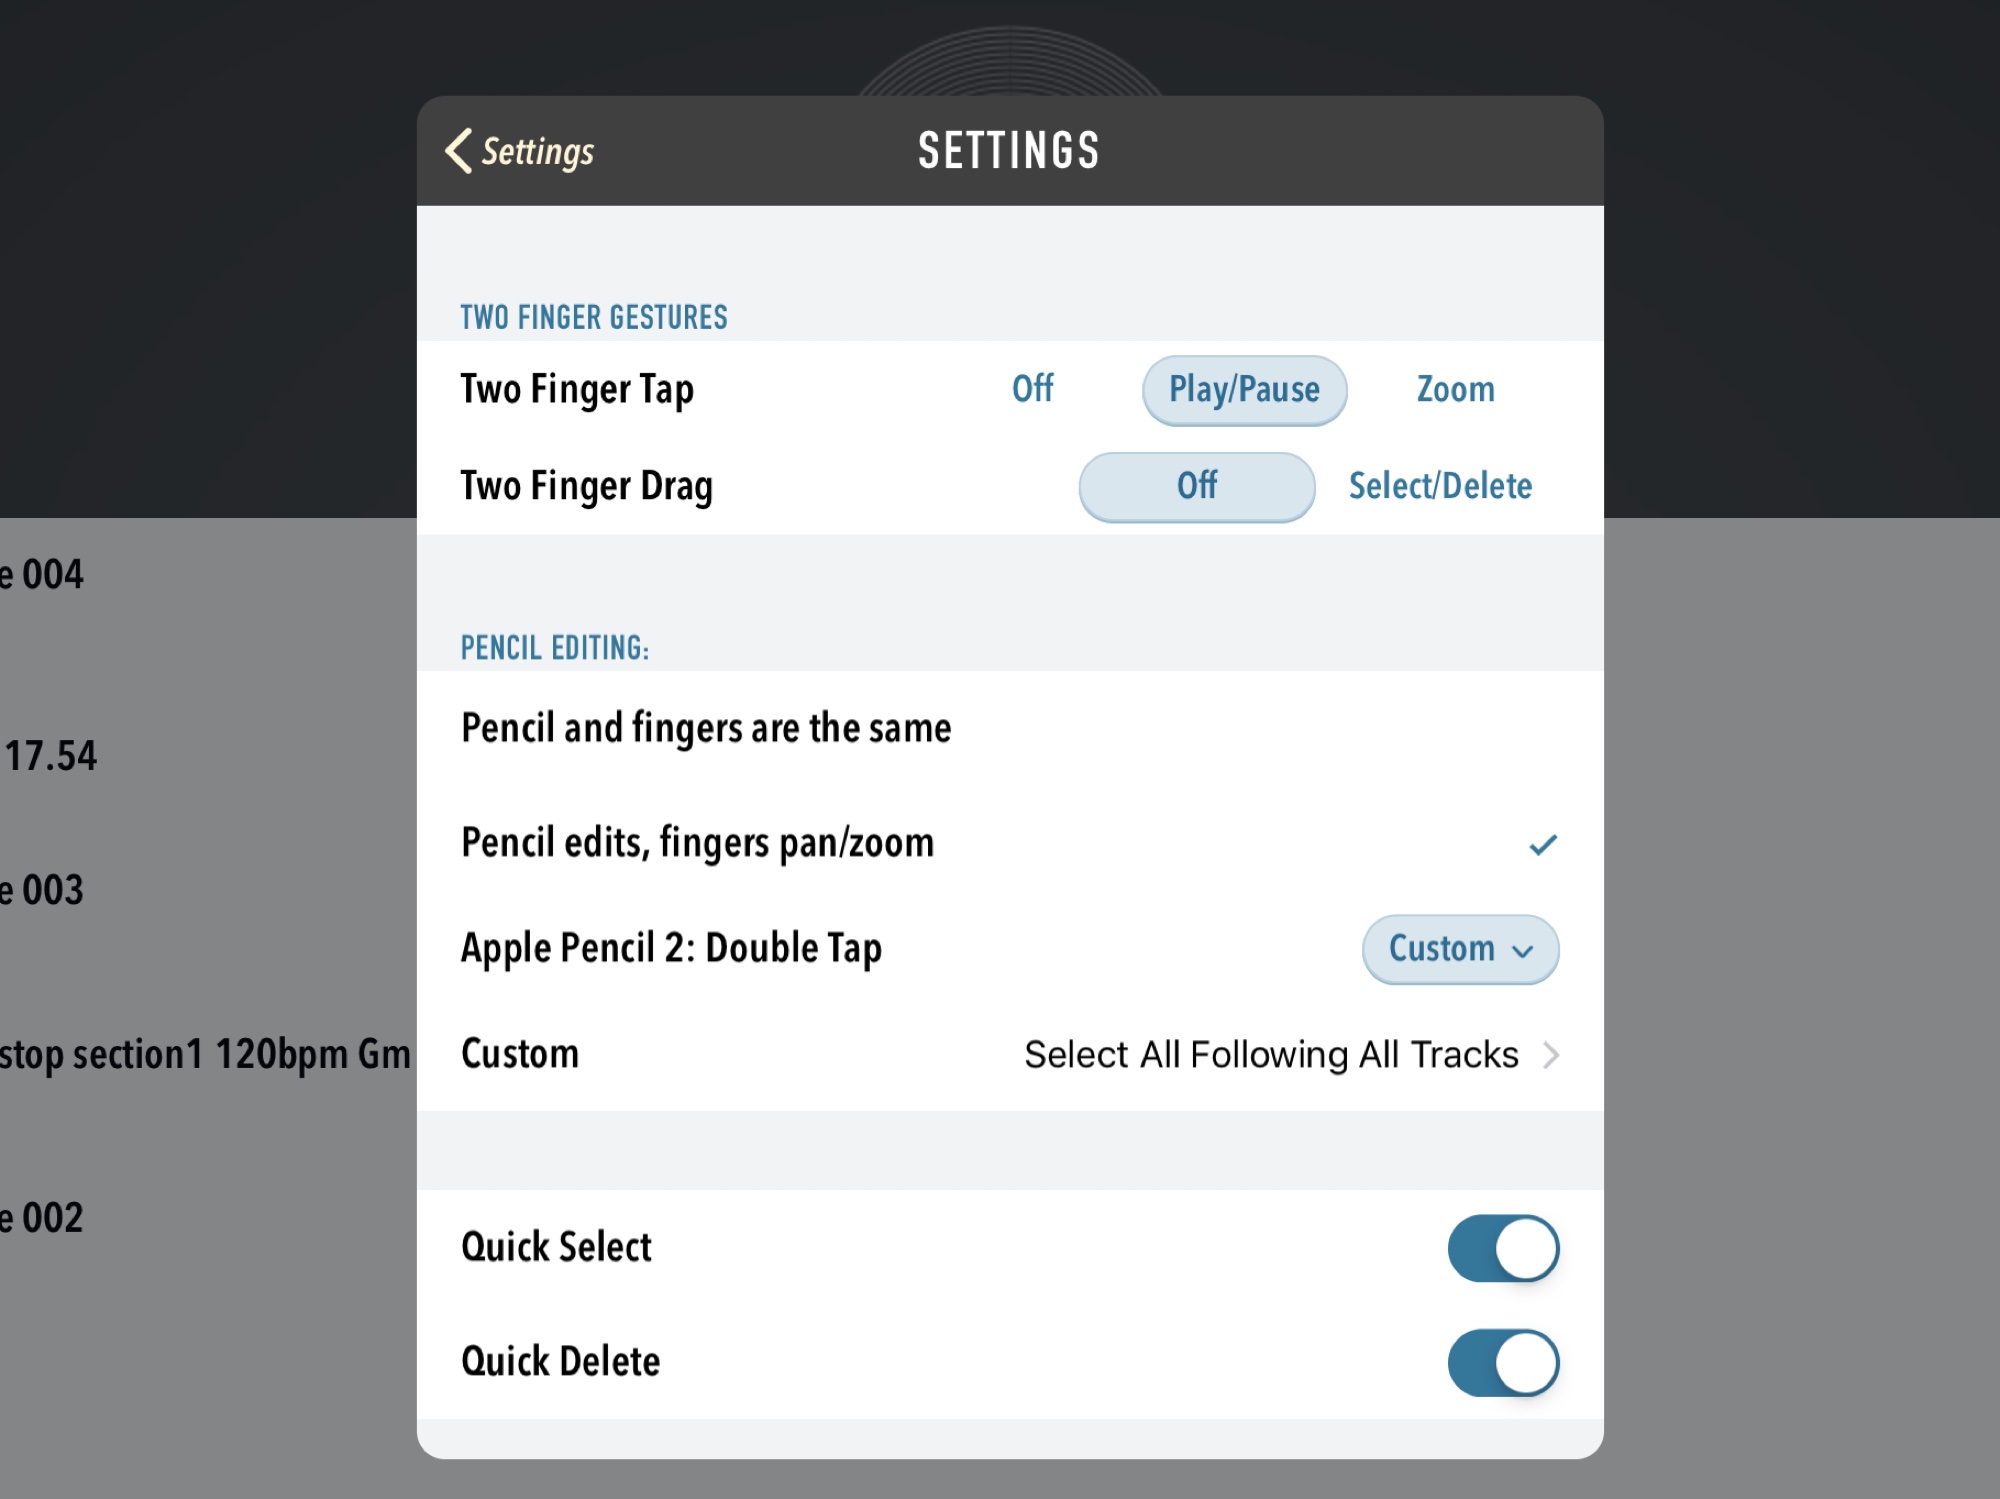
Photo: Cult of Mac
Good apps will respect this choice, but they will also offer other options. Many apps — like podcast-creation app Ferrite — offer their own settings section to let you customize the gesture. Make sure you check out the preferences of any app that works with the new Apple Pencil.
Check the Apple Pencil’s battery level
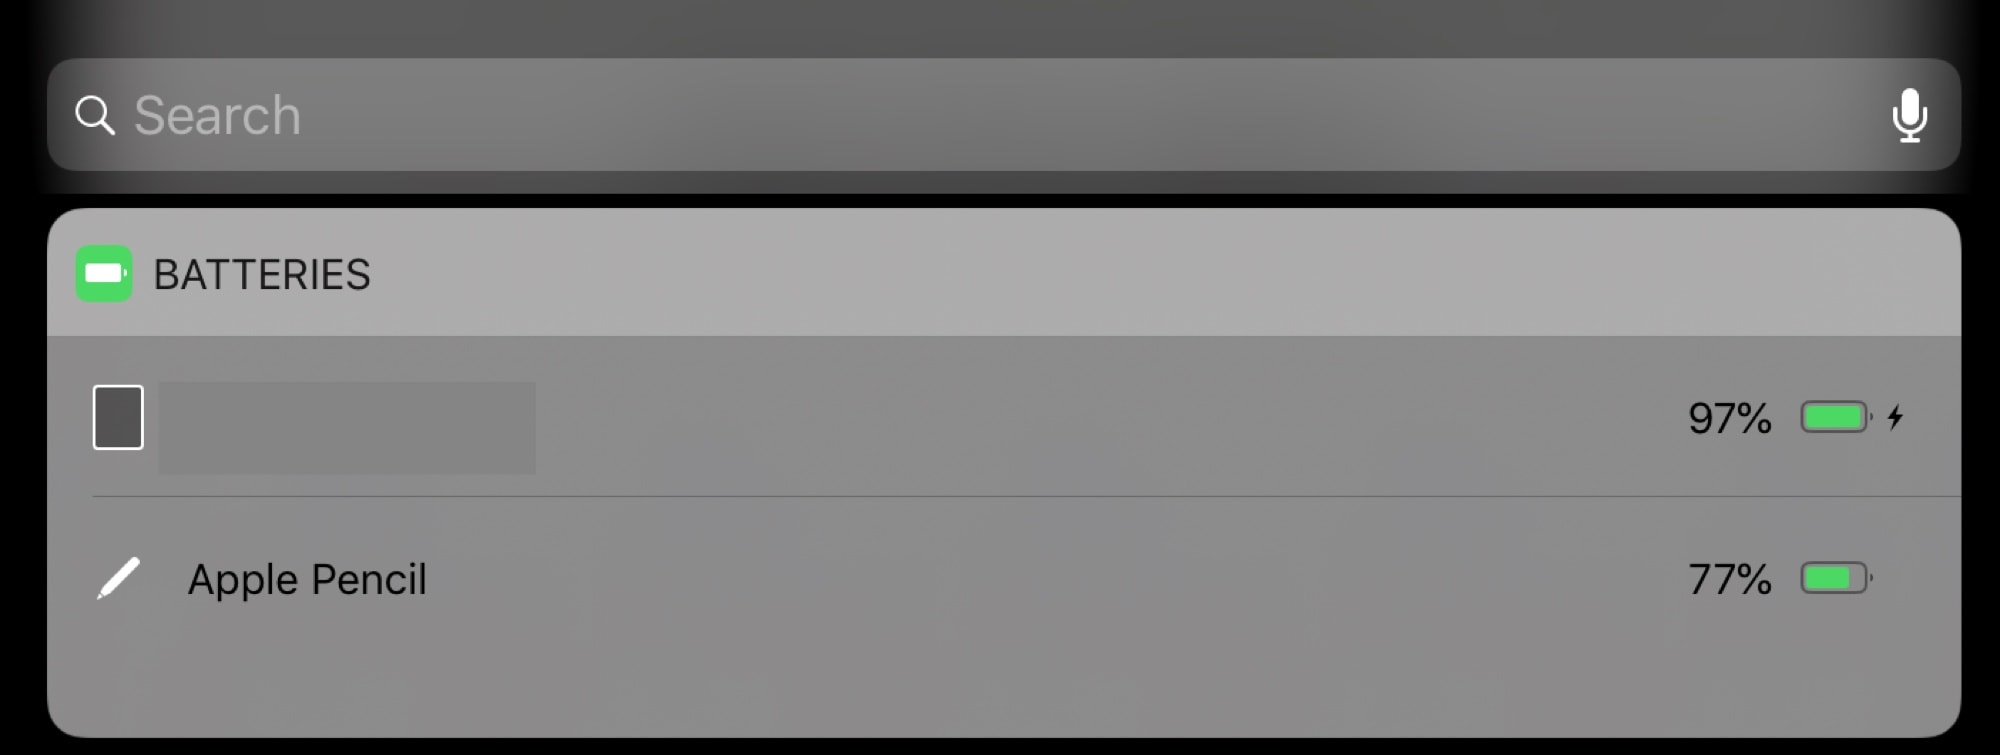
Photo: Cult of Mac
The easiest way to check the Apple Pencil battery level is to snap it into its charging spot on the side of the iPad Pro, then wait for the battery level graphic to appear. But if you want to check the battery status without doing this, you can use the iOS Battery Widget on the Today screen. Swipe right on the home screen to reveal the Today view, then just look at the widget. If the widget isn’t there, you can add it by scrolling to the bottom of the screen, tapping edit, and then adding it from the list.
Trace
Like your finger, the Apple Pencil works through paper and plastic, so you can easily trace something from paper into the current drawing app. It works really well, and is better than regular tracing because you can see the original paper perfectly, as it’s not obscured under a sheet of tracking paper.
Switch tips
If you do a lot of tracing on paper, then your tip may eventually wear out. You can buy packs of replacement tips form Apple for an exorbitant price, but if you have some old spare tips from your first-generation Apple Pencil, you can use those too. To remove the old tip, just unscrew it, counterclockwise like all regular screws. Then screw the new one into place.
Press harder, draw fat lines
Don’t forget that the Apple Pencil is pressure sensitive. That’s one of it’s main selling points, after all. Just like a regular pen or pencil, you can press harder to get a darker, thicker line. And if you tilt the pencil, it’s as if you’re using the side of a pencil lead, and you can quickly fill in large sections of your drawing.
Don’t forget to check how your favorite drawing app handles this. Procreate, for example, will do some pretty wild tricks with its custom brushes.
Draw straight lines
The built-in Notes app has a ruler that can be moved around with two fingers, and used to draw straight lines. To find it, tap the + button at the bottom right of any note, and choose Add Sketch from the pop up menu. You’ll now see the ruler along with the other drawing tools. Just tap it to add it to your paper.
Linea, the best drawing app on iOS, goes one better, using a draw-and-hold shortcut. Draw a straight line, and pause when you reach the end. The app will detect it, and snap the line to make it perfectly straight. This also works for geometric shapes.
Sign a document
Also in the notes app, you can scan a document into the app using the iPad’s camera, and then just tap the pencil onto the scanned image to sign it. You may have to double tap the Pencil activate markup on the image, but this is just about the quickest way to scan and sign a paper. ANd you can export it from there, either sending a digital copy, or printing it to an AirPrint-capable printer.
Make an Instant Note
If you like your Apple Pencil, you’re going to L.O.V.E this tip. Whenever you want to take a note, just tap the Pencil onto the screen of your sleeping iPad Pro. It’ll wake up and show you a new blank page in Notes.
It’s as fast as using a pencil and paper, and if you’re in class, or in a meeting, you can treat it like paper, with no need to leave the screen running the whole time. For more advanced options — controlling which notes appear when you tap the screen, for example, see our in-depth how-to.
The Apple Pencil really is an excellent accessory for the iPad Pro. If you never need a pencil, then don’t bother. But if you do, then don’t even consider any other option. None offers the same integration, and the same great options, as Apple’s own Pencil.

Recent Comments