Have you ever sat on the couch, or out on the porch with your iPad, and realized that the file you need is on your Mac? And only on your Mac — not in Dropbox or iCloud Drive or some other easy-to-reach storage? You have to get up, walk to the Mac, and then work out how to get that file onto your iPad.
It doesn’t have to be this way. With one app, you can put all of your Mac’s (or PC’s) folders and files right there inside the iPad’s Files app, ready to browse. Let’s do it.
You Mac’s folders, on your iPad
The app you’ll need is FileBrowser from Stratospherix. FileBrowser’s purpose is to connect to anything. You can hook it up to your Dropbox, for instance, but you can also connect to network storage, to hard drives plugged into your router, or to computers on your home (or work) network.
Today we’re interested in the last of these: connecting to a computer. To do this you have to enable file sharing on the Mac, then connect to the Mac using the FileBrowser app.
The setup for this is easy, and once you’re done, your Mac’s entire folder structure will appear inside the iPad’s Files app, ready to browse, and to copy to and from, just like local folders.
Step one is to grab the app:
FileBrowser – Document Manager
Price: $5.99
Download: FileBrowser – Document Manager from the App Store (iOS)
Set up your Mac once and forever

Photo: Cult of Mac
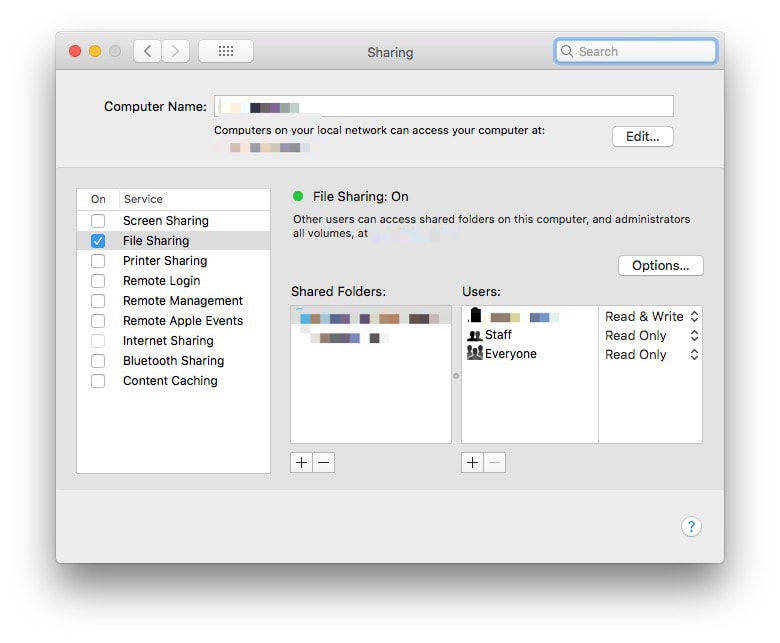
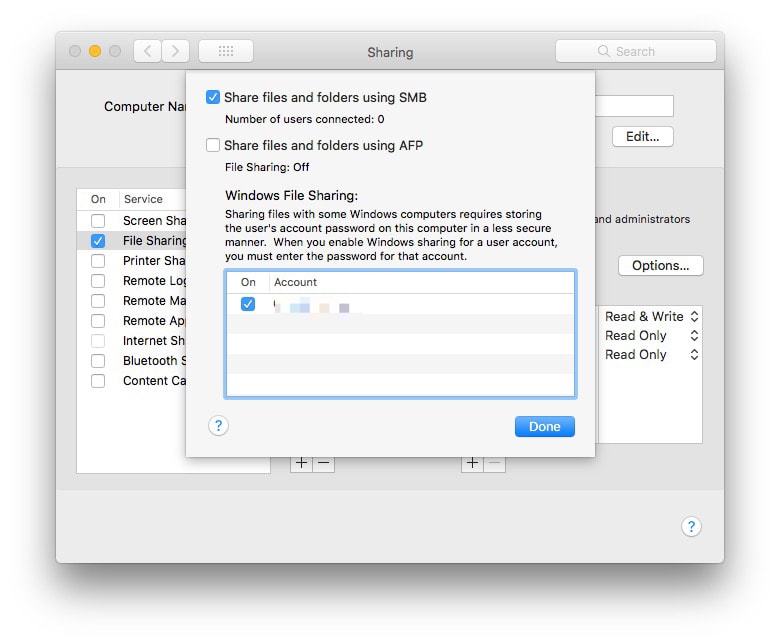
Step two is to enable sharing on your Mac. Go to System Preferences > Sharing on your Mac, and check the box next to File Sharing in the list on the left. This Tessa your Mac to share your files on the network. Then, click the Options… button, and check Share files and folders using SMB. Then, in the list os users, check the box next to your name.

Photo: Cult of Mac
That’s it. You’re done. For more on those, and to troubleshoot any problems, see the help pages for FileBrowser.
Connect FileBrowser to your Mac
This is even easier. Just open up FileBrowser, and tap the Scan button at the bottom of the right-hand column. If all is well, You Mac should show up in the list. Tap the Mac, then follow along with the setup steps. You’ll be asked what kind of computer you’re connecting to, and then you log in with your username and password.
That’s it! The Mac will be added to the sidebar, and in future you can connect automatically just by tapping it.
Add your Mac to Files app

Photo: Cult of Mac
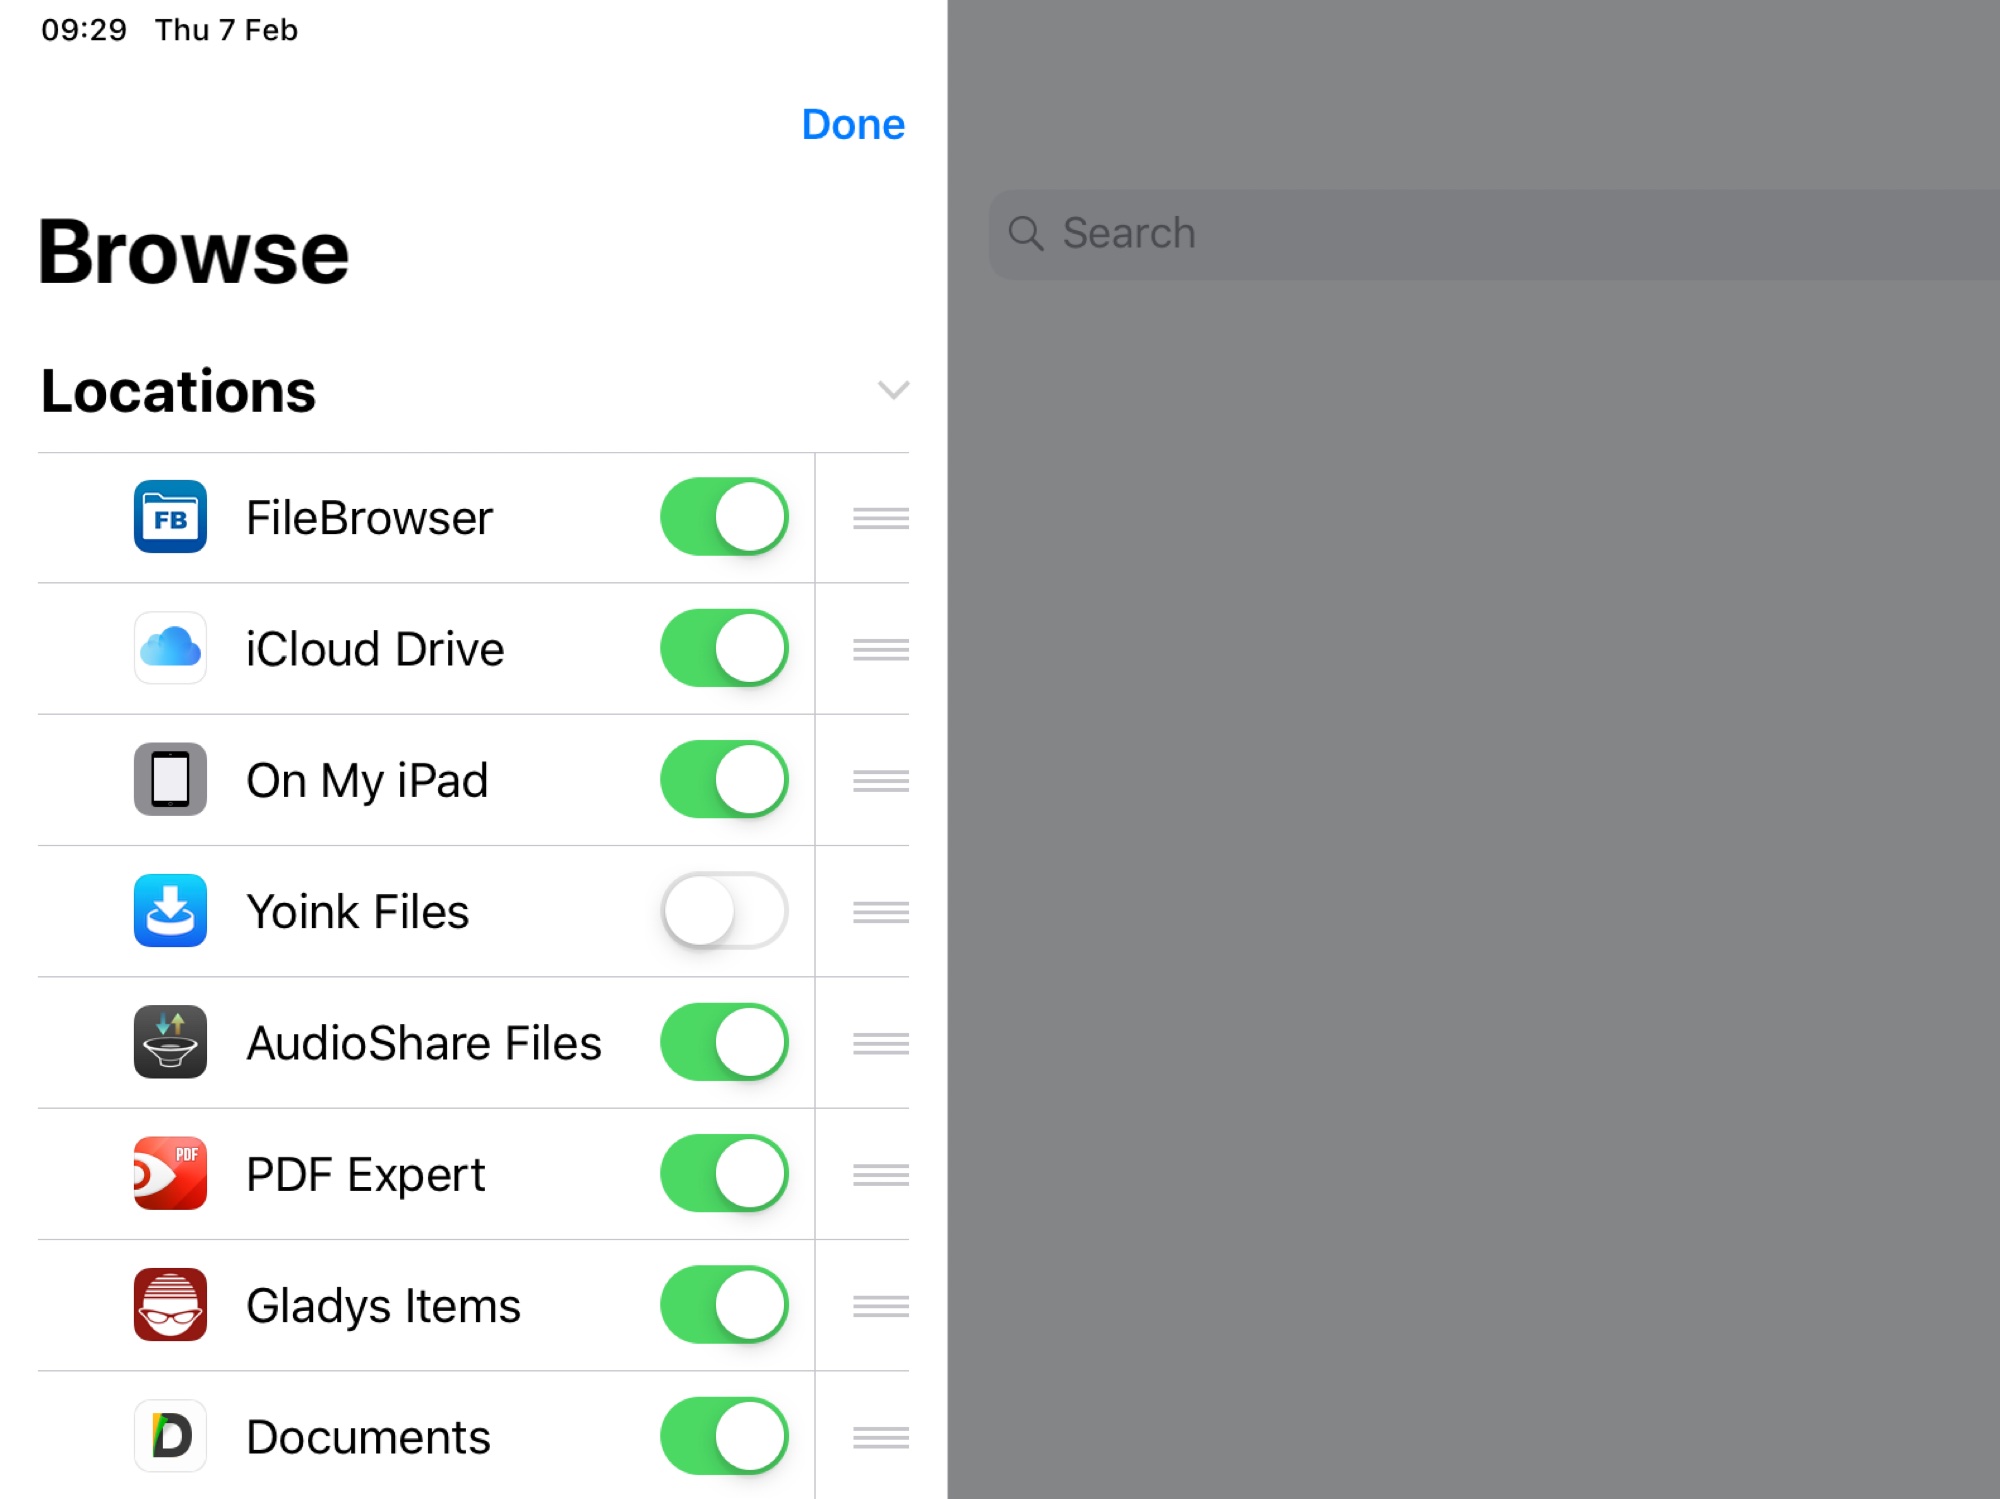
The final setup step is to open up the Files app. FileBrowser offers a “storage provider,” which means that it can make its contents available inside the Files app. To switch it on, tap Editat the top of the screen, and then slide the switch next to FileBrowser in the list. Tap Done. Now, when you tap on the FileBrowser icon, you can navigate to your Mac. Its files and folders appear just like any others.
Reconnection
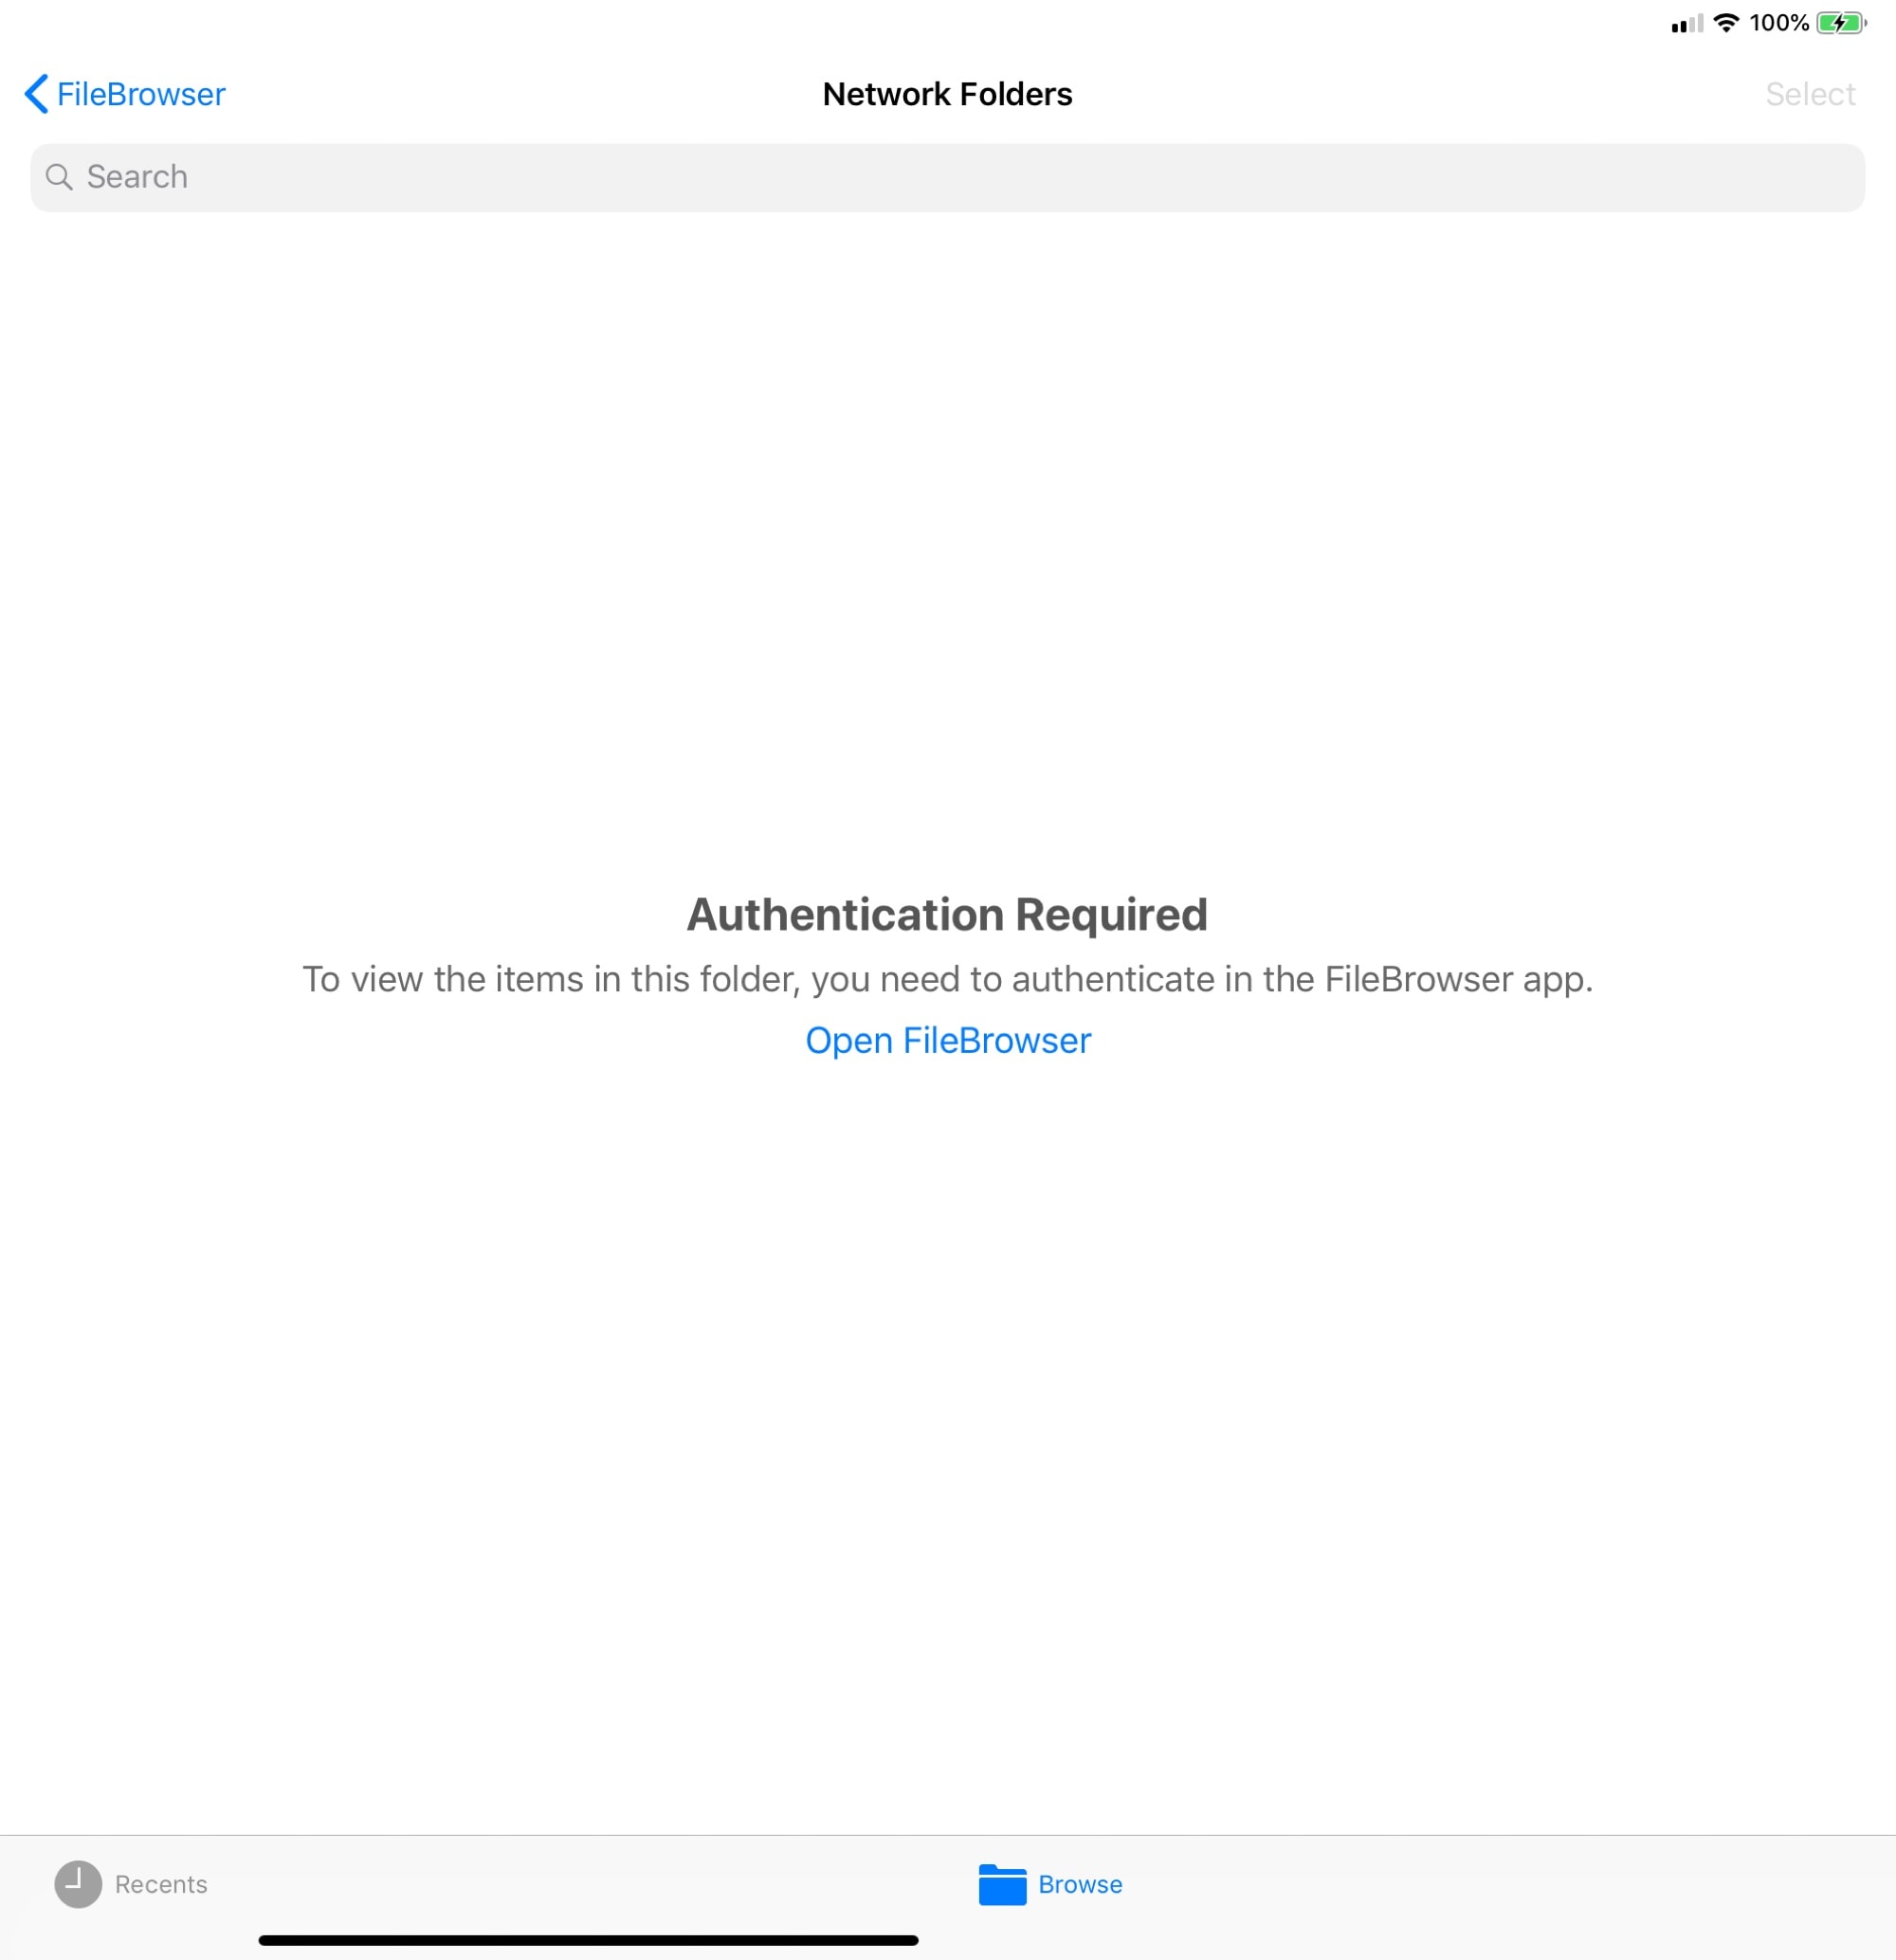
One thing to note. After a while, the Mac will drop the connection. To reconnect, you have to open the FileBrowser app. The good news is that a message to this effect appears in the Files app, so you just have to tap it to open the FileBrowser app and reconnect.

Photo: Cult of Mac
This is a rock-solid way to connect to almost any network storage, and is doubly great because those network shares appear inside the native Files app. In my experience, FileBrowser is a solid investment. It always just works, and is a real problem solver when you want to connect to anything. In fact, I use it instead of the Files app quite often, because it offers many more features, and doesn’t hang half way through a copy operation.


Recent Comments